Are you new to your Cricut machine and wondering what you can make with it? While the possibilities on things to make are endless it can be overwhelming on where to begin. So here is the easiest beginner Cricut project to make with your Cricut Explore Air 2.
This post is sponsored by Cricut.
I still remember the first project that I made when I got my first cutting machine. It was a Halloween shirt for my daughter and I was SO SCARED to use my machine. It’s intimidating and it can be overwhelming on where to start. The biggest thing that helped me dive right in? Joining Facebook groups. Before I got my first machine I joined a few Facebook groups, watched YouTube videos, and read blog posts on projects to make, tips and tricks, and sat back and watched what other people were doing. This helped me a lot with learning what weeding was, the different types of material, and things I could make.
If you’re just starting out I have a series of posts that could help you! Come check them out:
- What is a Cricut Machine & Which Machine to Buy
- What is Cricut Design Space
- All About Cricut Access
- What are the different Cricut Materials
- Cricut Terms and What They Mean
- Beginner Tools and Supplies
- Tips for Learning your Cricut Machine (perfect for anyone who is frustrated with their machine)
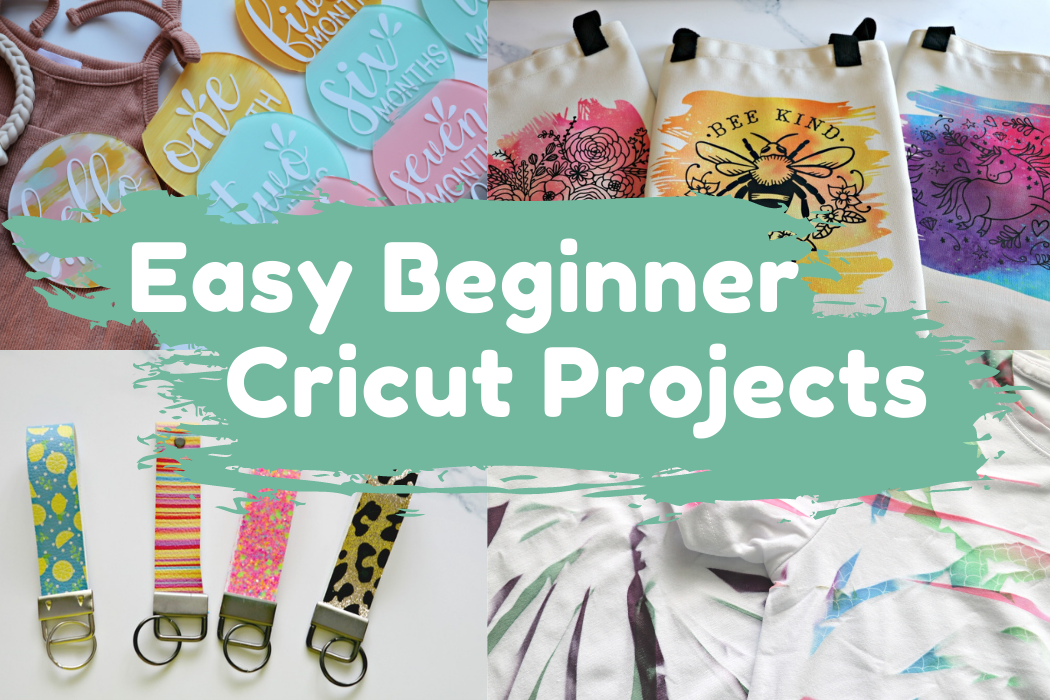
Other Beginner Cricut Projects
- Infusible Ink Tote Bag
- Flower Candy Bouquet
- Leather Key Fob (second easiest beginner project)
- Infusible Ink Tie-Dye Shirt (no cutting required)
- Baby Milestone Rounds
Beginner Cricut Project
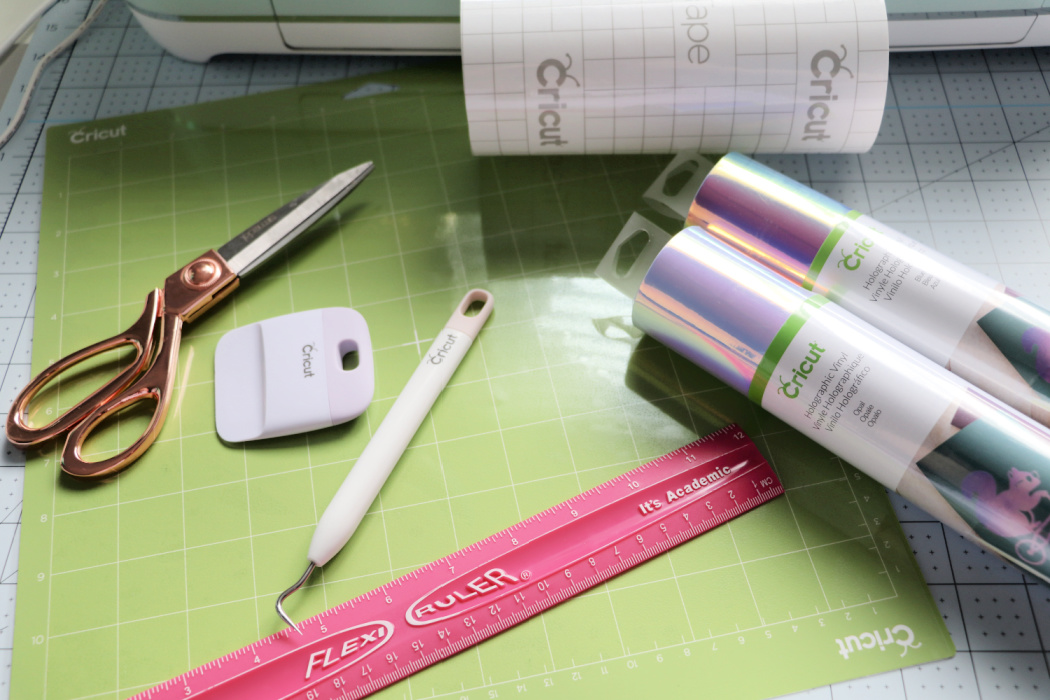
In this post, I am going to show you a beginner project to make that is easy to do using permanent vinyl. For this project you’ll need:
- Vinyl – I used Holographic
- Transfer Tape
- Weeding Tool
- Scraper
- Cutting Mat
- Cricut Machine
- Rubbing Alcohol Wipe
- Ruler or small tape measure
- Blank Cup – For cup/tumbler making, you can use ANY cup except silicone. Plastic or stainless steel are the best cup types to use, but I am using plastic tumblers. You cannot use silicone because vinyl won’t stick to it.
How to cut vinyl with your Cricut Machine
For these projects, we are going to use permanent vinyl or what I like to call “sticky vinyl”. Here are the steps you’ll take to cut out the vinyl.
Open Design Space (log in if you need to)
Click New Project
You’ll need to measure the blank item that you are going to put vinyl on so your design isn’t too big or too small for your project blank.
For this project, we are going to use text. Click the text box (left side).
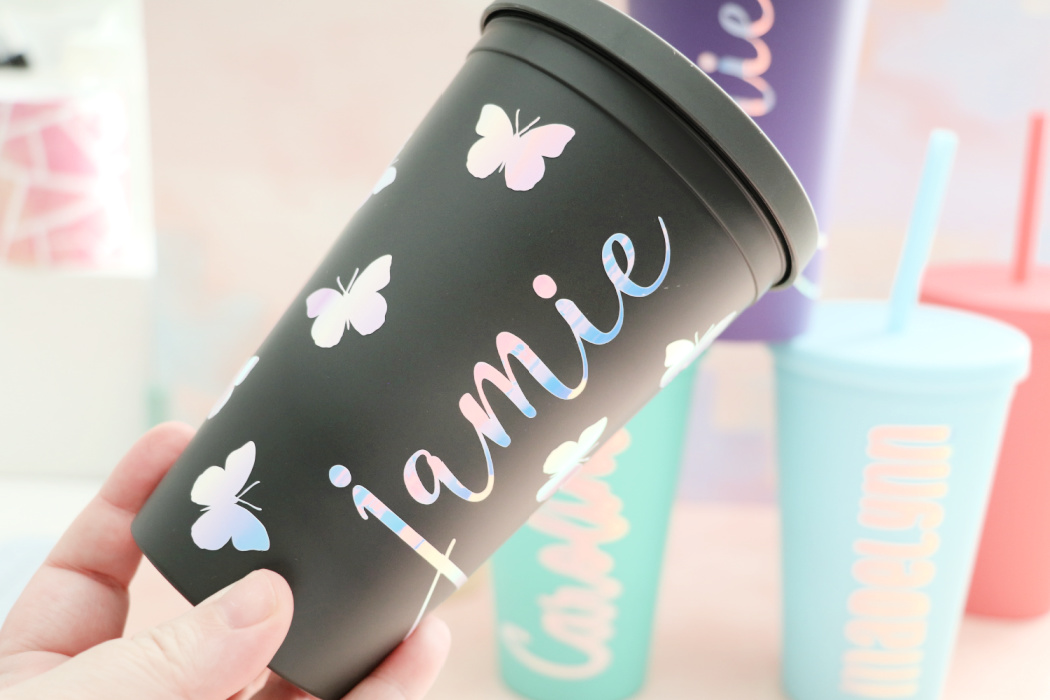
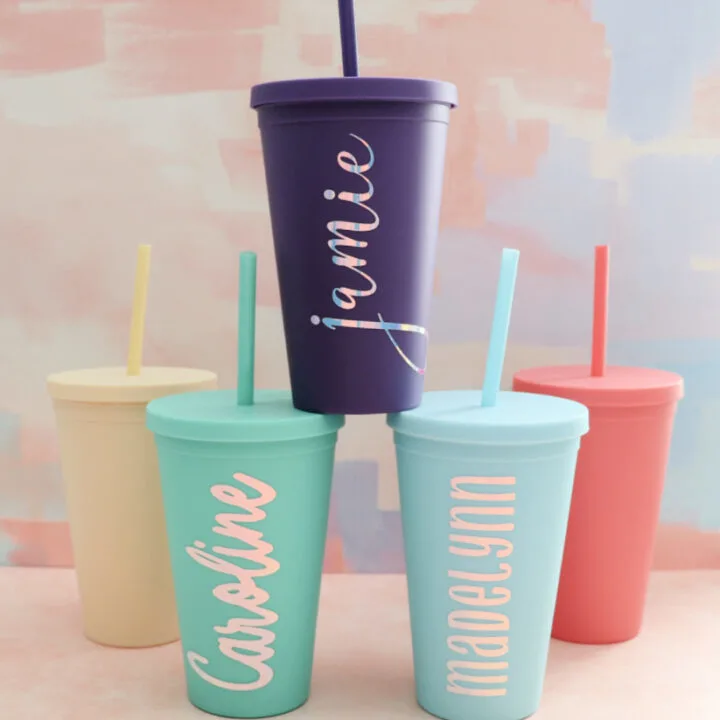
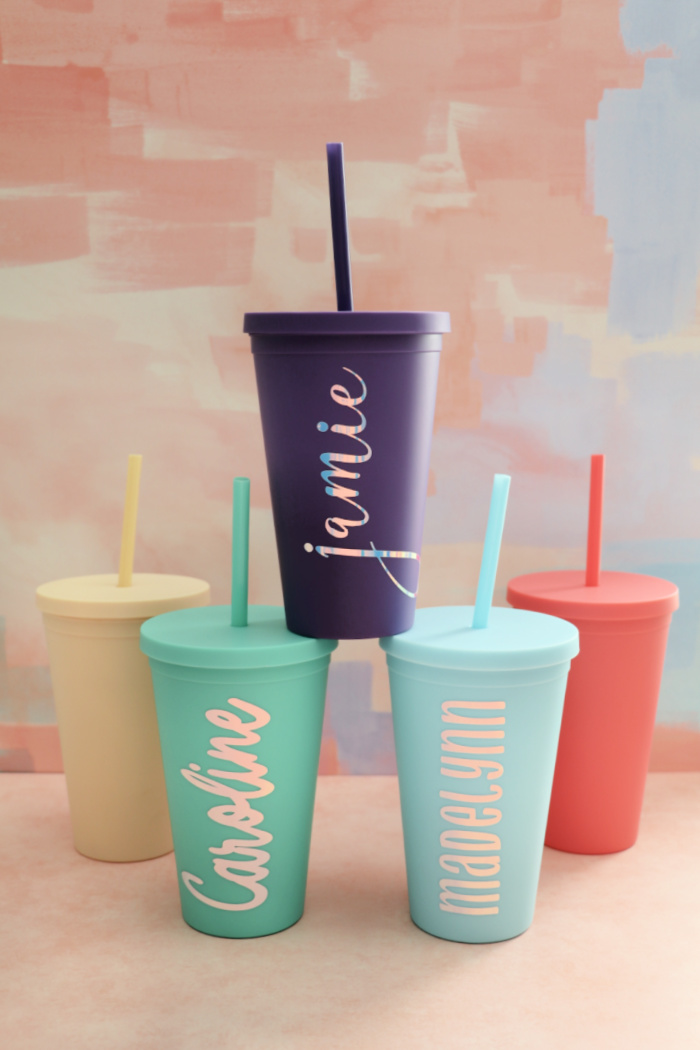
Write out what you want your design to say. I am going to do my name, Jamie.
Type out your name or word and hit enter.
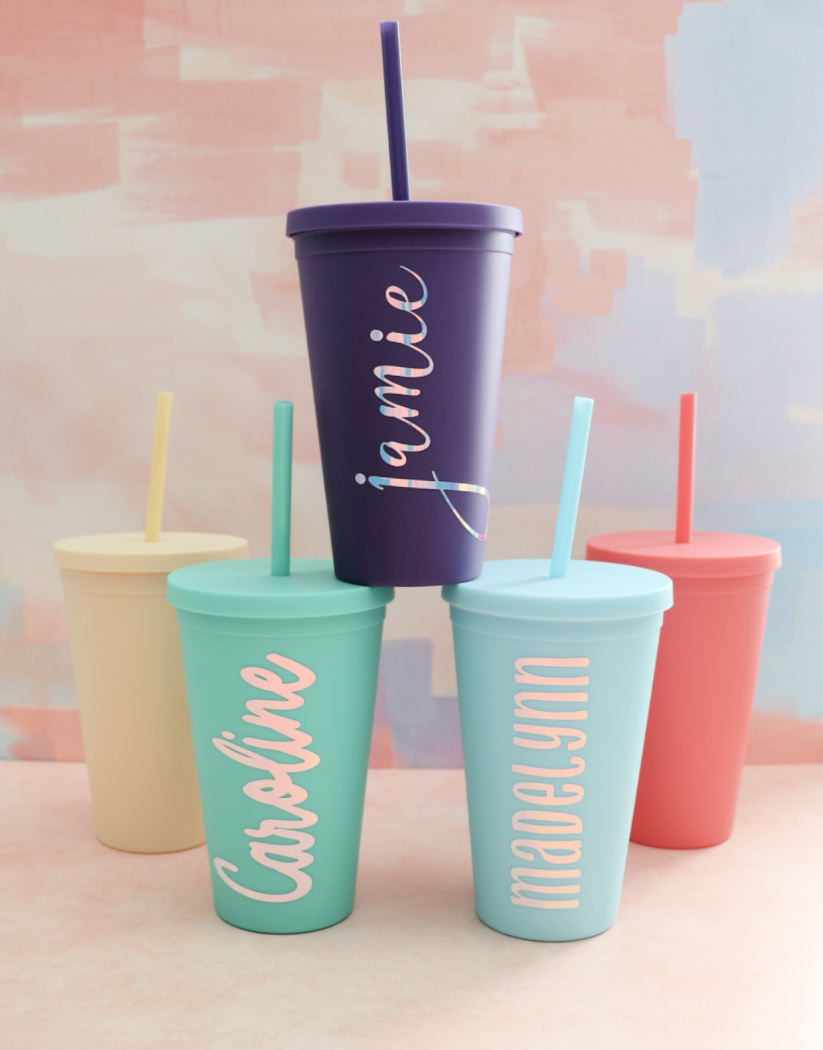
Click the text and at the top of Design Space pick a font you like. You can pick either a Cricut font or a font installed on your computer. I am going with a Cricut font. I went with Don Juan for Madelynn, Eighties for Caroline, and Lana Jane for Jamie.
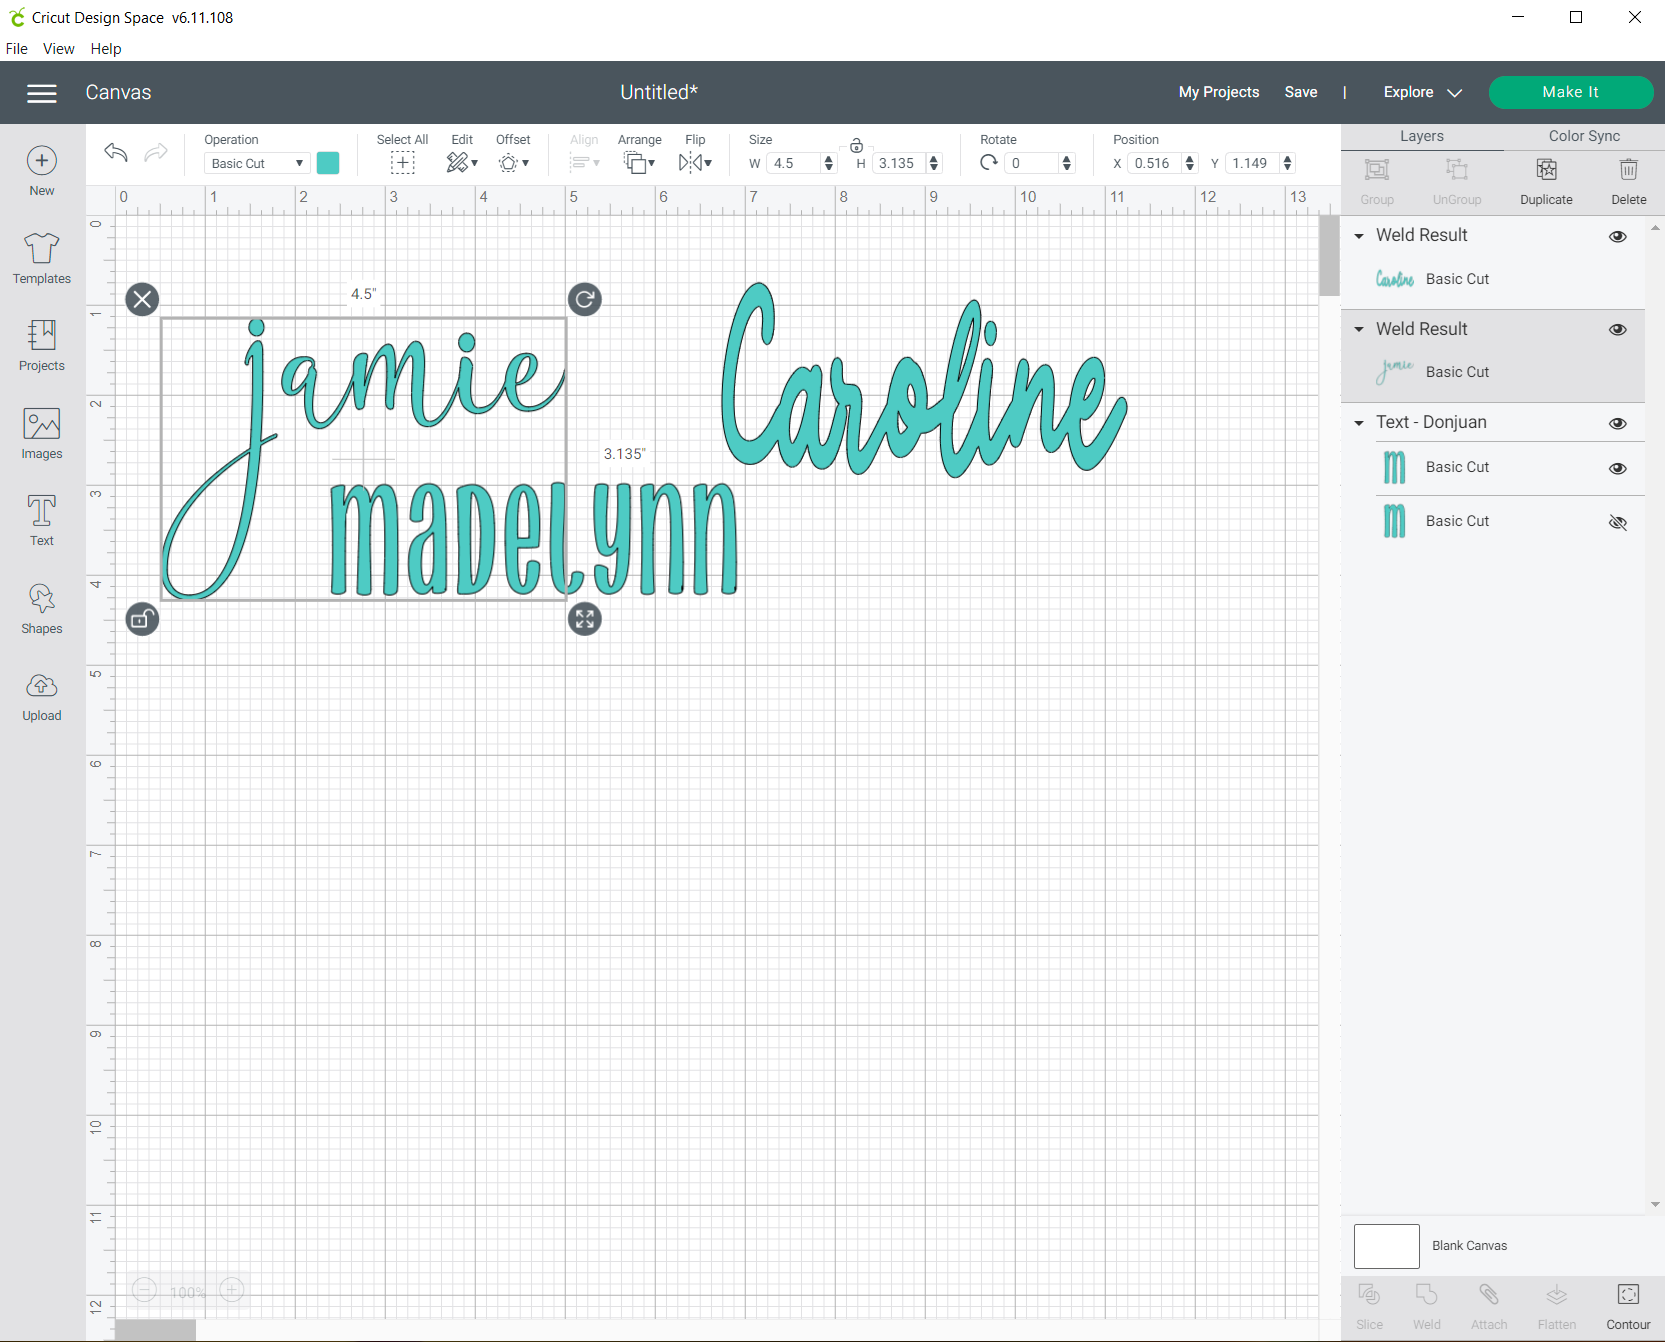
If you are using a font that connects letters together, like a cursive font, you are going to want to weld your words together when you’re done typing them out. This will make it so that the word cuts as one cut instead of cutting each individual letter out. To weld your name you are going to highlight the name and click the weld button on the bottom right of the screen.
Now it’s time to cut. Make sure you have your correct machine picked from the drop-down box at the top right of Design Space.
Click the green make it button.
Apply your vinyl to your mat. With vinyl, I use the green Cricut mat. You apply your vinyl to the mat with the color/pattern side up.
Now you’ll be taken to a prepare screen.
Click Continue.
If you are using the Explore Air 2 for this project you will turn your dial to Vinyl. If you are using the Joy, Maker, or the new 3 machines you will pick your material from this screen since they don’t have dials. Click the drop-down and find your material from the list.
Click Continue.
Now you will load your mat into your machine by clicking the arrow button on your machine.
Once your mat is loaded hit the flashing C button on your machine and watch your design cut out.
Once the cutting is done unload your mat.
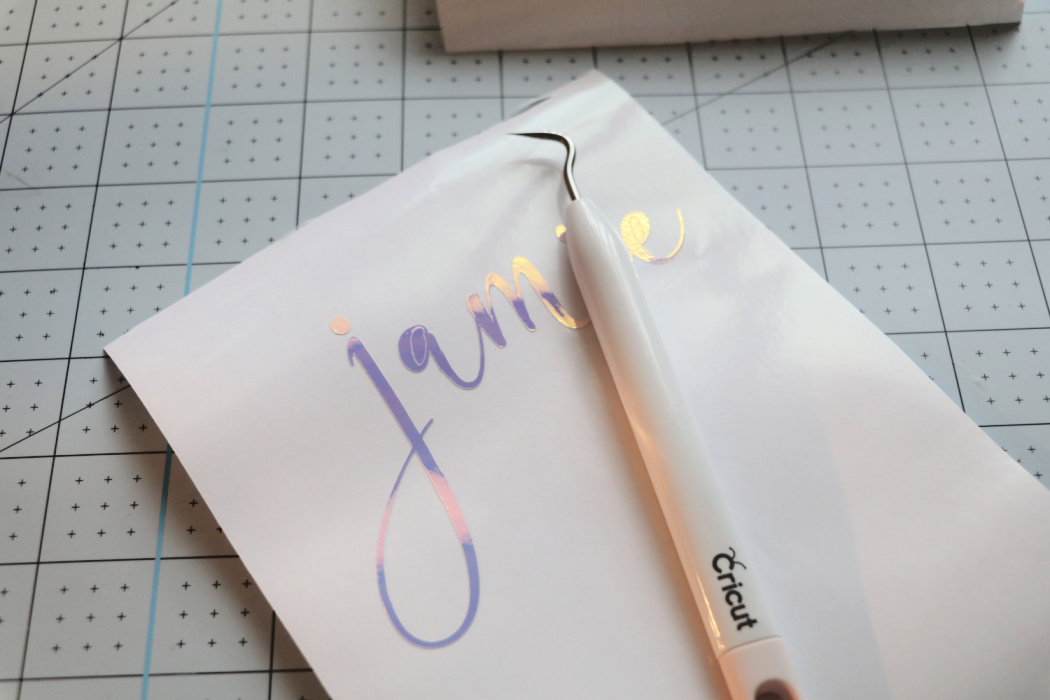
Peel your vinyl off of your mat.
I like to cut the excess vinyl away from my design, like a square or rectangle around the design so I can use the extra material (if there is any).
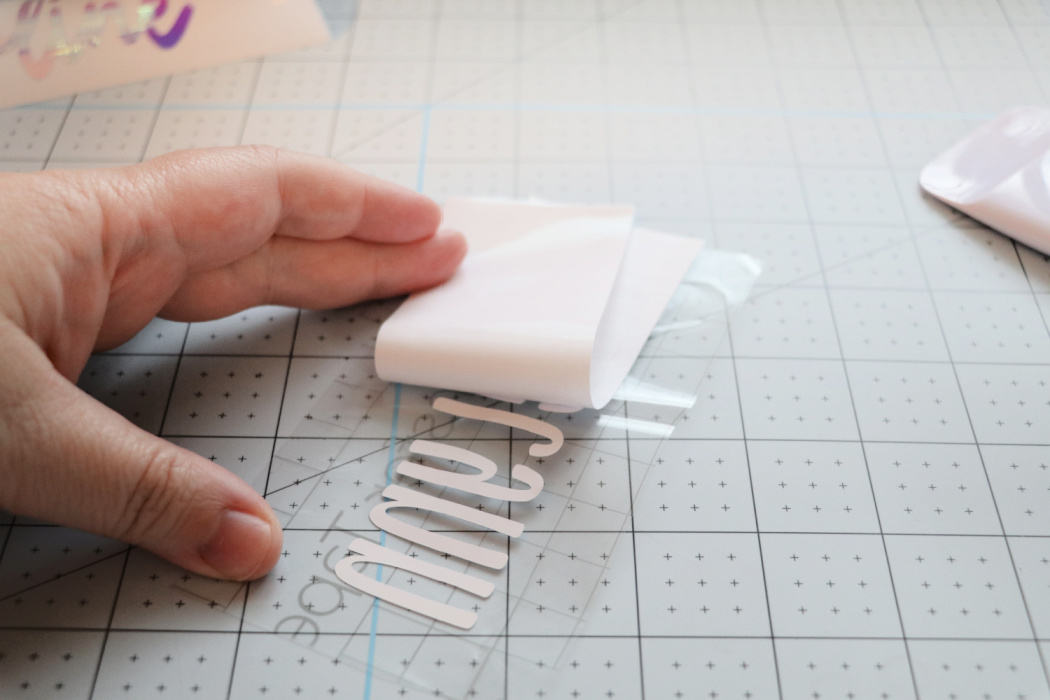
Now get your weeding tool and weed your design. You are going to take away the vinyl we don’t need for this design. In this case, peel the vinyl away from around your words. You’ll also want to get any little bits inside letters like o, e, a, b, and so on.
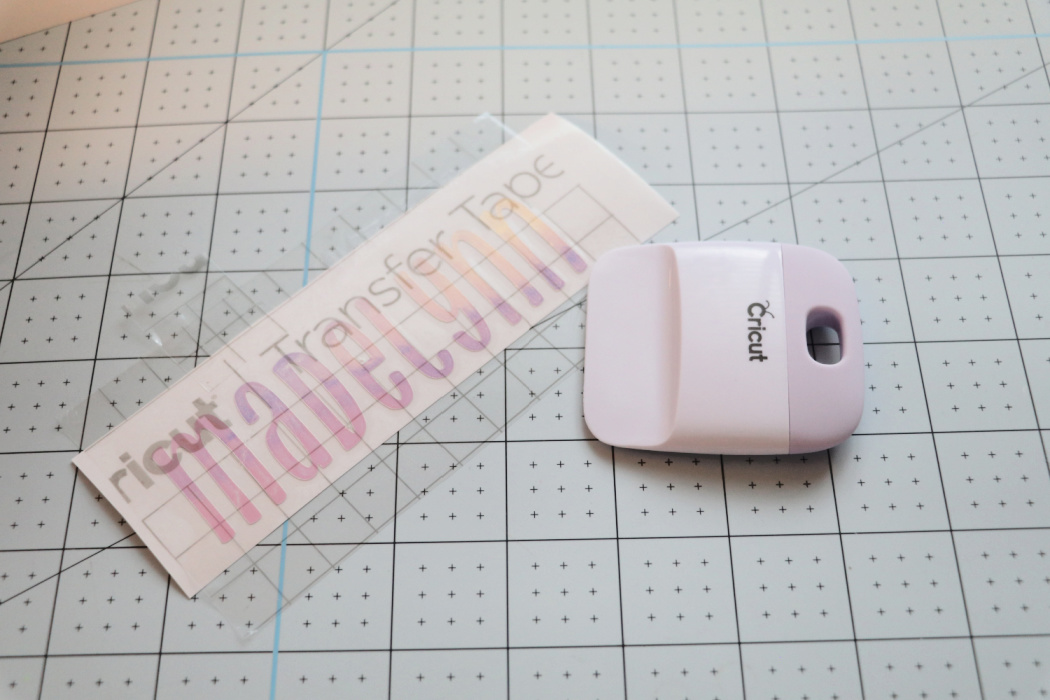
Now cut a piece of transfer tape that is about the size of your design.
Peel the back off and place the sticky side over the top of your words.
Use your scraper to scrape it back and forth over the transfer tape. This helps it get a good grip on the vinyl. Give it a firm rub. Now flip it over and rub the back.
You’ll want to make sure your blank is clean from lint. You can run a lint roller over it. You’ll also want to make sure it’s free from any skin oils by using rubbing alcohol. You can either use a microfiber towel or a small alcohol pad. Clean your surface. Alcohol dries quickly, but make sure your surface is dry before applying your vinyl.
Now peel the vinyl backing away from the transfer sheet. If your vinyl isn’t sticking to your transfer tape place the backing back down and rub harder. Make sure to rub well around the edges of your words or design.
Pro Tip: When using transfer tape with your Cricut Vinyl place the transfer tape facing down towards your table so that the vinyl backing is facing up. Peel the vinyl backing away from your transfer tape and vinyl. This should peel away smoothly every time. Peeling the transfer tape away from the vinyl backing can sometimes be finicky and you’ll have to keep putting the transfer tape back down and rubbing more. Peeling the backing away instead gives me easy results every time.
Once you have your backing peeled off you’ll hover your design over your blank item, make sure it’s straight, and then press it down.
Use your scraper to make sure your vinyl is firm against your surface. Peel the transfer tape off.
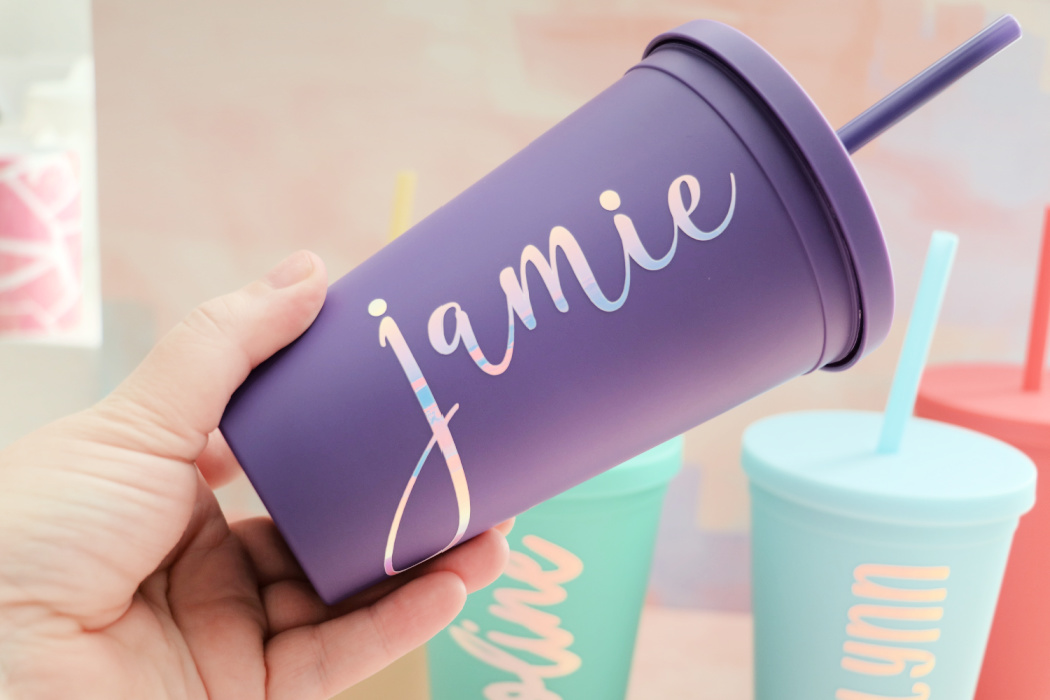
All done!
If you are putting vinyl on a surface that will be washed you’ll need to wash the item in cool to warm water with mild soap. Do not soak it, put it in the microwave, or dishwasher. Be gentle while washing over the vinyl because if you use hot water, a dishwasher, or are rough around the design it can peel up.
Once you get the hang of adding names to your tumblers or cups you can add embelishments too like hearts, butterflies, polka dots, leopard print and so much more. I sized these butterflies to 1″ and randomly placed them all over the cup for some extra decoration.