

Come learn how to make a Teacher Libbey Glass Can gift for teacher appreciation week gifts. Are you looking for some DIY Teacher gifts that you can make with your Cricut? Want to learn how to glass etch a Libbey glass can? This tutorial will cover an easy Cricut teacher gift, how to glass etch a Libbey beer can glass for iced coffee, and something cute to give teachers as a teacher appreciation gift.
I love to spoil our kid’s teachers. Teaching is such an underpaid job that is so important to our children’s growth and learning. Teachers deserve more than just a cup or gift, but it’s one of the ways I show them how much I appreciate them for showing up every day and teaching our kids, being positive role models in their life, and keeping them safe when they’re away from home.
How to Make a Teacher Libbey Glass Can Gift
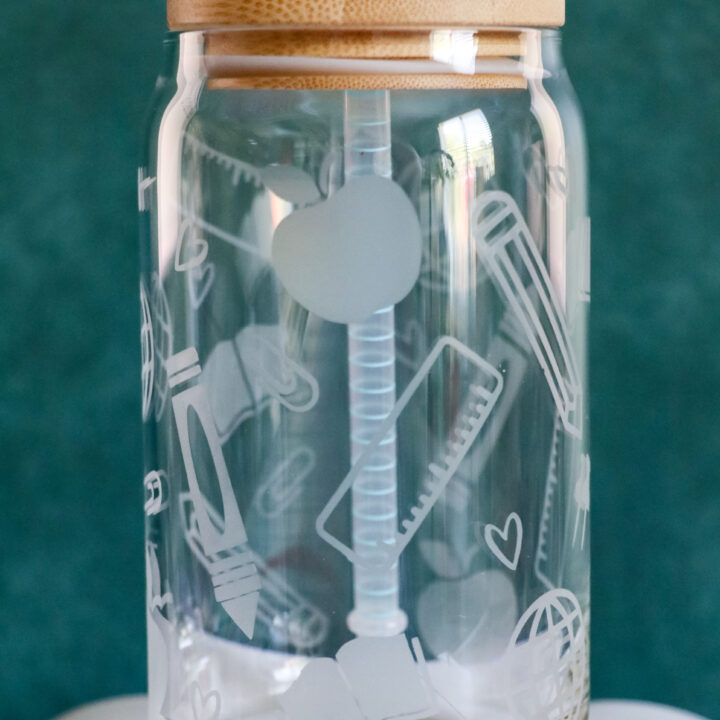
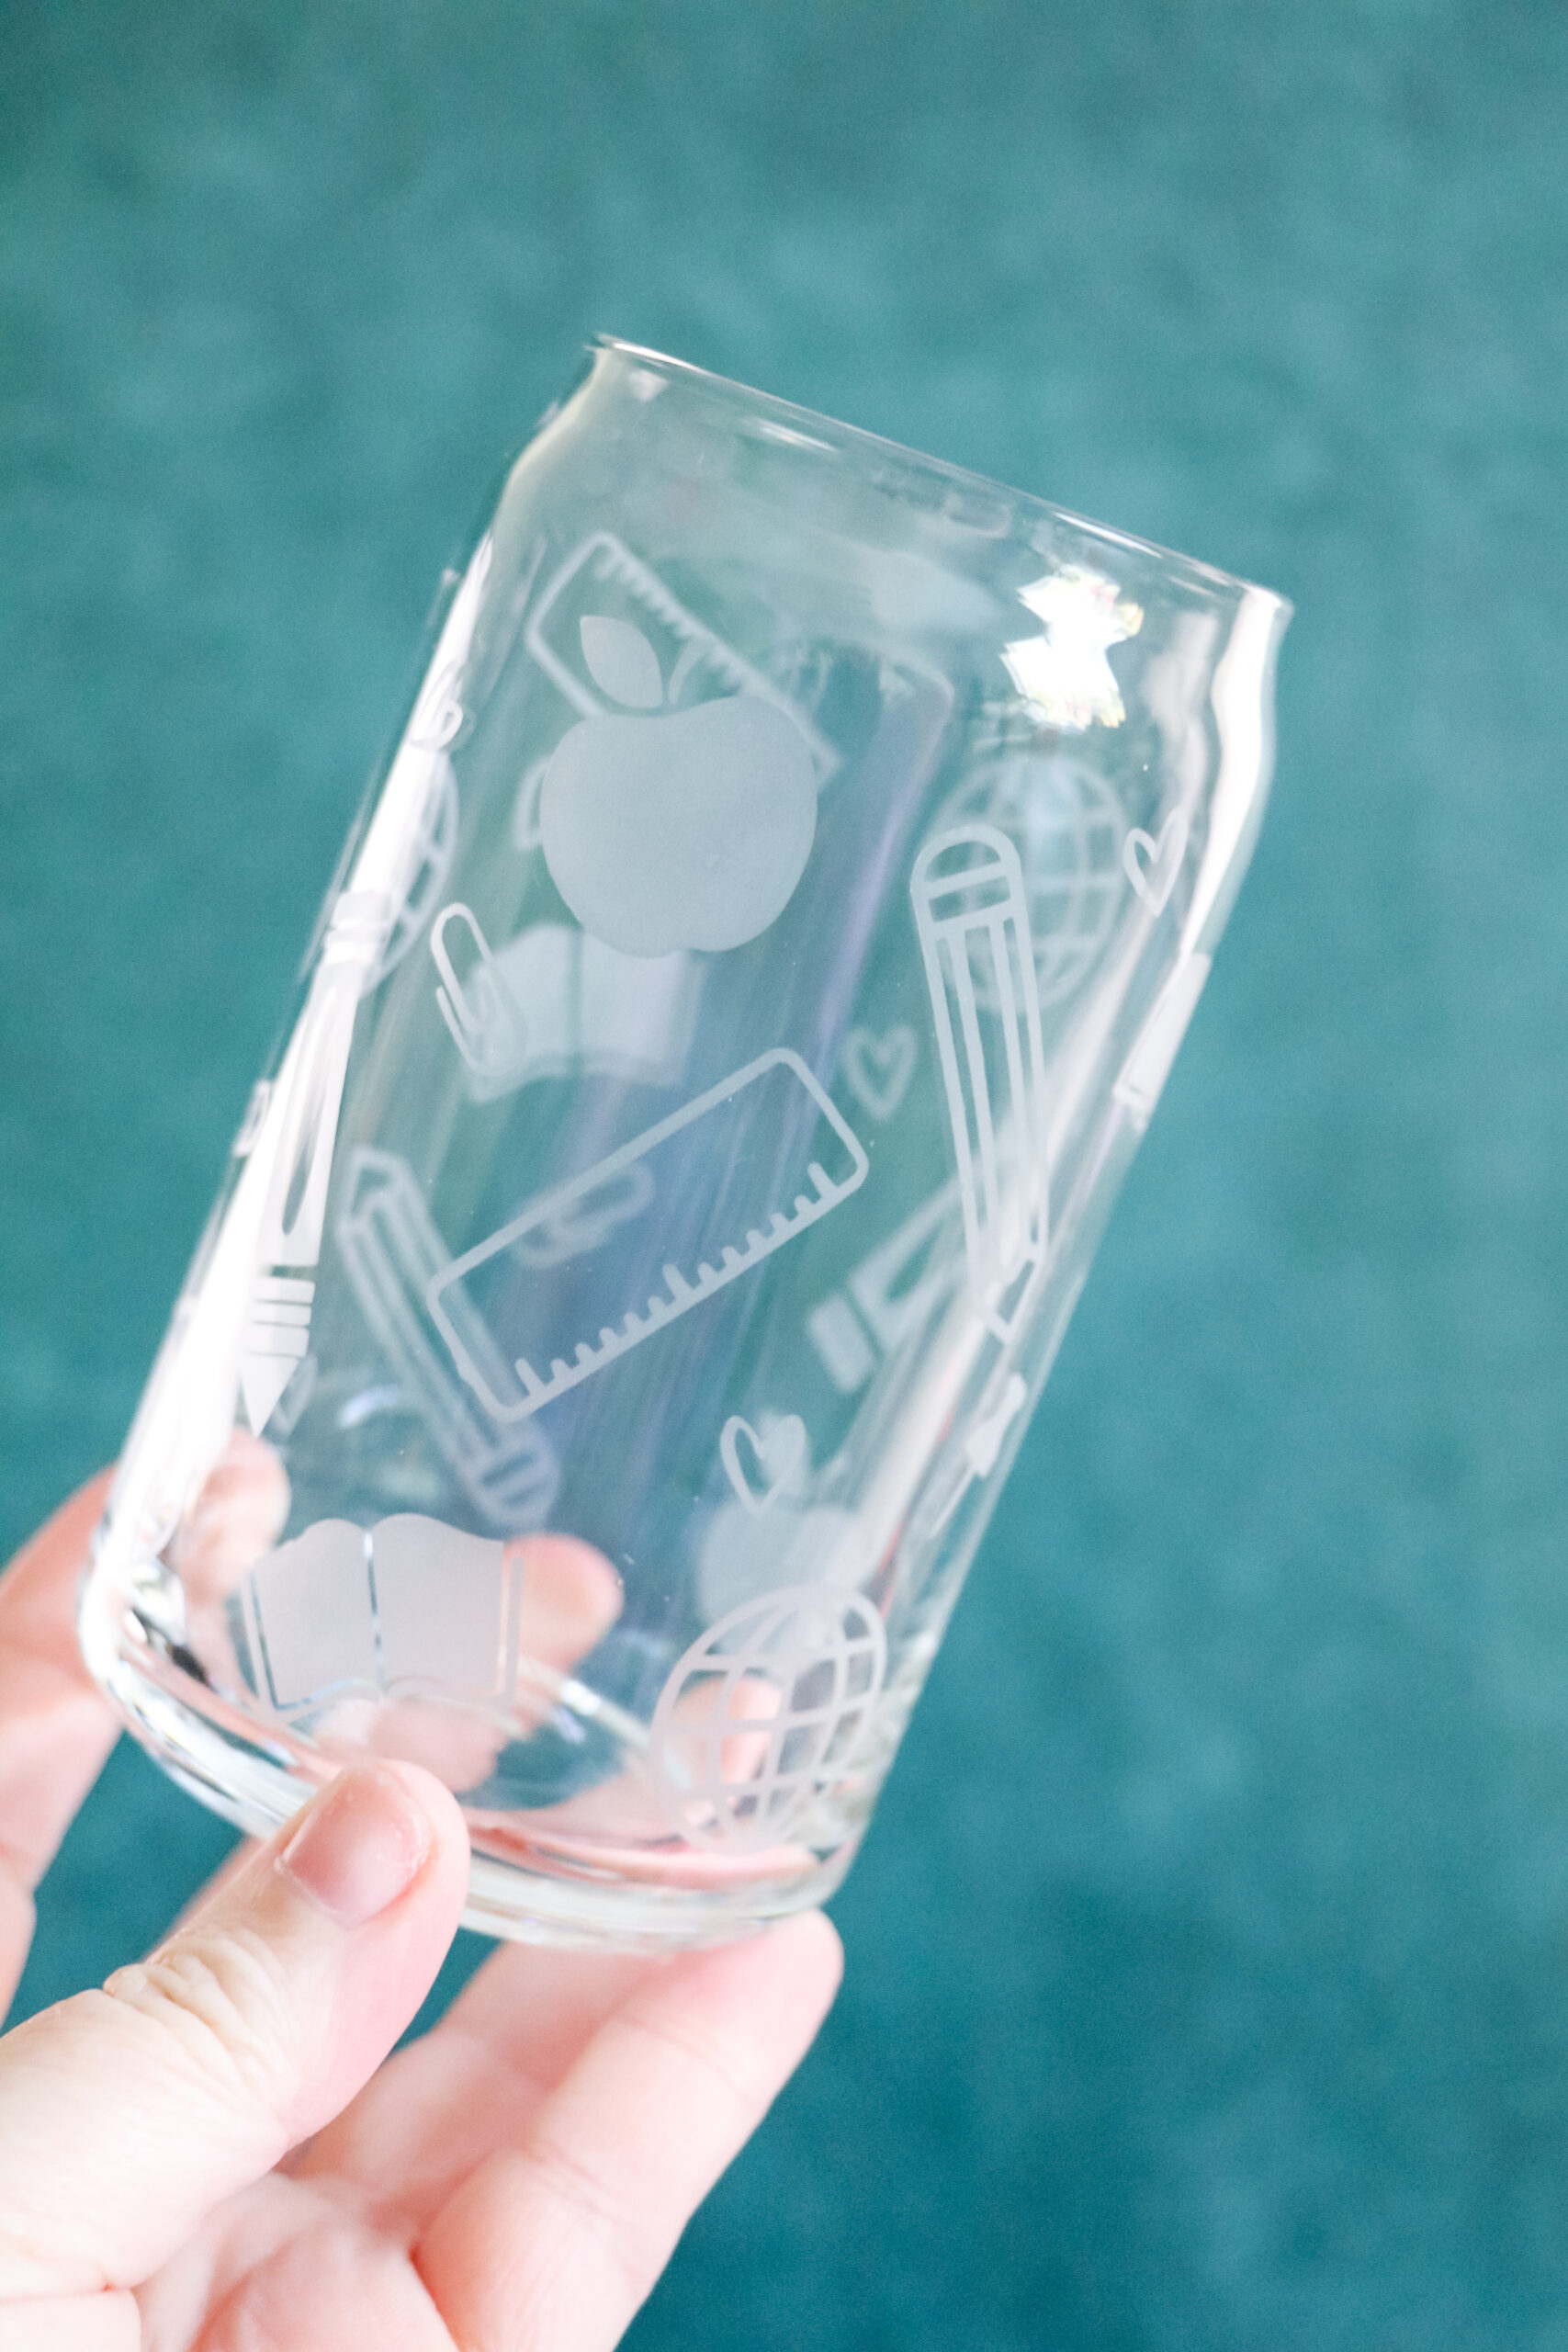
Libbey glass cans are super popular right now and if you’re not familiar with them it’s a glass tumbler/cup that is shaped like a can. They’re great for ice coffee, water, or whatever cold drink you want to enjoy. I get my blank Libbey glass cans on Amazon and these ones are great for vinyl or glass etching.
What stencil to use for glass etching
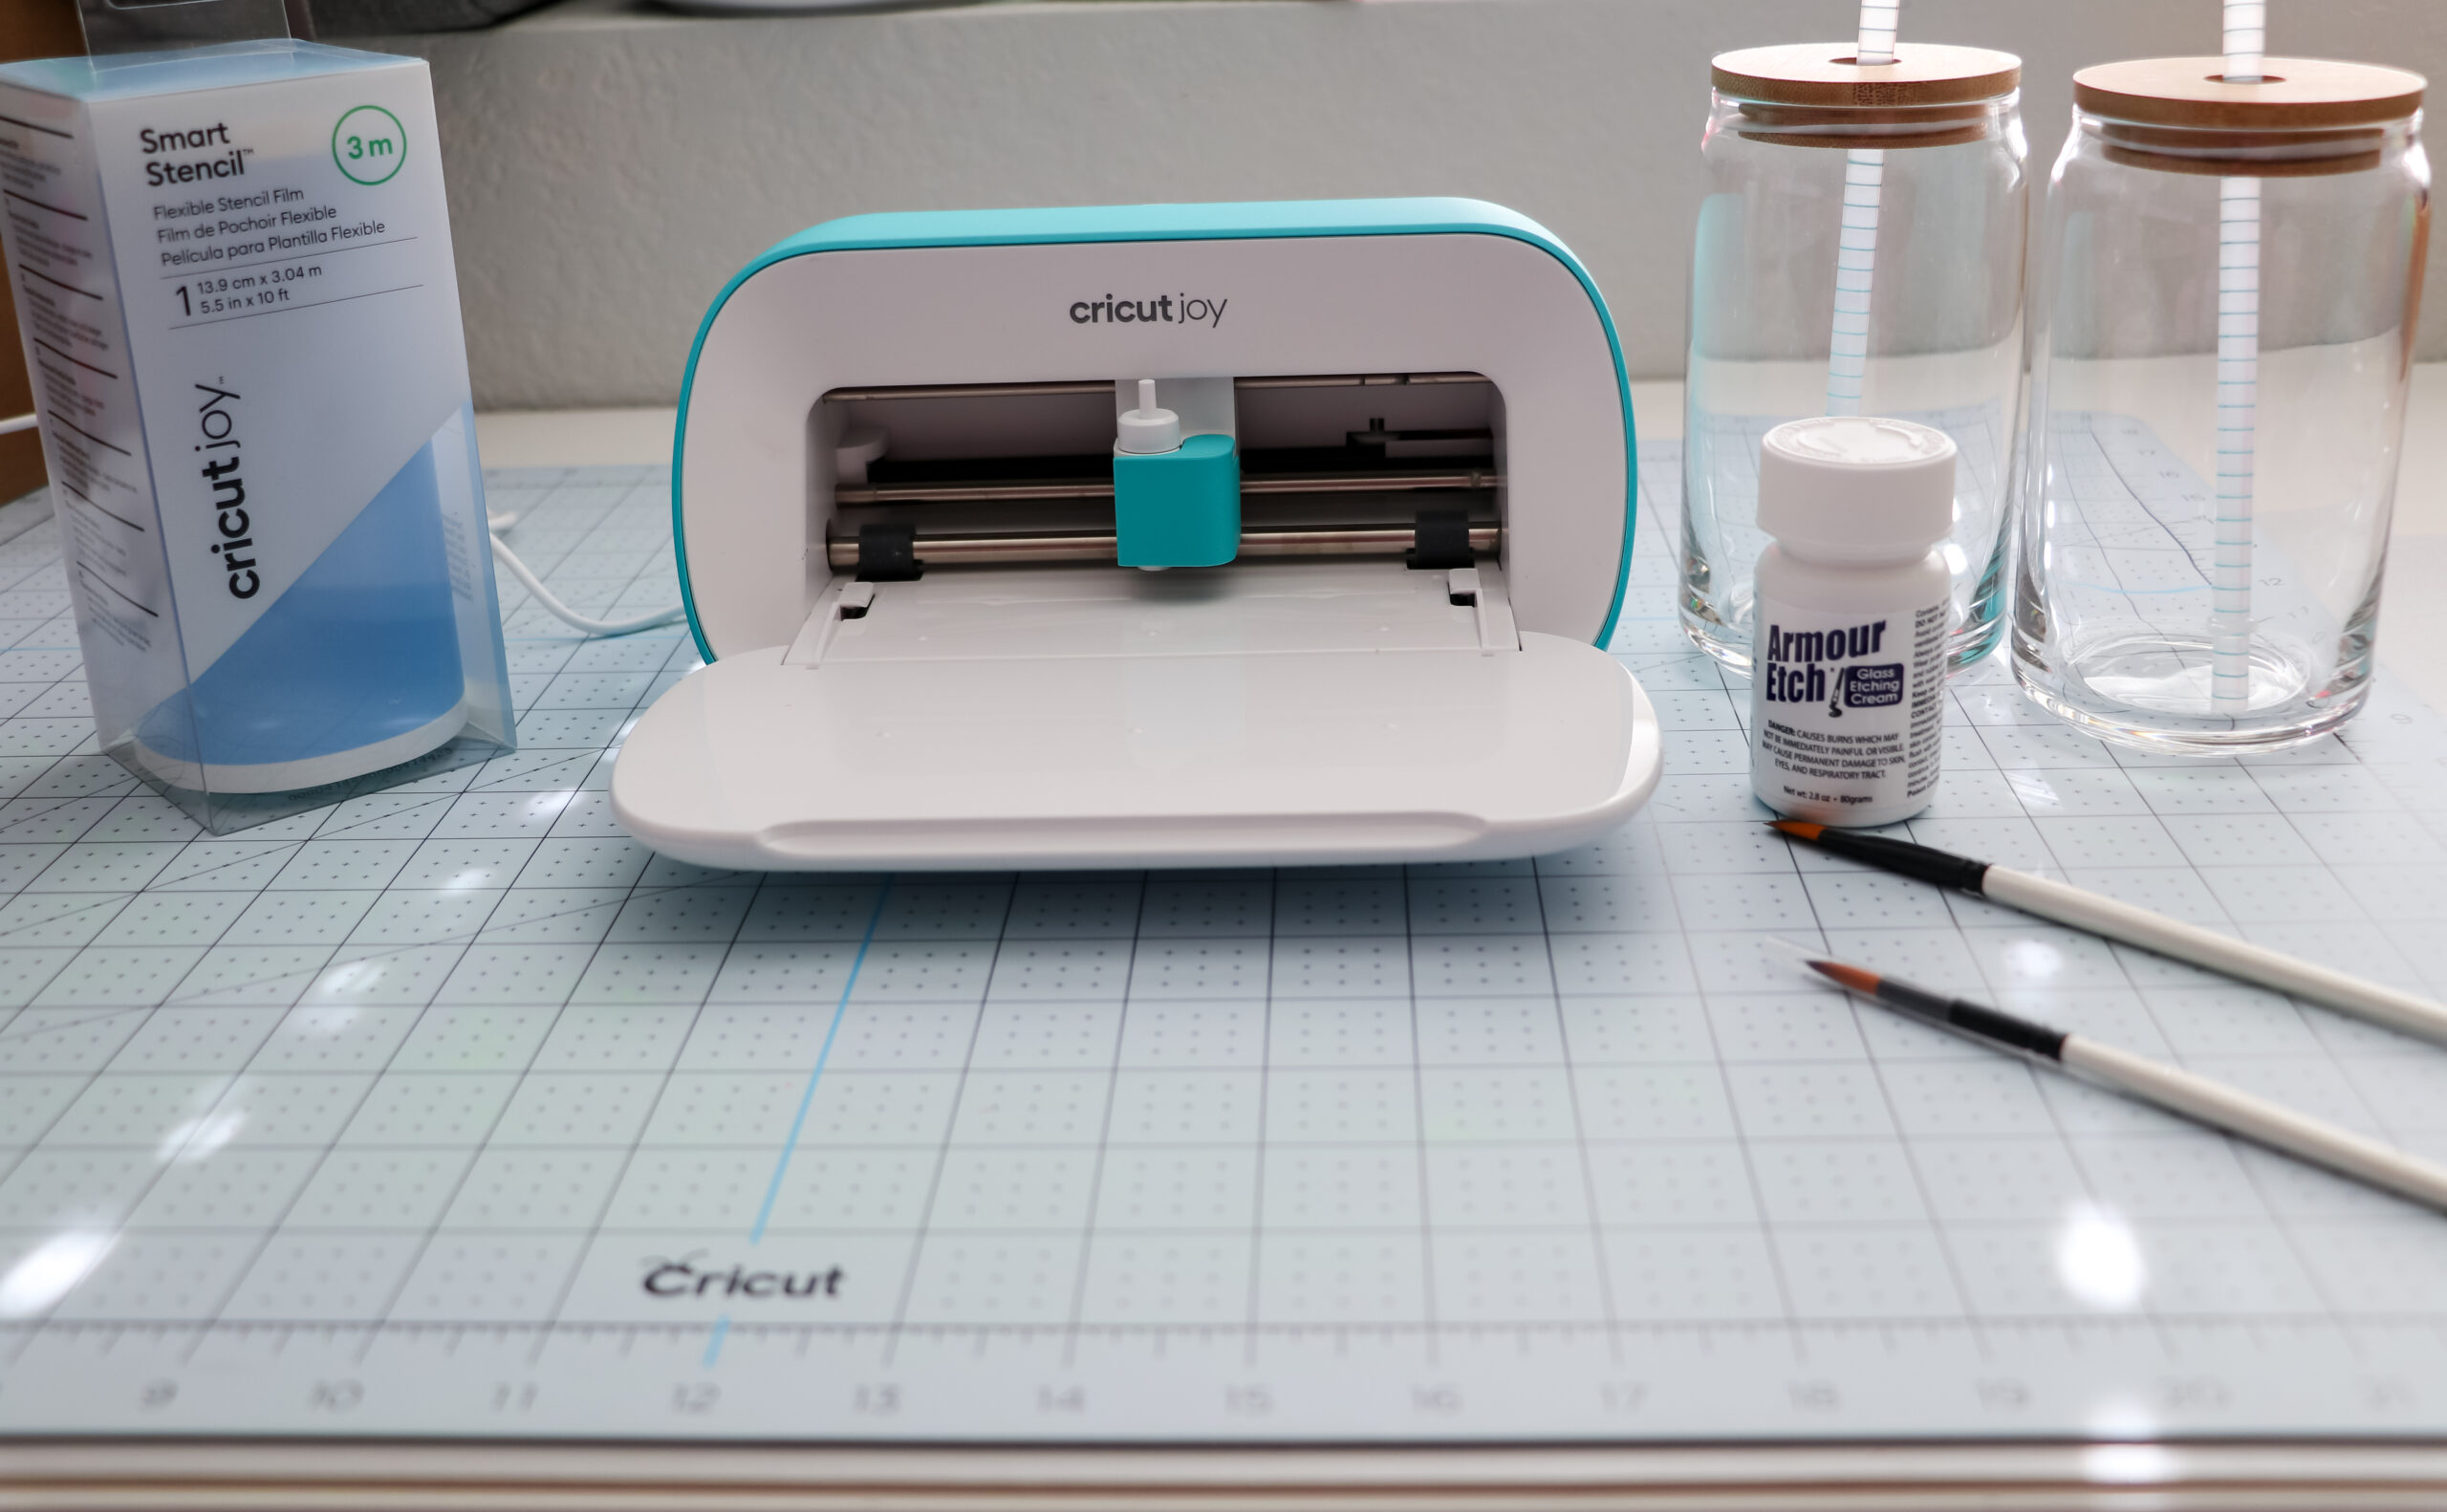
I used the Cricut stencil for this project, but you could also use a removable vinyl. Just make sure it’s not permanent vinyl because that could be a pain to get off the glass. Since I was using my Cricut Joy (which is perfect for this project) I used the new Cricut Joy Smart Stencil. You’ll also need transfer tape with the stencil to apply it to the cup.
How to Glass Etch a Libbey Glass Can
I found the process of glass etching to be really easy. It’s as easy as laying down your stencil, applying the glass etching cream, and washing the cup.
Materials needed for Glass Etching
Glass Cup – I used the Libbey Glass Cans
Paint Brush (I used the brushes in the armour etch bundle linked above)
Transfer Tape
Weeding tool & Scraper
Optional:
Reuseable Straw – Notebook Straw or Apple Straw
How to Glass Etch a Tumbler
First, you are going to clean your glass with a lint-free cloth and rubbing alcohol. This helps to ensure all dust, dirt, and debris is removed from the glass before etching.
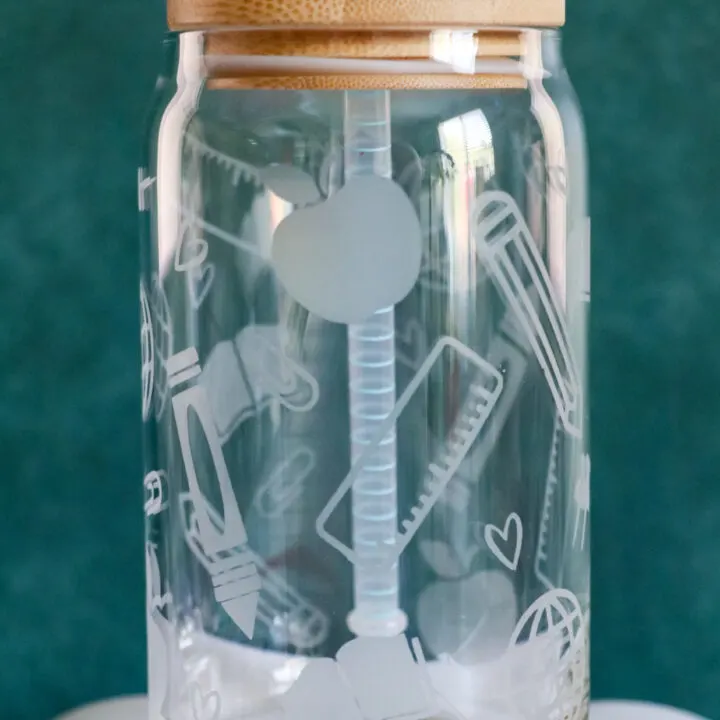
Download your design and upload it to Design Space. This is the file I used from Etsy – Teacher Glass Wrap.
You do not need to resize your design unless you are using a different size cup.
Cut your design out with your Cricut machine. You do not need to mirror this!
Now it’s time to weed. You will be removing the icons from the stencil material. See the below image for example.
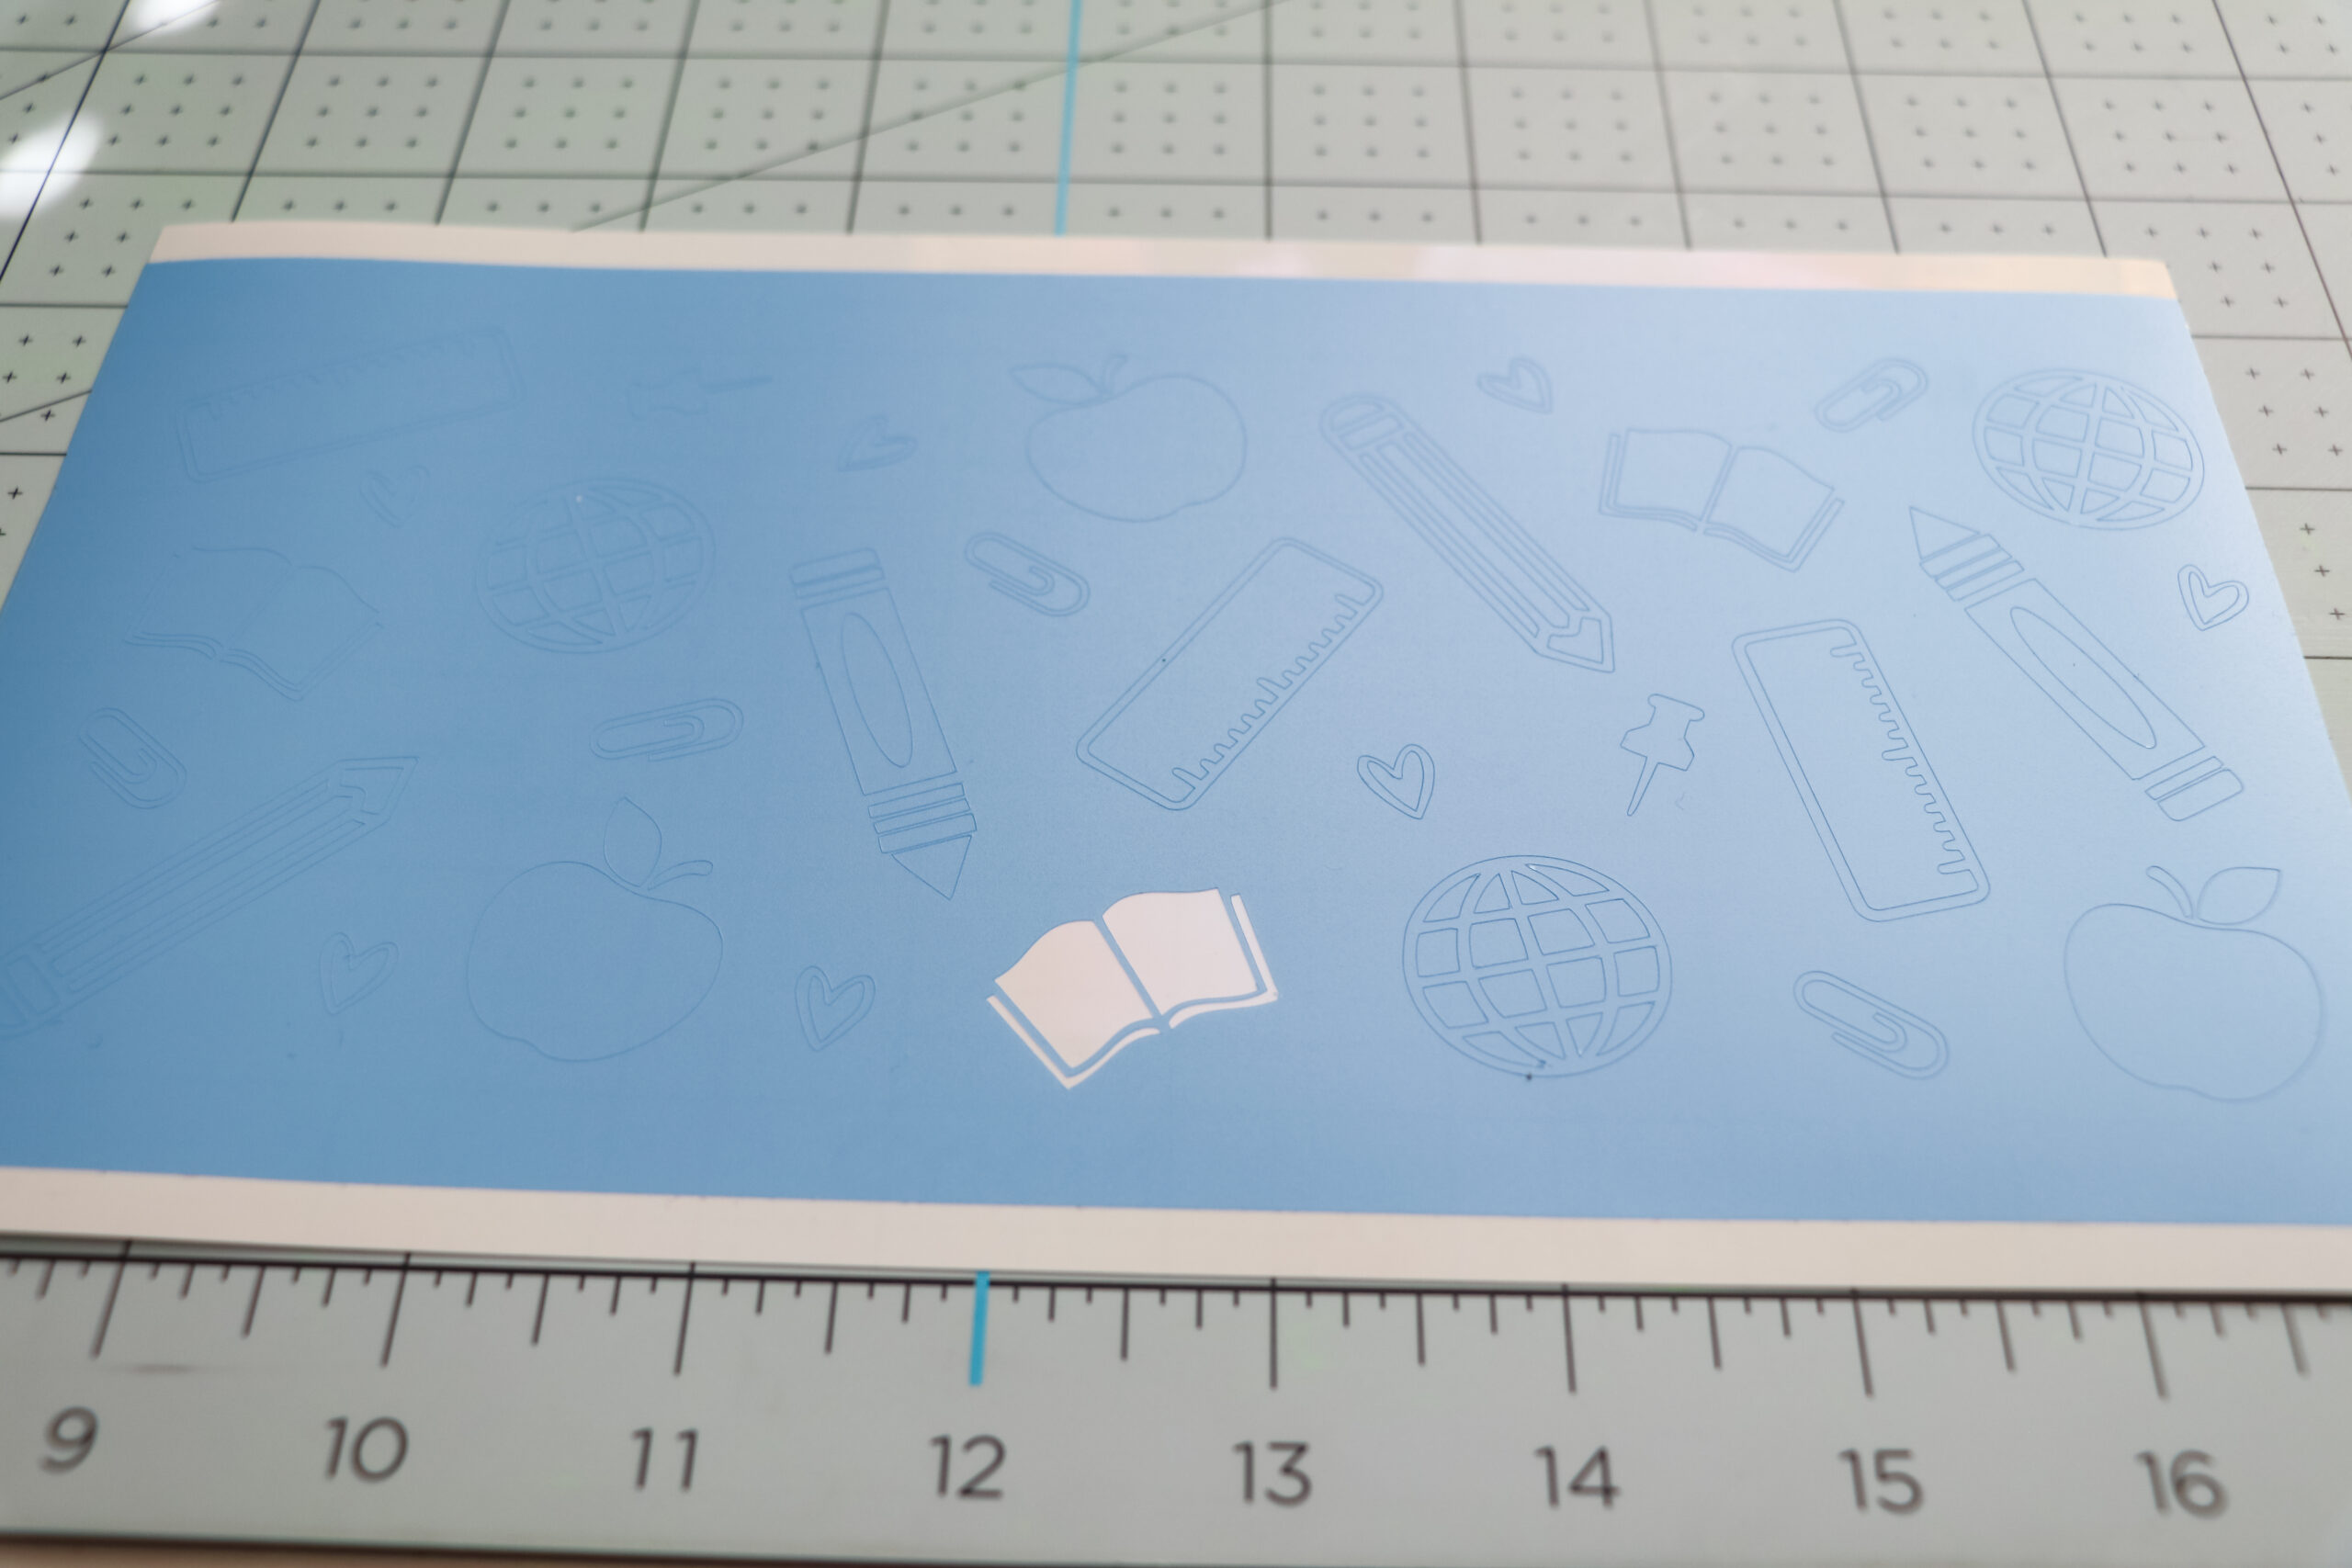
Once you are done weeding apply your transfer tape.
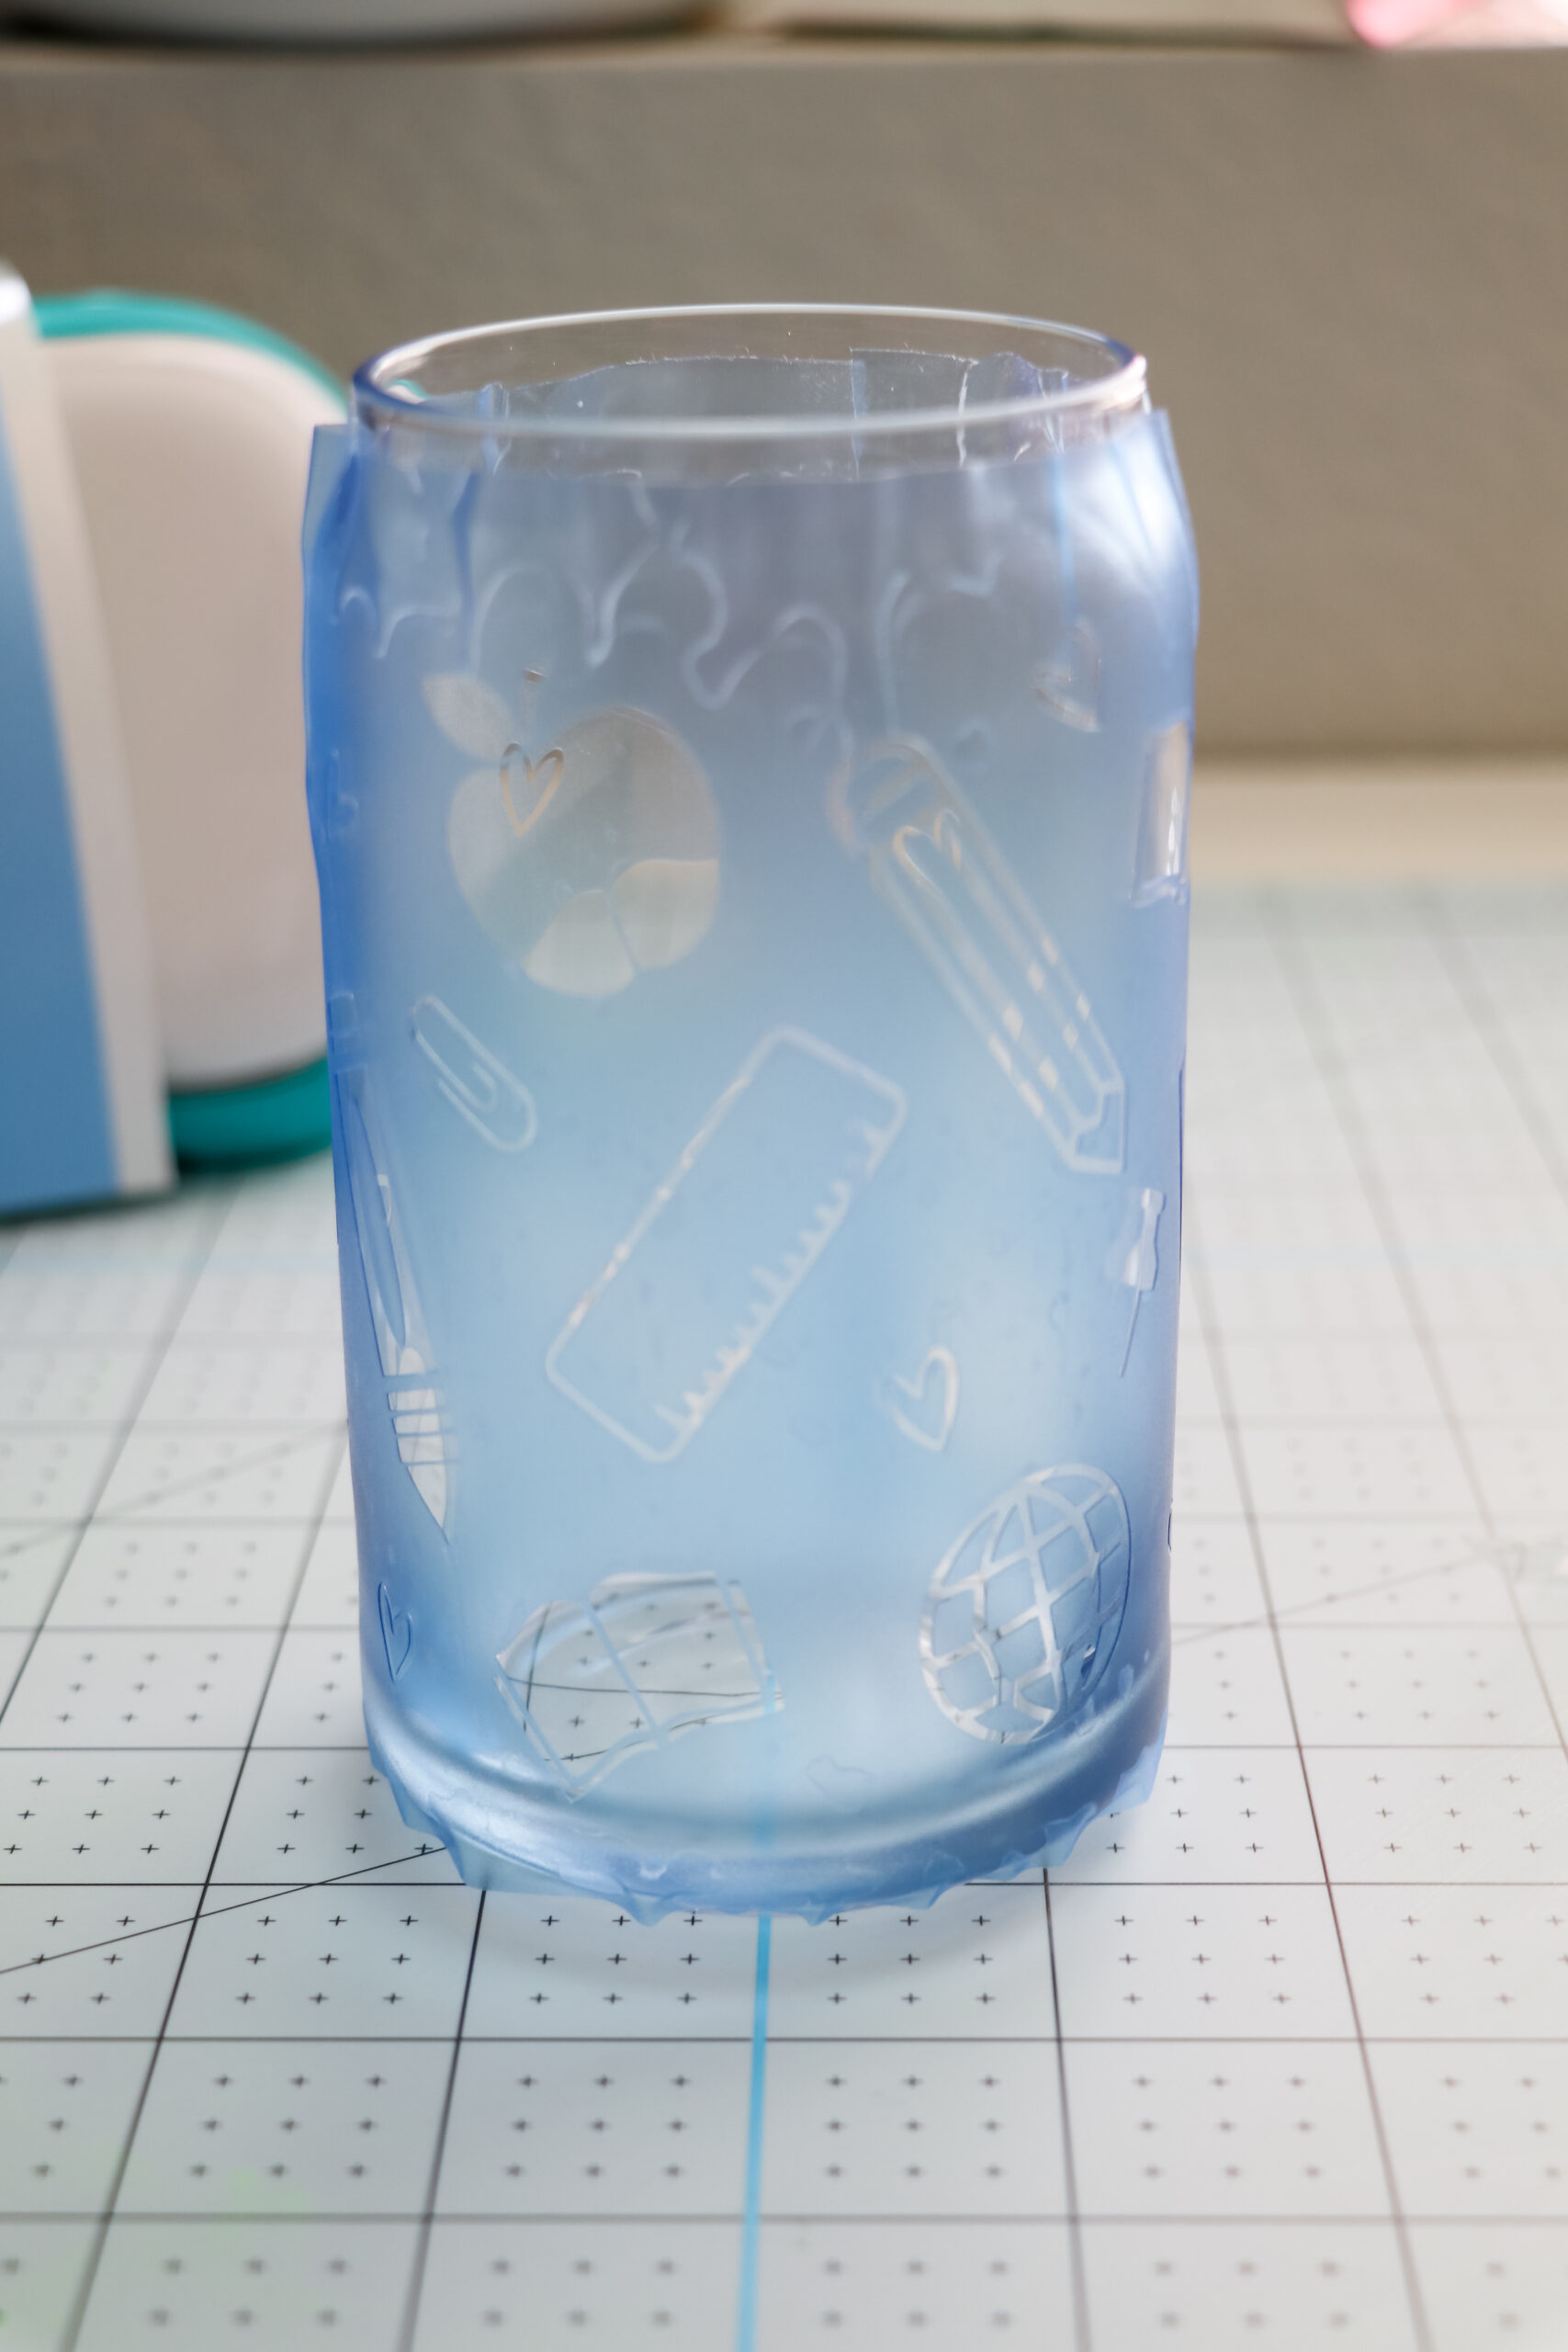
Apply the stencil material to the cup. I place the material down towards the middle of the design and then smooth out each side.
When using etching cream you need to really make sure there are no air bubbles around the icons. I tried to smooth them out while applying the stencil and then did it again after removing the transfer tape.
Remove the transfer tape and rub your finger around each icon, making sure any bubbles around the edges are smoothed out. If there are bubbles in the bigger sections of blue that is ok as long as they aren’t around the edges of the design icons. If etching cream gets under the bubbles it will leave etches spots and uneven lines.
*Note – I messed up my first 2 cups. There can be a tiny bit of a learning curve if you haven’t done this before (like me). My advice is to make a few practice cups first. Once I figured out any kinks my other cups came out perfectly.
Apply your etching cream with a paintbrush. I found the best way to do this was to dip the paintbrush into the etching cream and dab the cream in the icon. You want to make sure you apply an even coat over the icon. If the etching cream is blotchy your design will come out blotchy. Be careful using brush strokes when applying the cream because if it’s too thin or not evenly coated you could end up with your etching looking like brush strokes. I found just dabbing the cream on worked best.
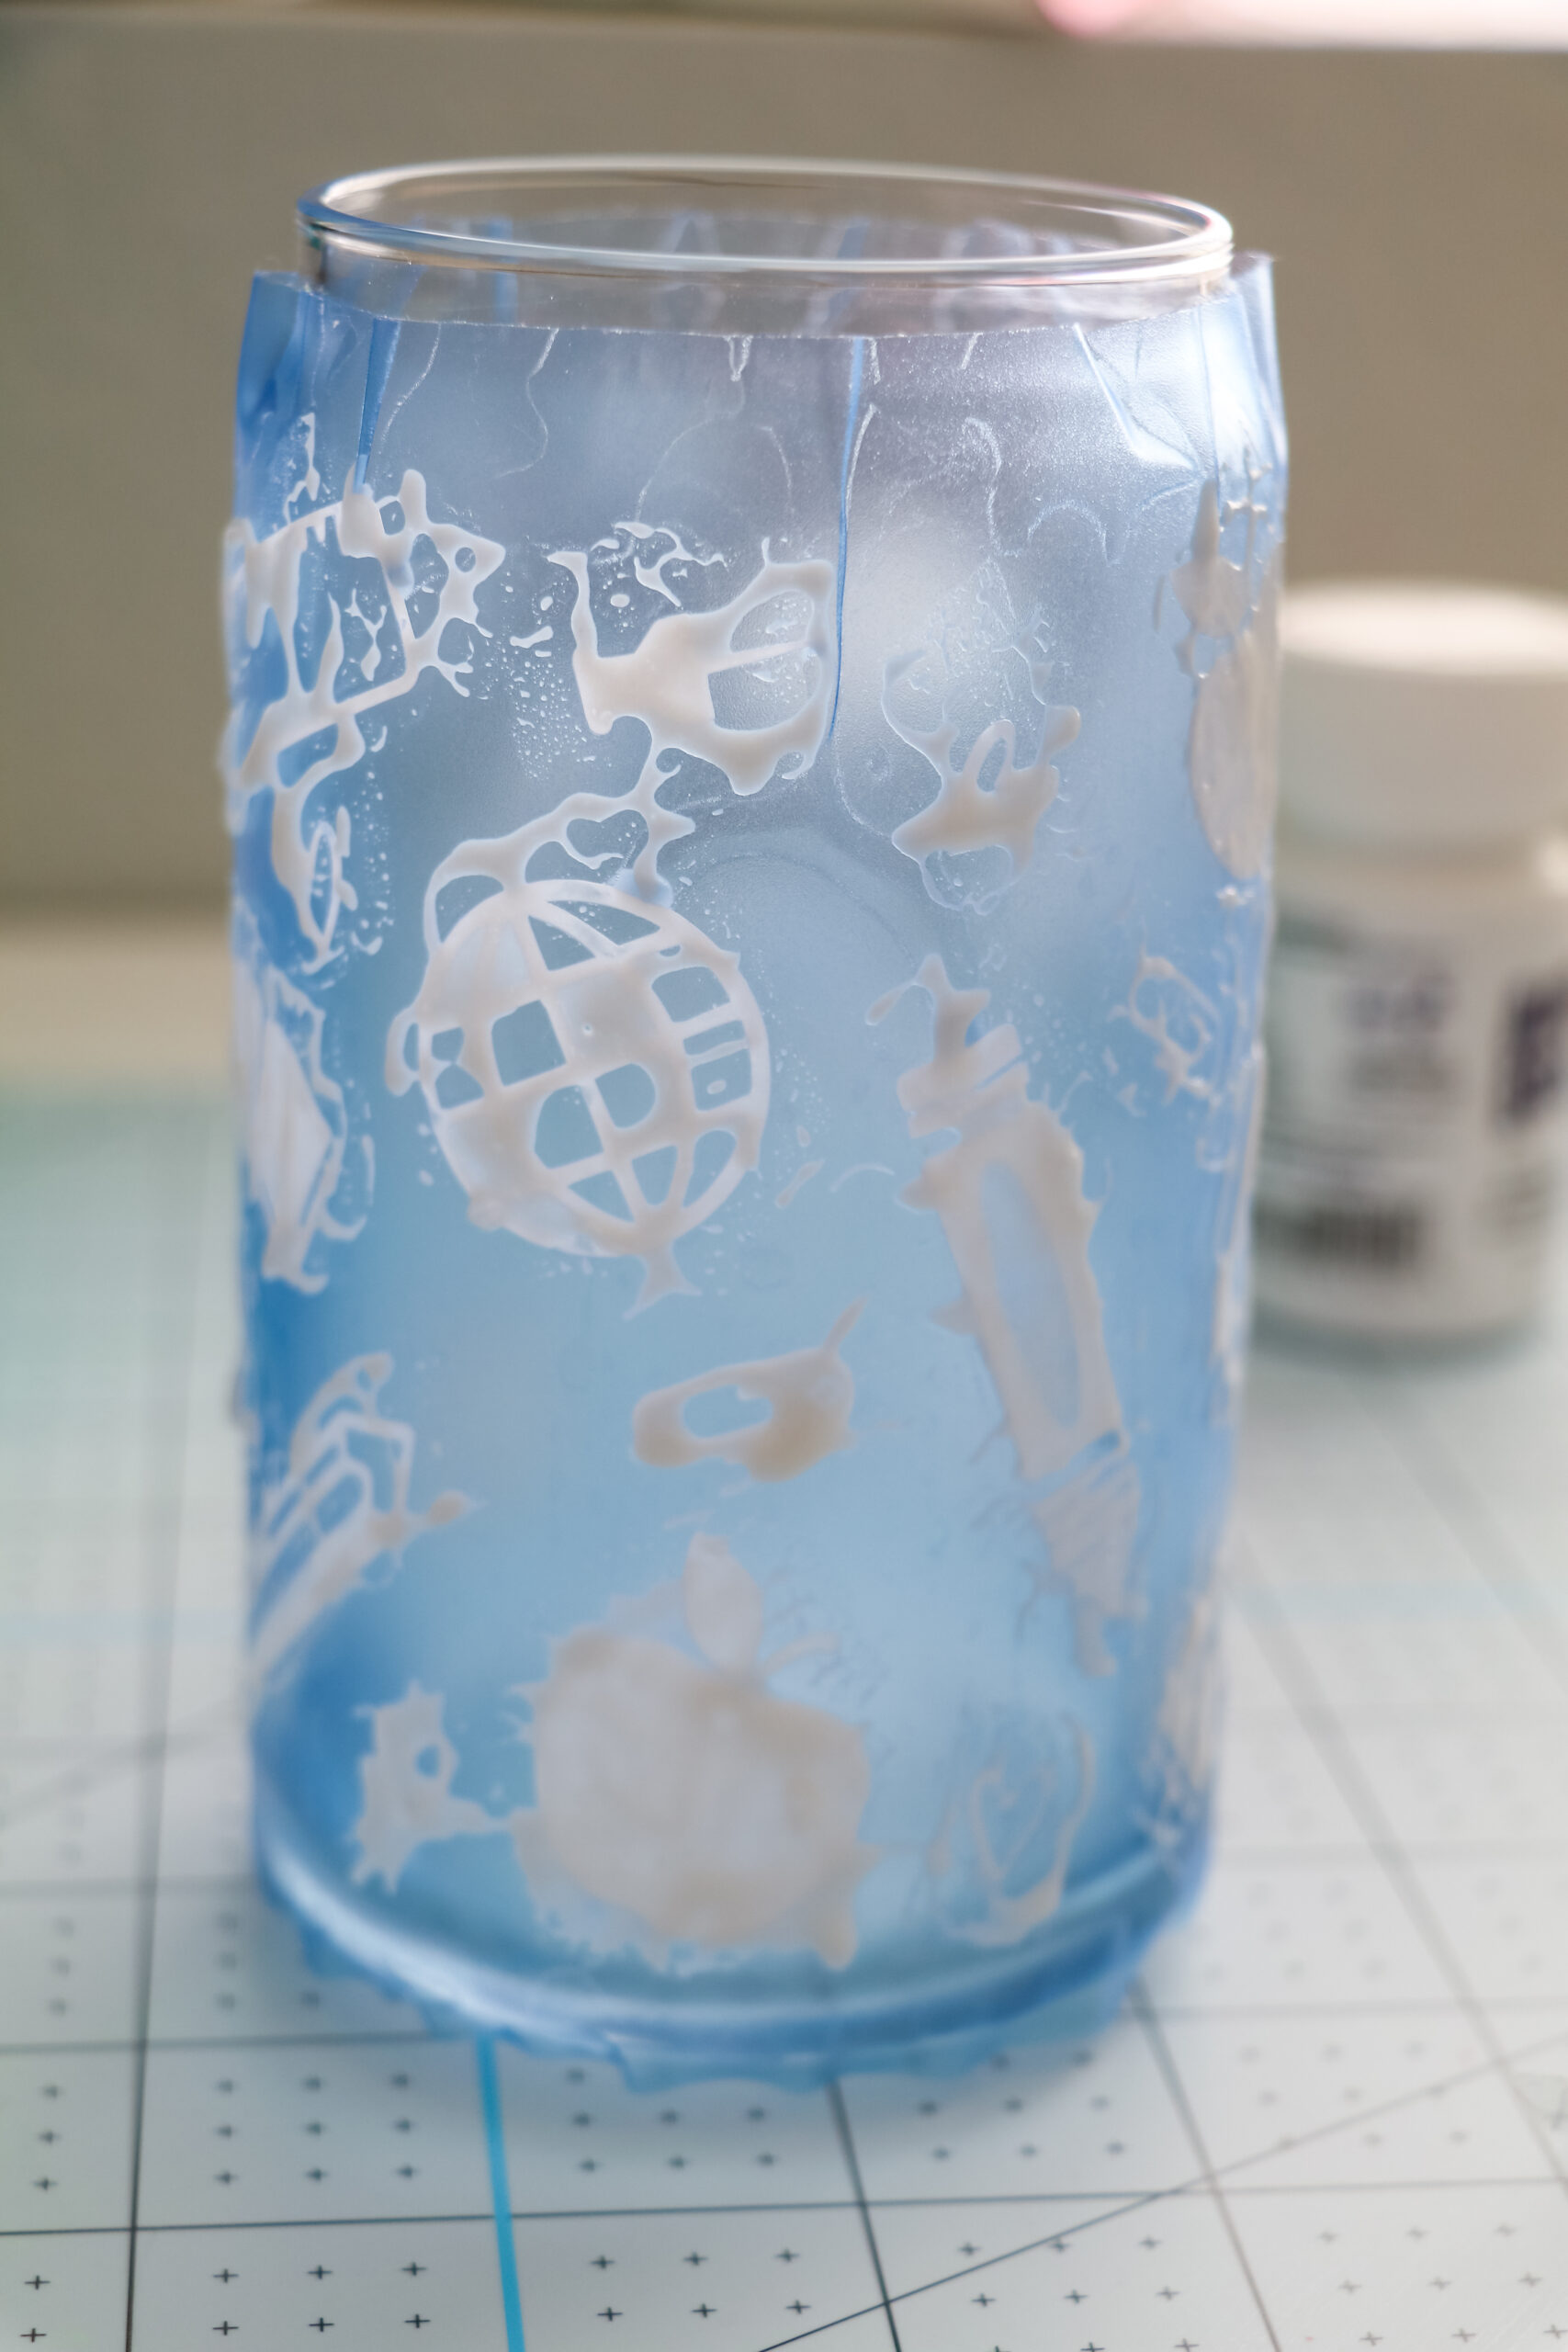
You want to try and keep the cream to only the design and if there is an icon close to the edge of the stencil make sure not to go over the stencil or you will end up with etched spots on your glass.
Let the etching cream sit for 10 minutes. The bottle says 1-3 minutes, but all the reviews I read said 10-15 minutes. I did both 10 and 15 and didn’t notice a difference so I would go with 10.
After 10 minutes rinse your glass off. I ran mine under cold water and used a wet paper towel to help remove all of the etching cream.
Note – With the stencil still on the glass hold your glass up to the light and see if you missed any spots. You can still apply more etching cream if you missed any spots and the stencil is still on. I did this on my trial glass, but even with doing a touch up it still looked a little blotchy.
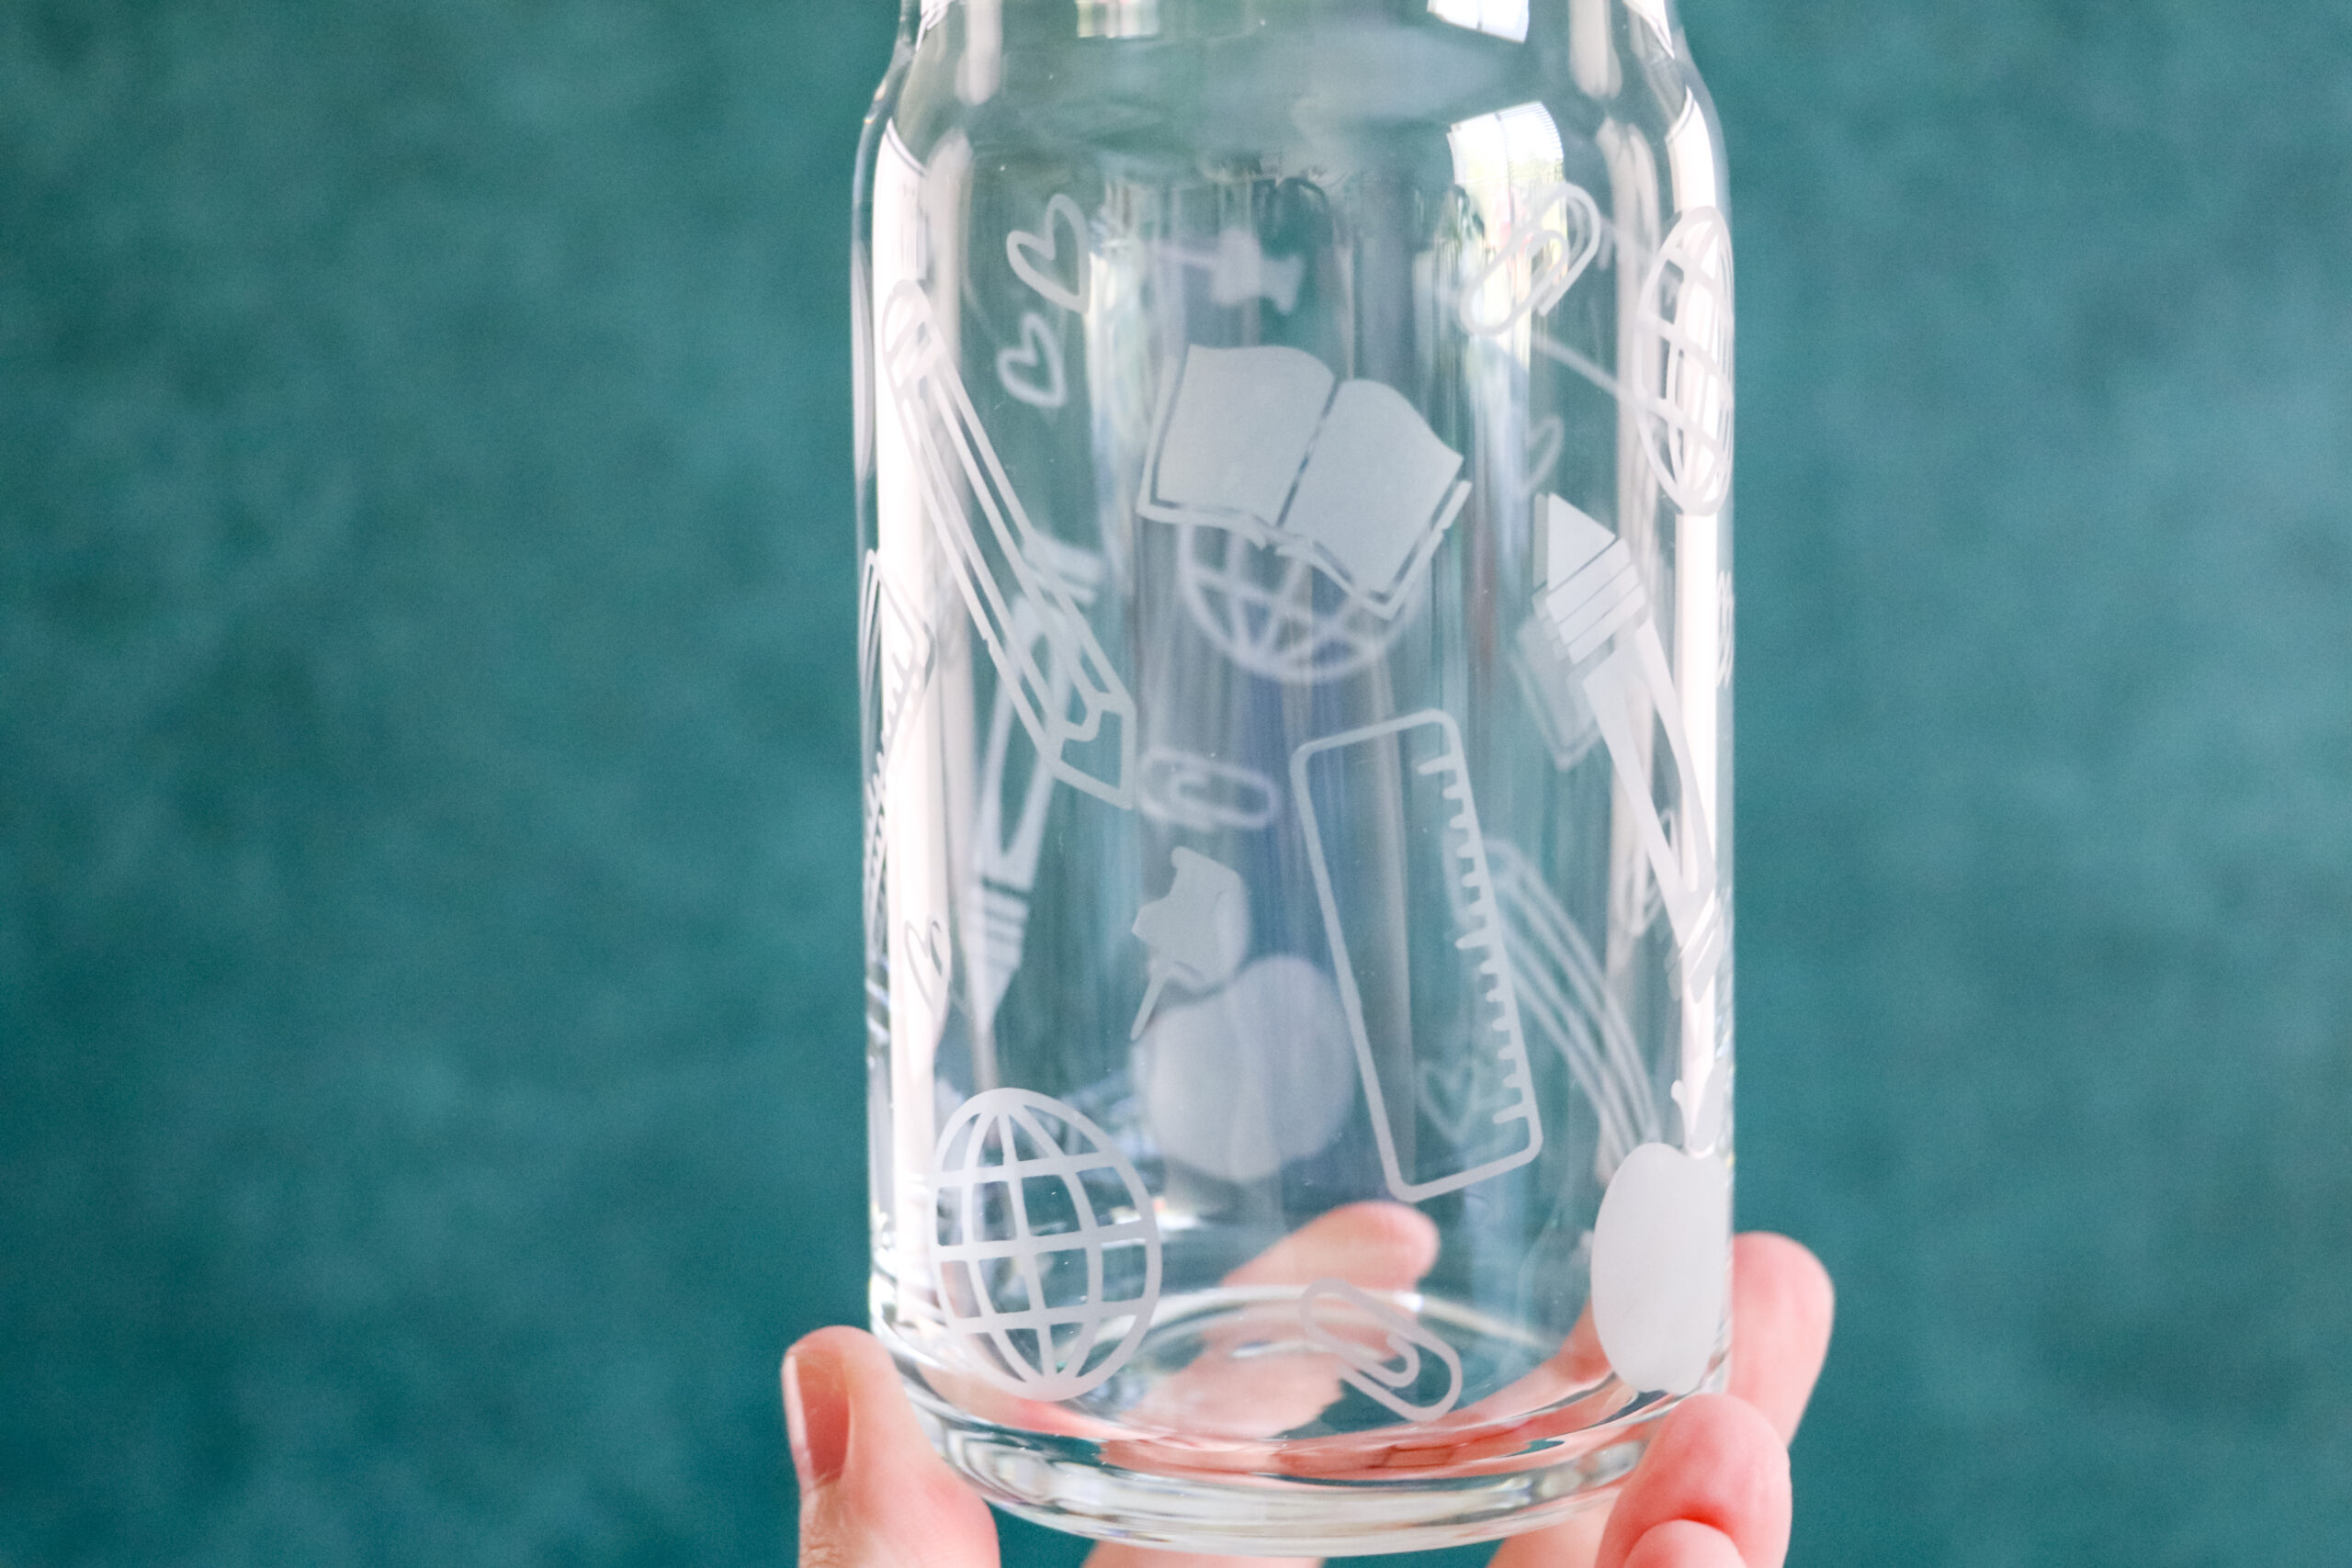
Remove the stencil and give your glass a good wash with warm water. Dry well and it’s ready to use or gift!
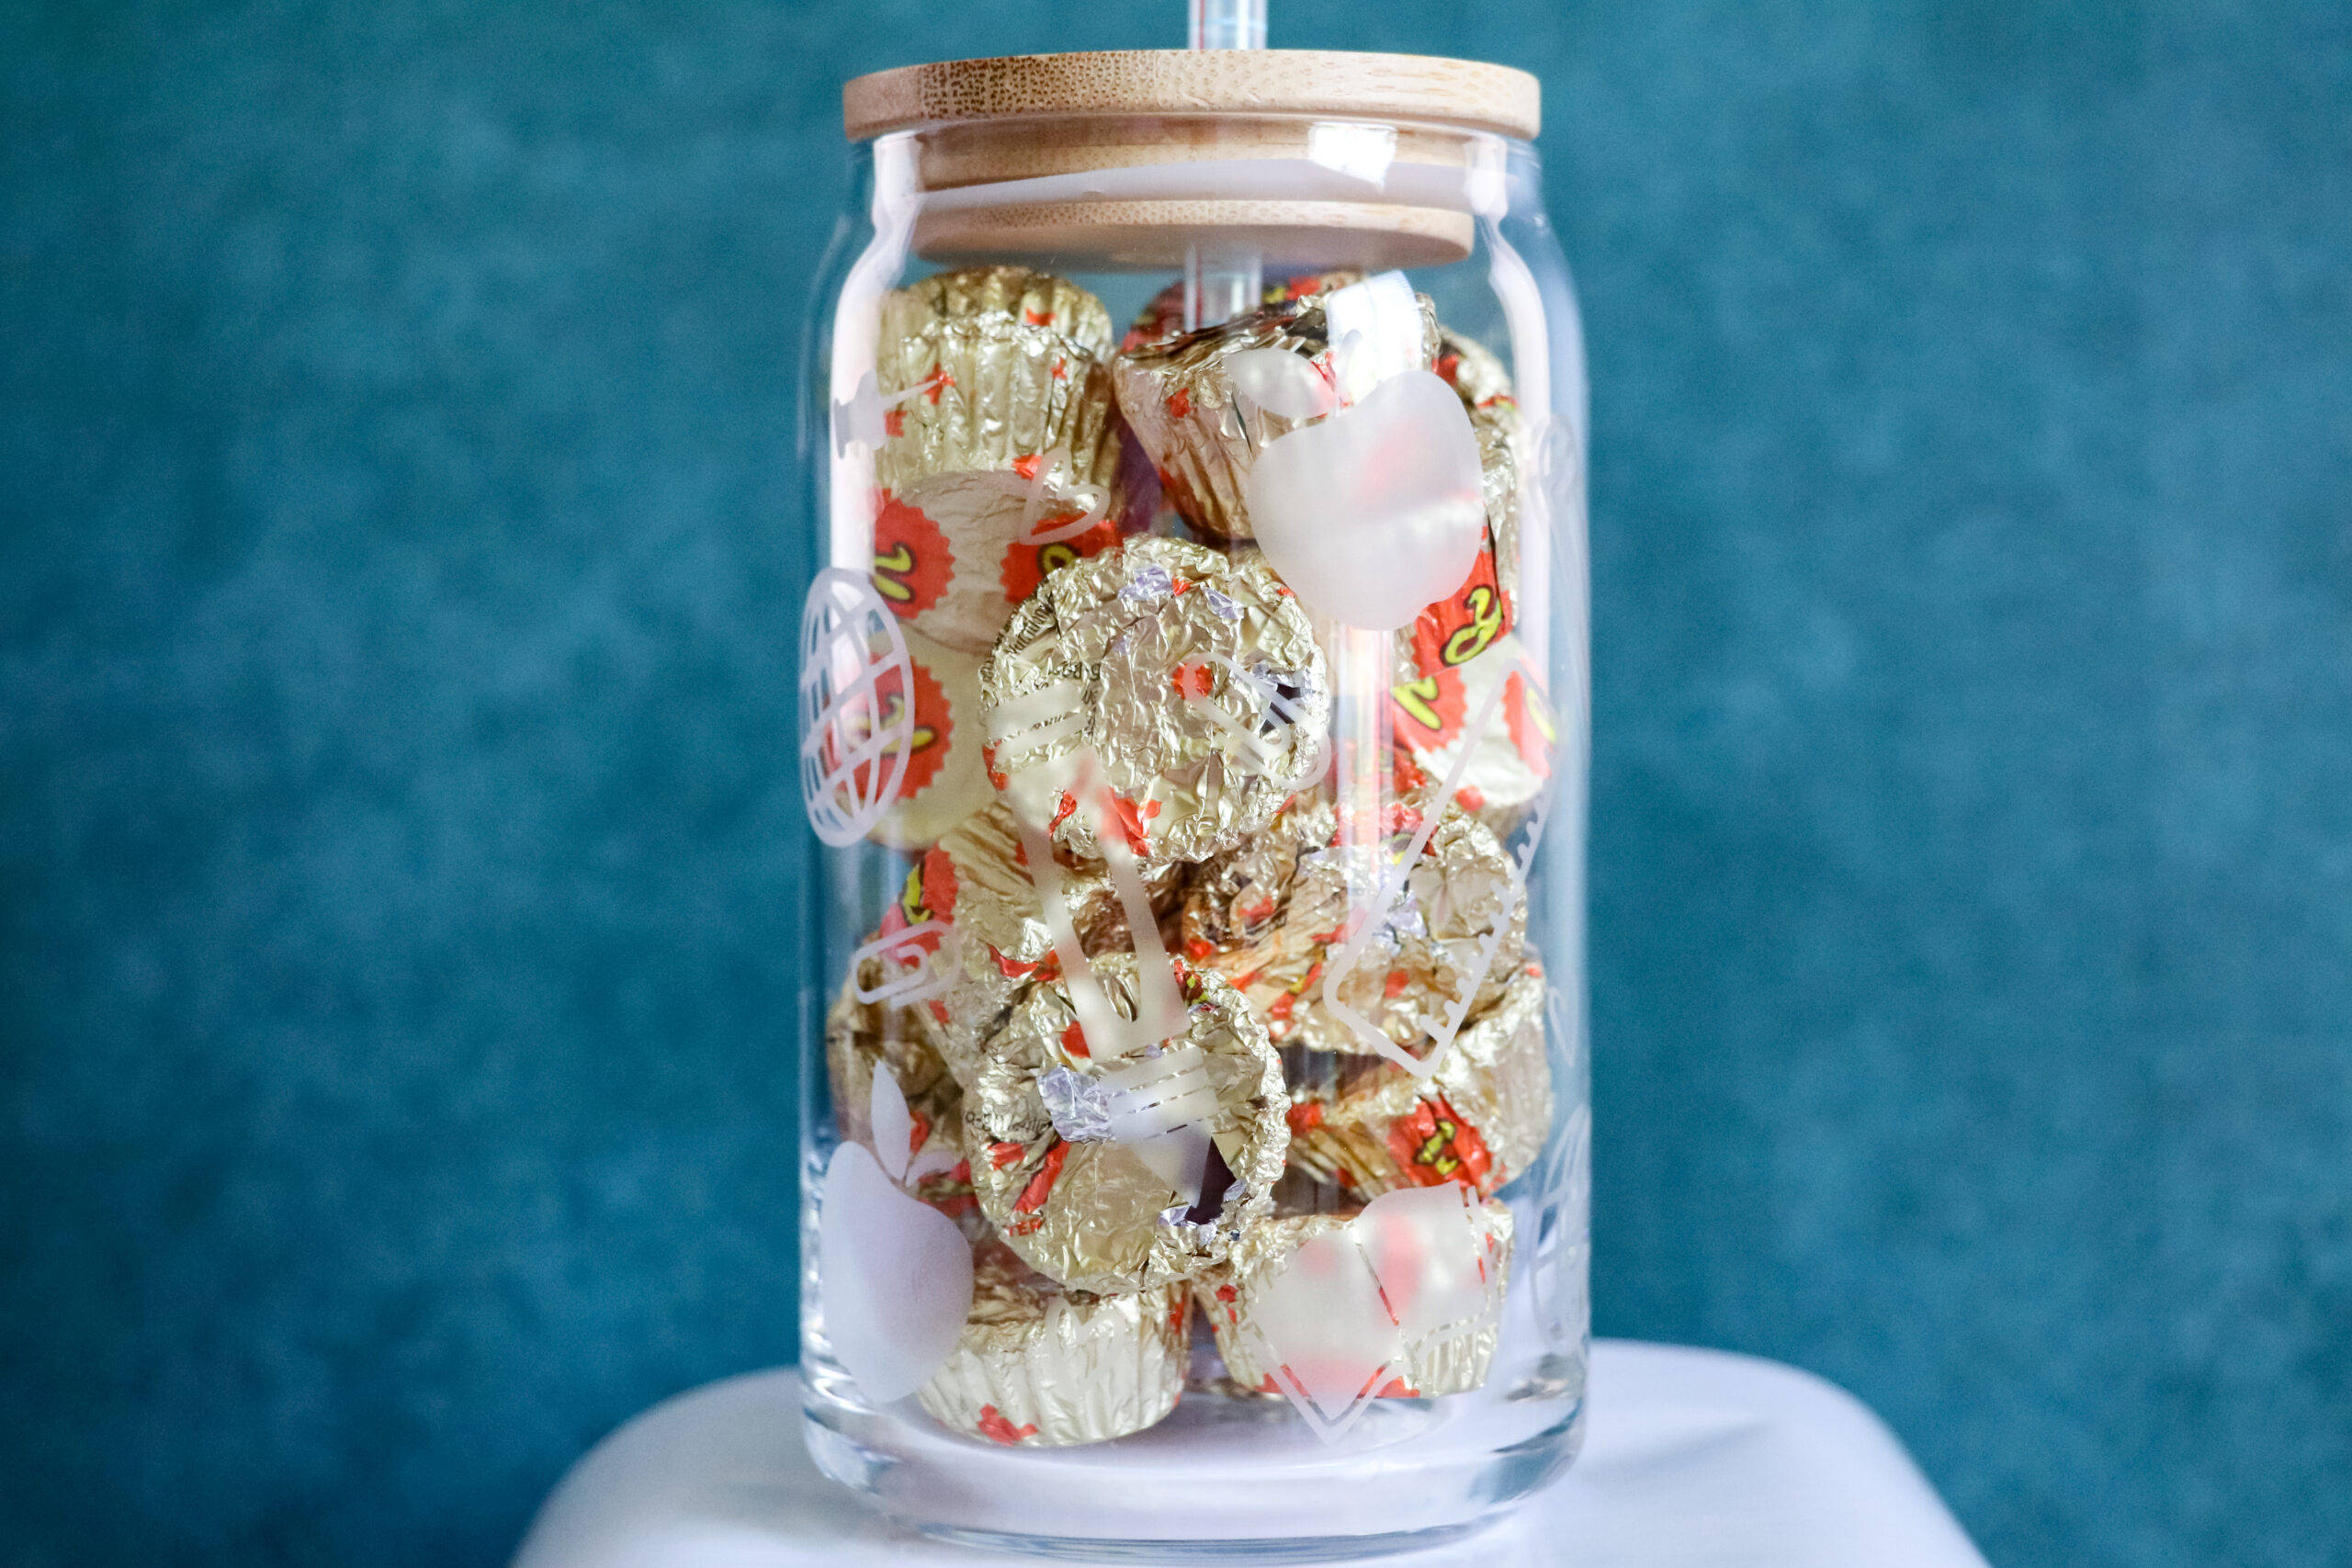
You can give the cup as is or fill it with candy, a gift card, or other small items. I added a notebook straw and bamboo lid to my cups.
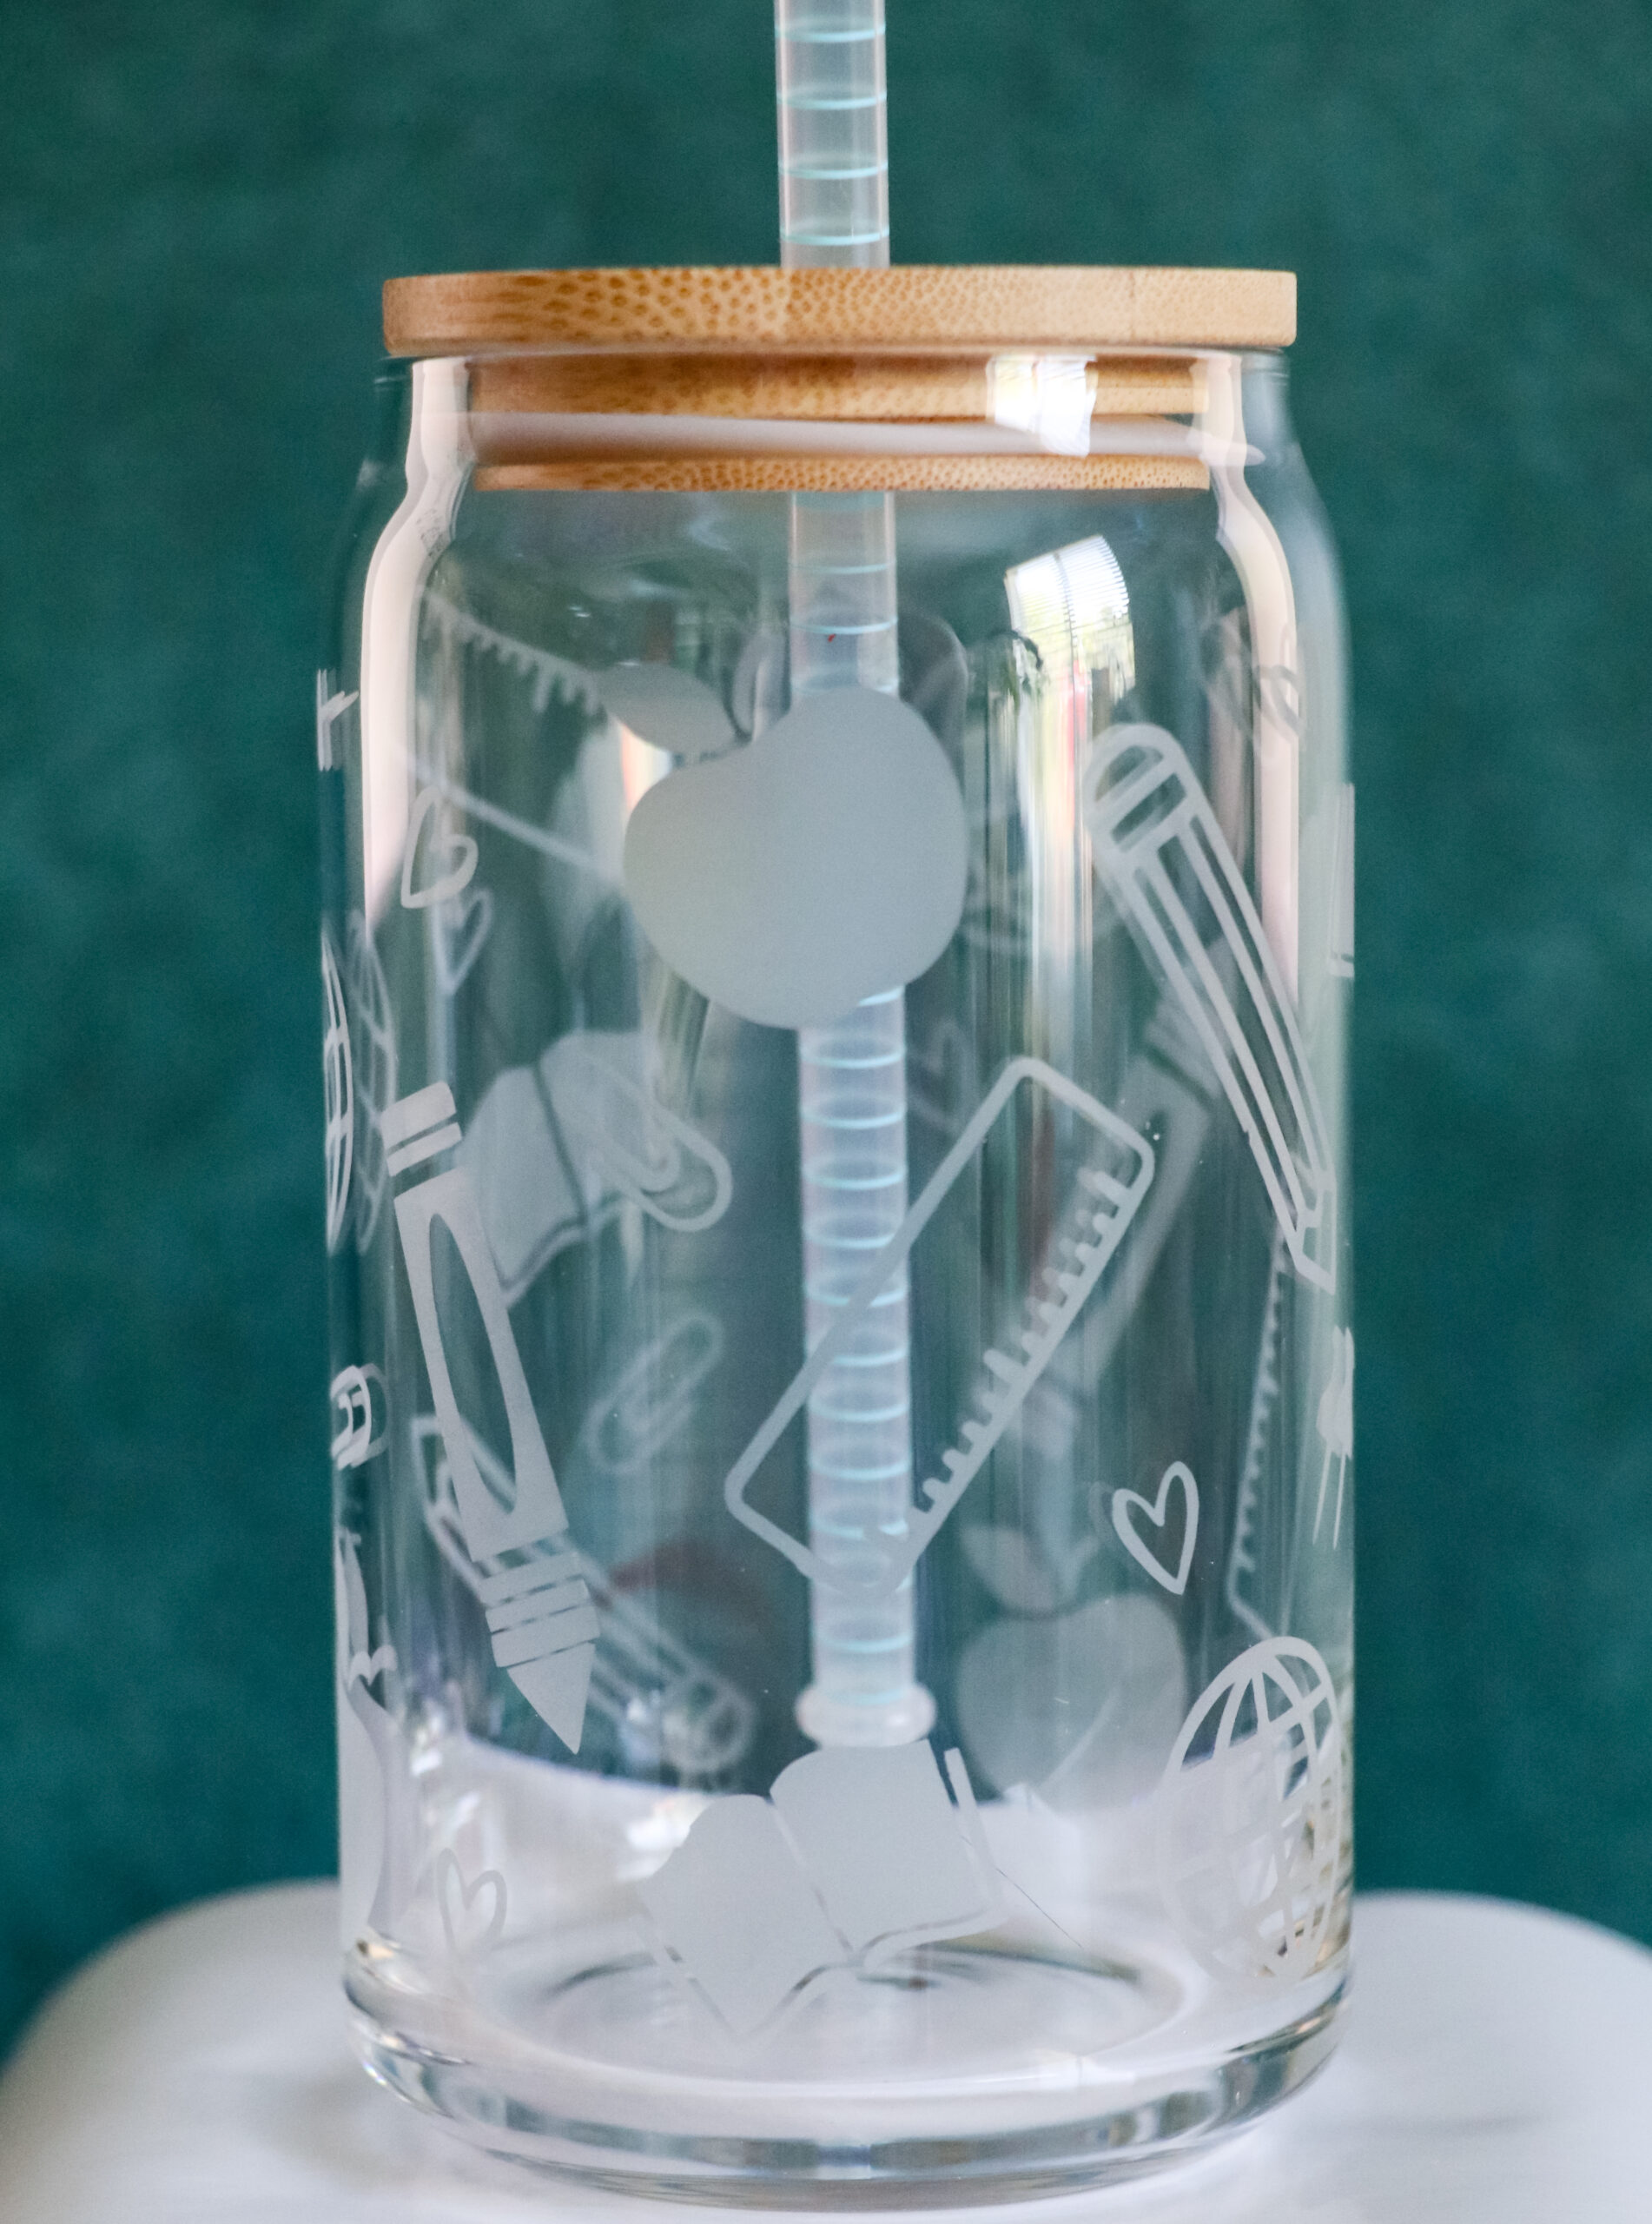

Glass Etch Libbey Glass Can
Make an easy DIY teacher gift with your Cricut. This cute Libbey Glass Can is customized for the perfect teacher appreciation gift.
Materials
- Glass Cup – I used the Libbey Glass Cans
- Etching Cream
- Paint Brush (I used the brushes in the armour etch bundle linked above)
- Stencil Vinyl
- Transfer Tape
- Weeding tool & Scraper
- Teacher Glass Wrap file
Instructions
- First, you are going to clean your glass with a lint-free cloth and rubbing alcohol. This helps to ensure all dust, dirt, and debris is removed from the glass before etching.
- Download your design and upload it to Design Space. This is the file I used from Etsy – Teacher Glass Wrap.
- You do not need to resize your design unless you are using a different size cup.
- Cut your design out with your Cricut machine. You do not need to mirror this!
- Now it’s time to weed. You will be removing the icons from the stencil material. See the below image for example.
- Once you are done weeding apply your transfer tape.
- Apply the stencil material to the cup. I place the material down towards the middle of the design and then smooth out each side.
- When using etching cream you need to really make sure there are no air bubbles around the icons. I tried to smooth them out while applying the stencil and then did it again after removing the transfer tape.
- Remove the transfer tape and rub your finger around each icon, making sure any bubbles around the edges are smoothed out. If there are bubbles in the bigger sections of blue that is ok as long as they aren’t around the edges of the design icons. If etching cream gets under the bubbles it will leave etches spots and uneven lines.
- *Note – I messed up my first 2 cups. There can be a tiny bit of a learning curve if you haven’t done this before (like me). My advice is to make a few practice cups first. Once I figured out any kinks my other cups came out perfectly.
- Apply your etching cream with a paintbrush. I found the best way to do this was to dip the paintbrush into the etching cream and dab the cream in the icon. You want to make sure you apply an even coat over the icon. If the etching cream is blotchy your design will come out blotchy. Be careful using brush strokes when applying the cream because if it’s too thin or not evenly coated you could end up with your etching looking like brush strokes. I found just dabbing the cream on worked best.
- You want to try and keep the cream to only the design and if there is an icon close to the edge of the stencil make sure not to go over the stencil or you will end up with etched spots on your glass.
- Let the etching cream sit for 10 minutes. The bottle says 1-3 minutes, but all the reviews I read said 10-15 minutes. I did both 10 and 15 and didn’t notice a difference so I would go with 10.
- After 10 minutes rinse your glass off. I ran mine under cold water and used a wet paper towel to help remove all of the etching cream.
- Note – With the stencil still on the glass hold your glass up to the light and see if you missed any spots. You can still apply more etching cream if you missed any spots and the stencil is still on. I did this on my trial glass, but even with doing a touch up it still looked a little blotchy.
- Remove the stencil and give your glass a good wash with warm water. Dry well and it’s ready to use or gift!
- You can give the cup as is or fill it with candy, a gift card, or other small items. I added a notebook straw and bamboo lid to my cups.