

Put your Cricut Maker 3 to work with this easy personalized project. Cricut personalized name tie dye towels are an easy beginner Cricut Maker 3 or Explore Air 3 project. They make great gifts all year round and kids love them!
When Cricut announced their Maker 3 I knew I had to add it to my Cricut collection. What really sucked me in was the ability to cut bigger projects and that you don’t have to use a mat with smart vinyl. This means personalized name beach towels could be done in one easy cut, with no mat and no piecing together. Total crafting win!
Cricut Personalized Name Tie Dye Towels
We spend a lot of time at splash pads, running through the sprinklers, and having water fun during the warmer months. Having big towels for each kid in designs they like is a must. These also come in handy during the colder months after showers or while traveling. They work great for wrapping up the little ones to stay warm after a shower or for the indoor pool at a hotel.
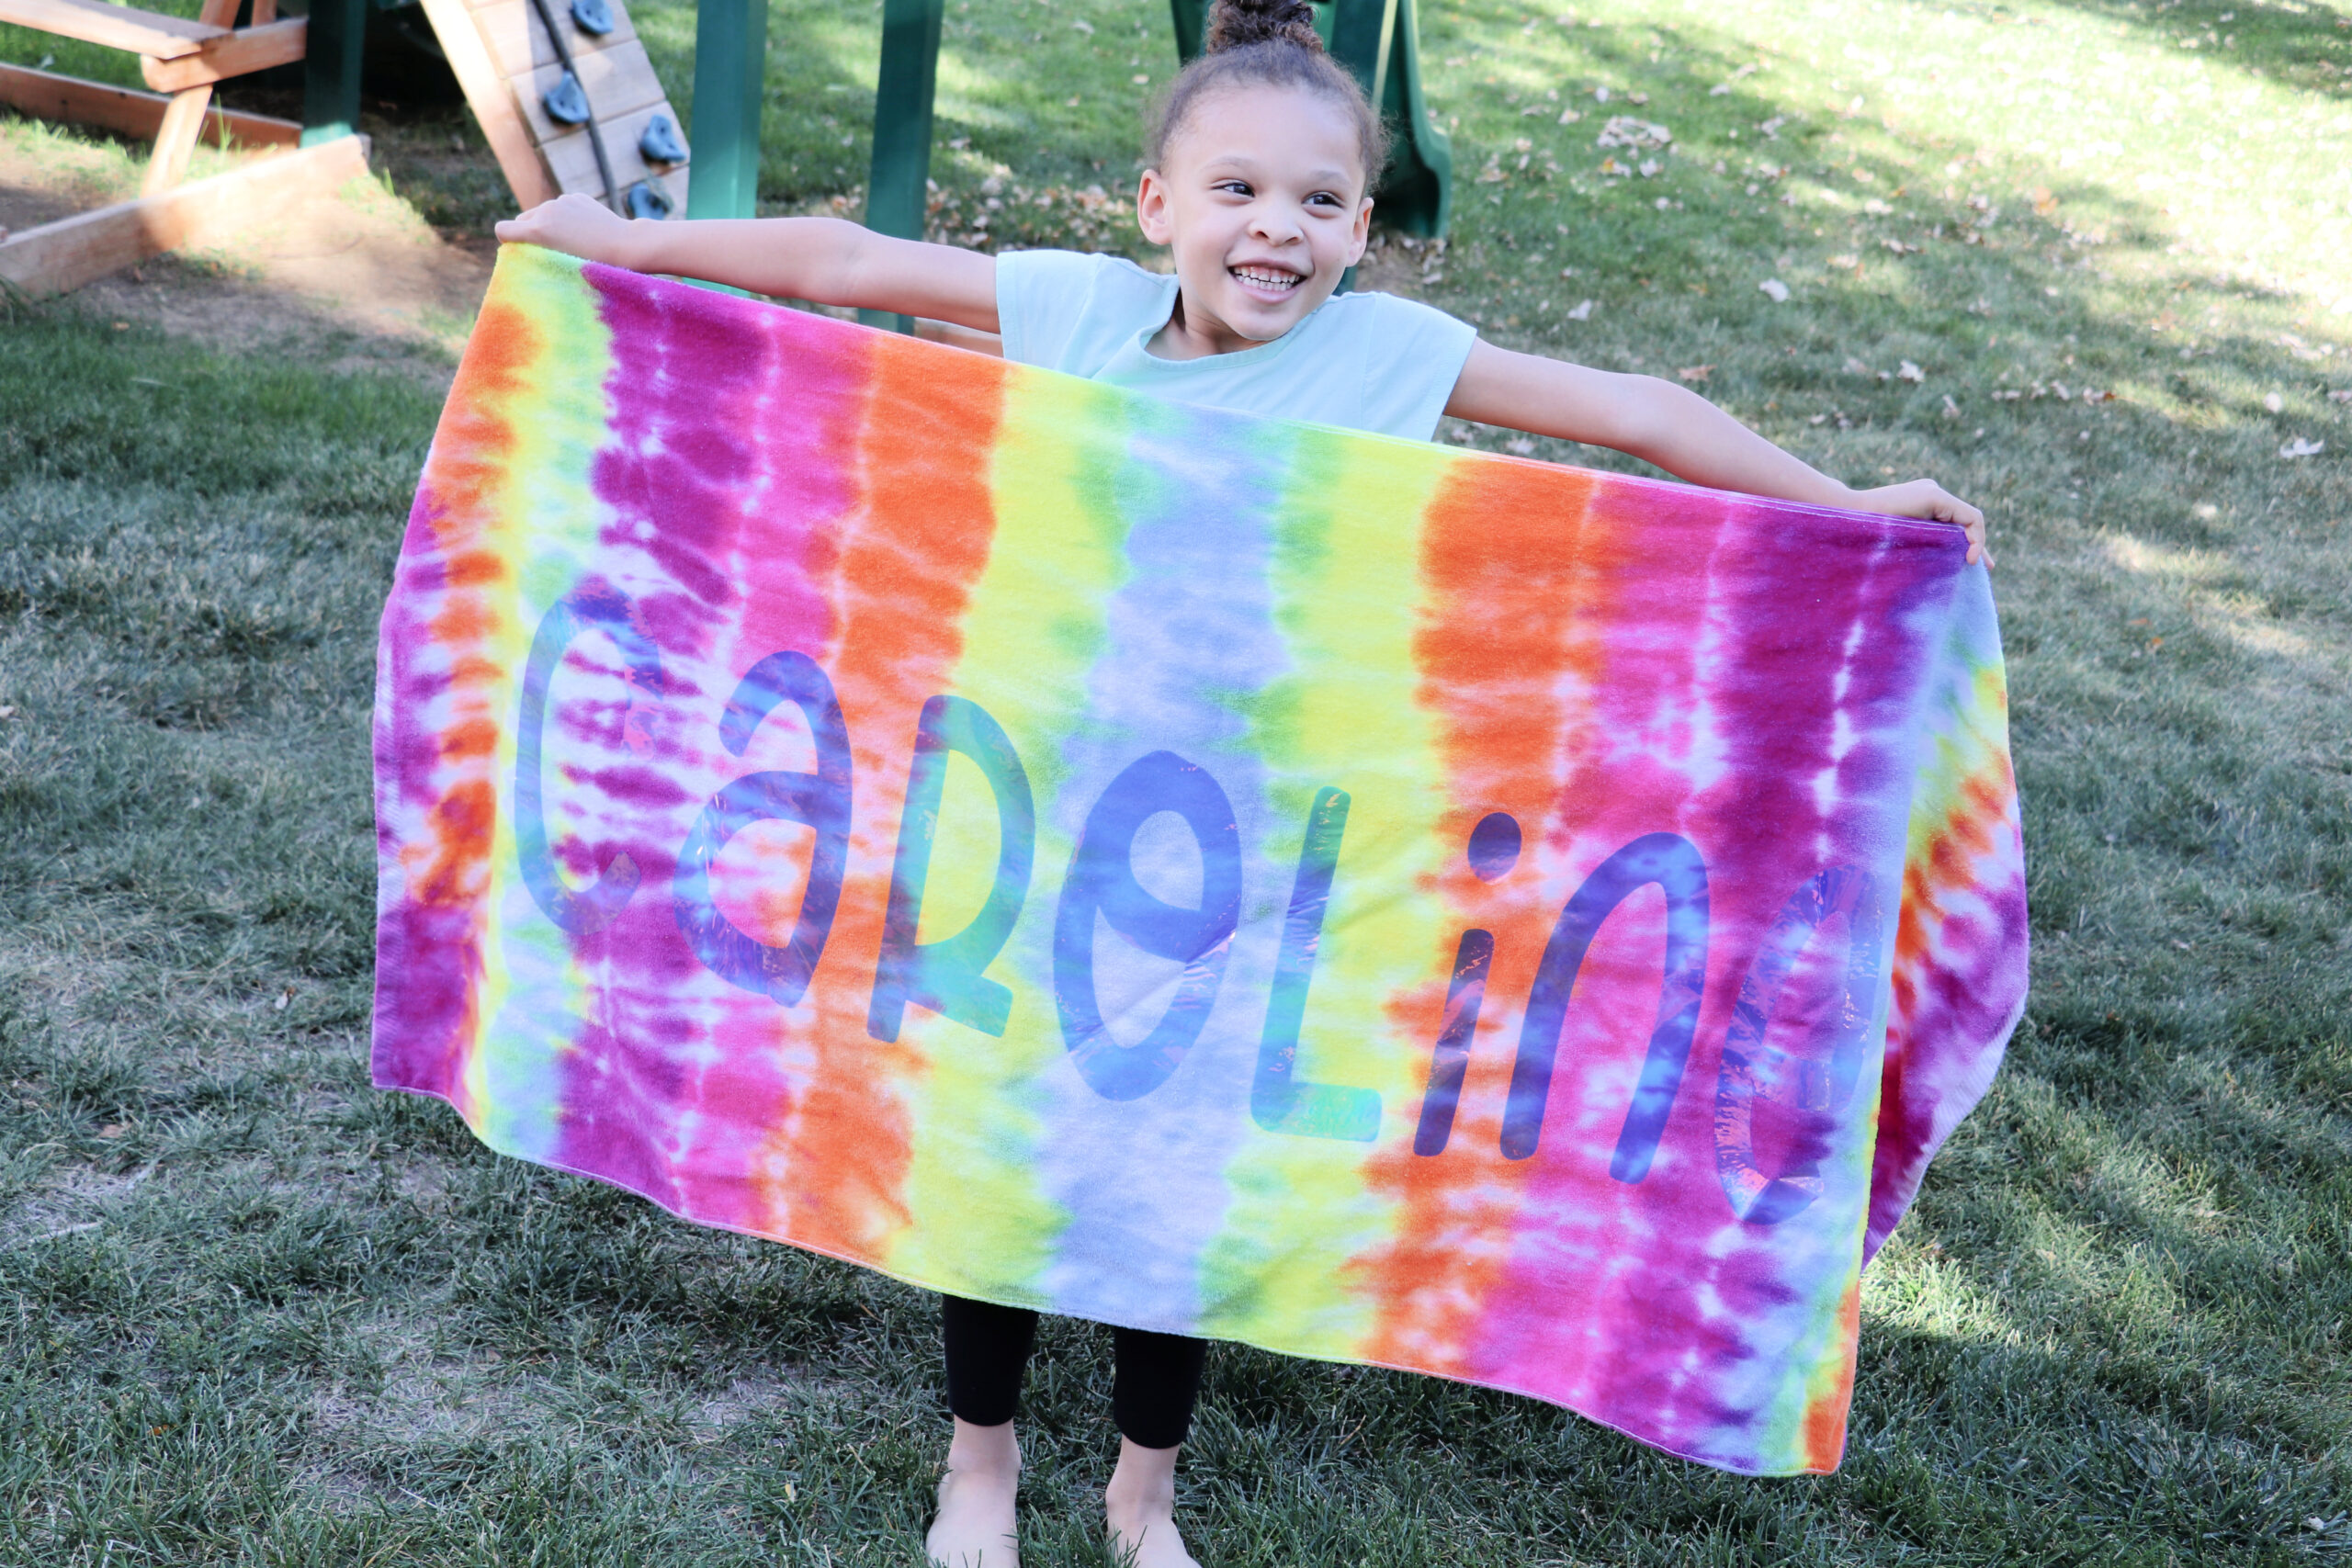
Since tie-dye is all the rage right now I knew we had to make some personalized tie-dye towels. The kids got to pick their color schemes and mama got to work making them each their own new towel.
For this project you’re going to need:
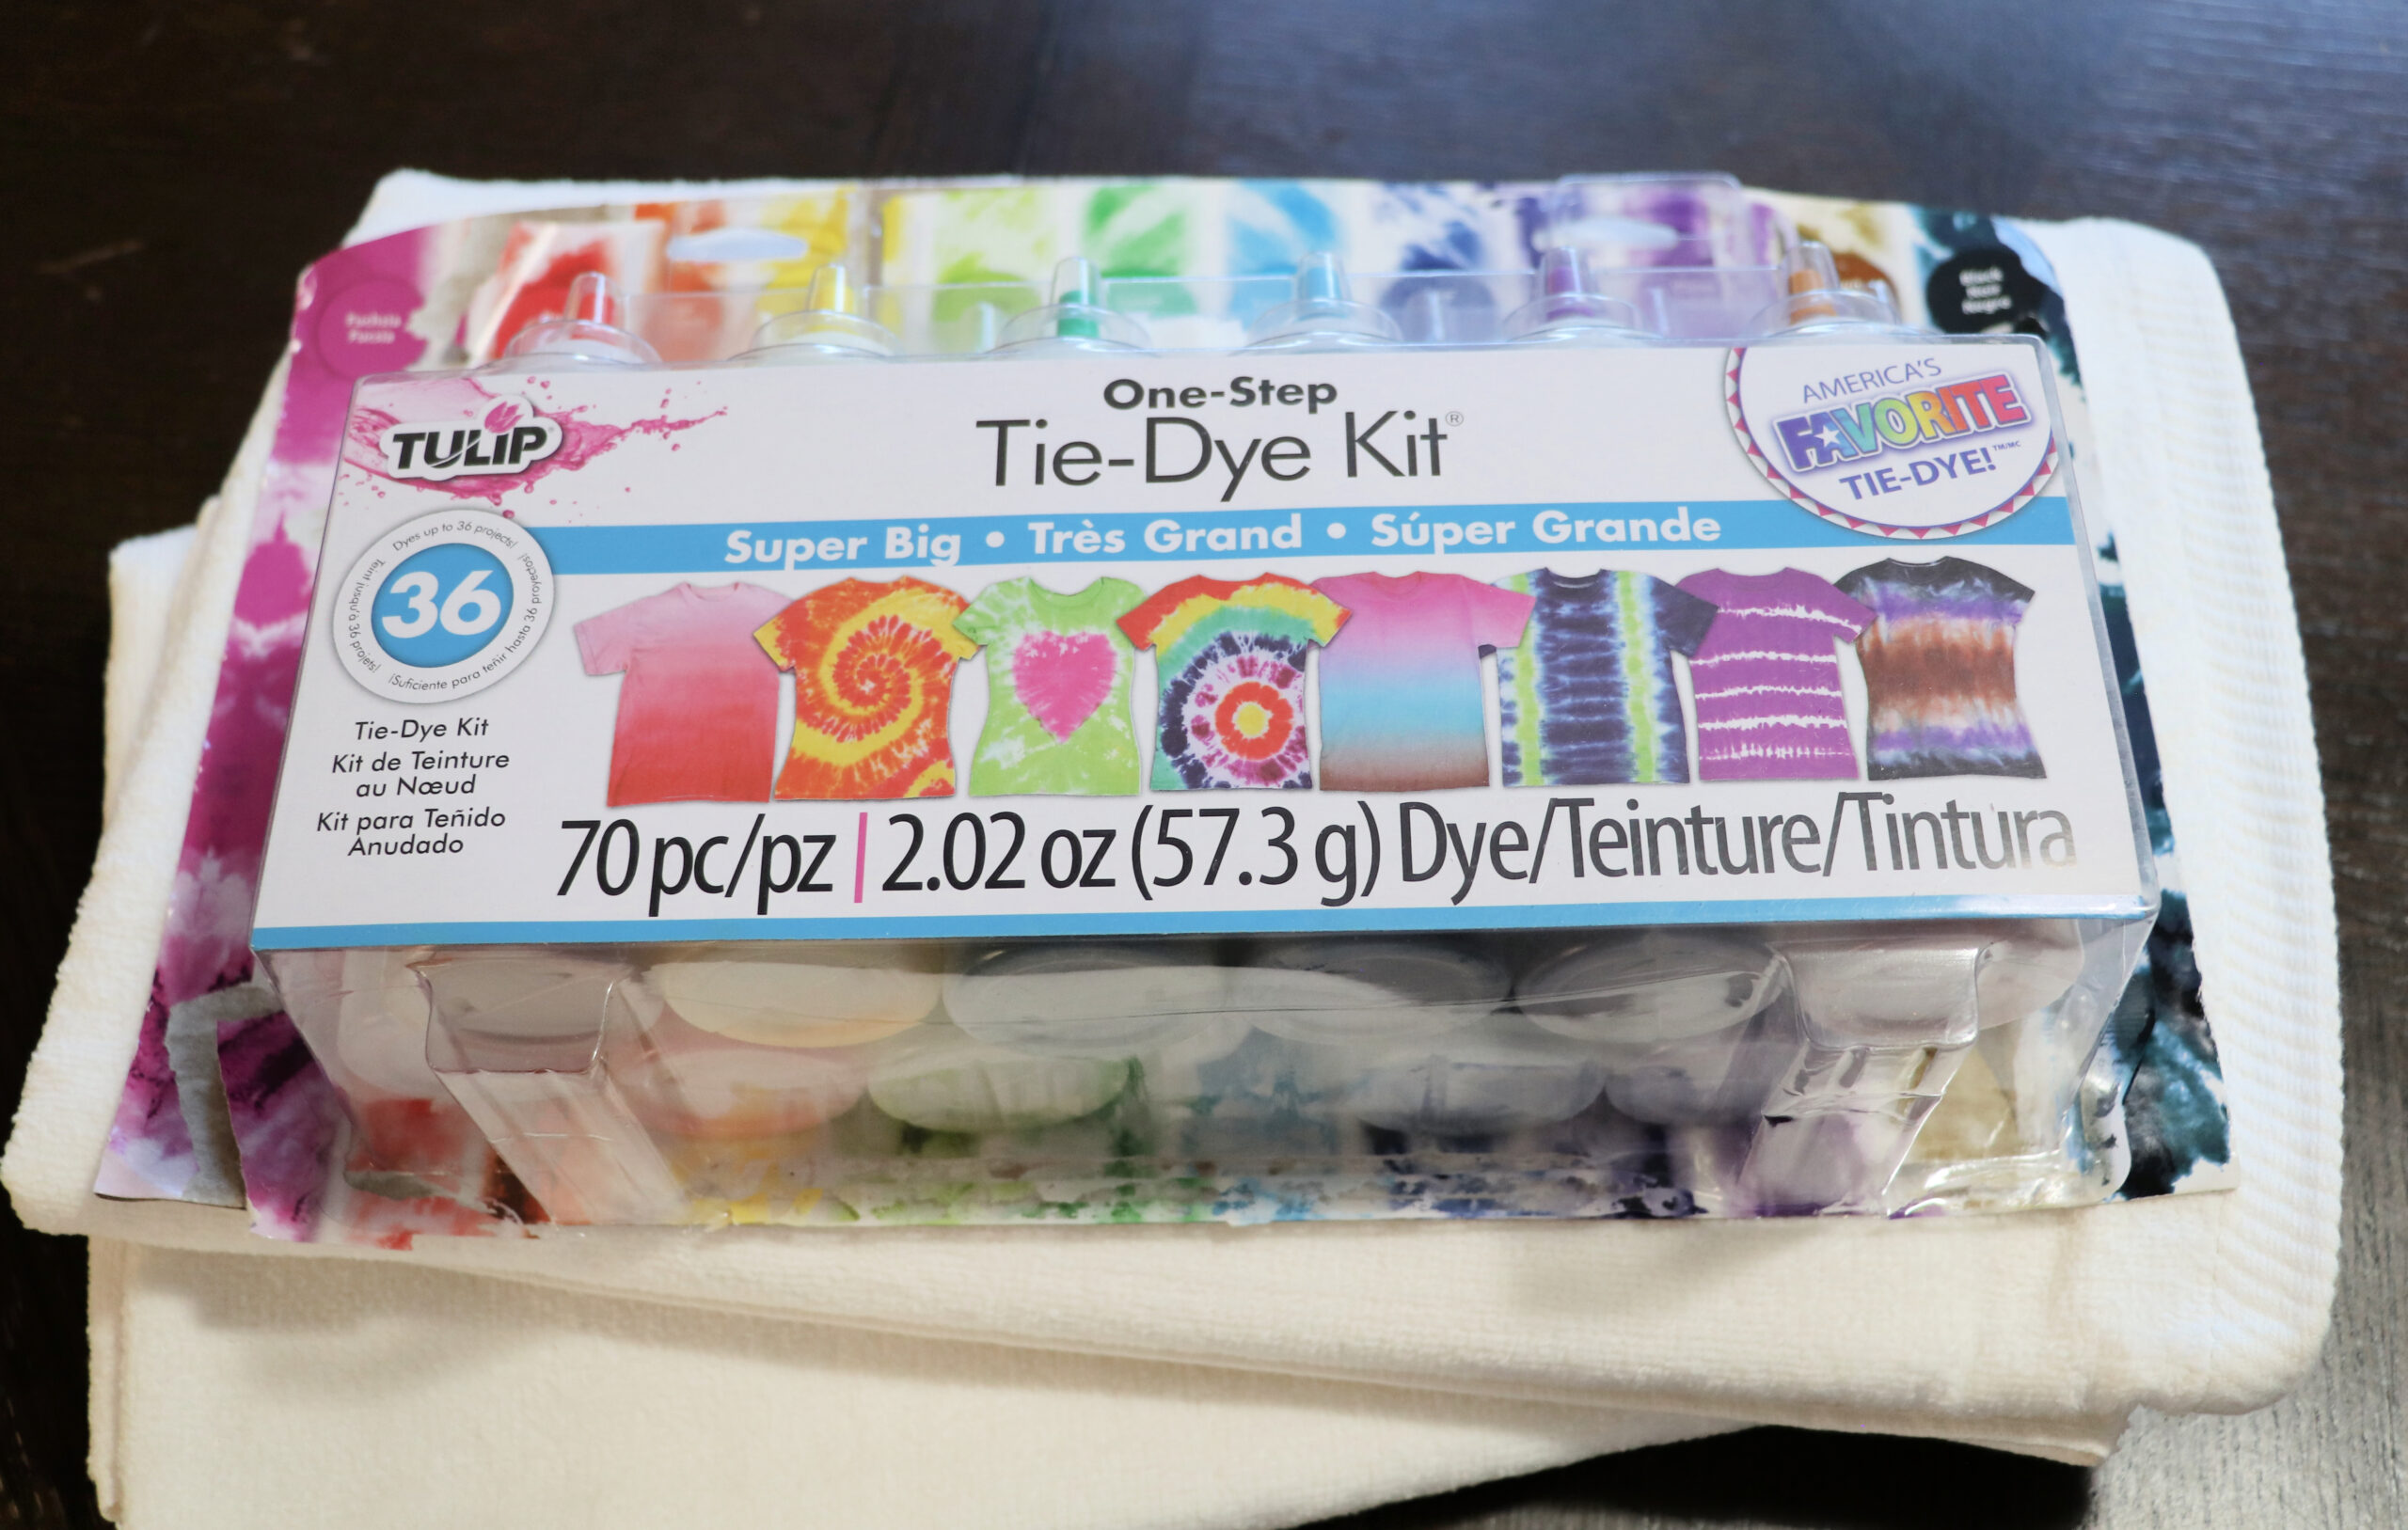
- Tie Dye Kit
- Cotton Towels
- Cricut Maker 3 (or other machine)
- Iron-On or Heat Transfer Vinyl – Holographic
- Weeding Tools
- EasyPress or Heat Press
- Lint Roller
If your tie dye kit doesn’t come with it you’ll also need gloves, rubber bands, and a plastic table cloth or trash bags.
How to Make a Personalized Name Tie Dye Towel
How to Tie Dye a Towel
This project is going to be done in 2 parts. The first part is going to be tie-dying your towels. You will need cotton towels for this project because tie-dye works best on cotton.
To get started you’ll want to protect your surface with something. Either a plastic table cloth or trash bags. This will catch the dye and prevent your surface from getting dye marks. You can tape the plastic down to ensure it doesn’t move around.
I find I get the best ink absorption when my material is wet. You can do this by running your towel under your faucet and squeezing excess water out or put your towels through a rinse cycle in your washer. You will want them damp, but not dripping wet. If your towel isn’t wet the dye could roll off instead of absorbing into the fabric. Also, try not to wash your towels prior to tie-dying with detergent or fabric softener because they could cause issues with the dye absorption.
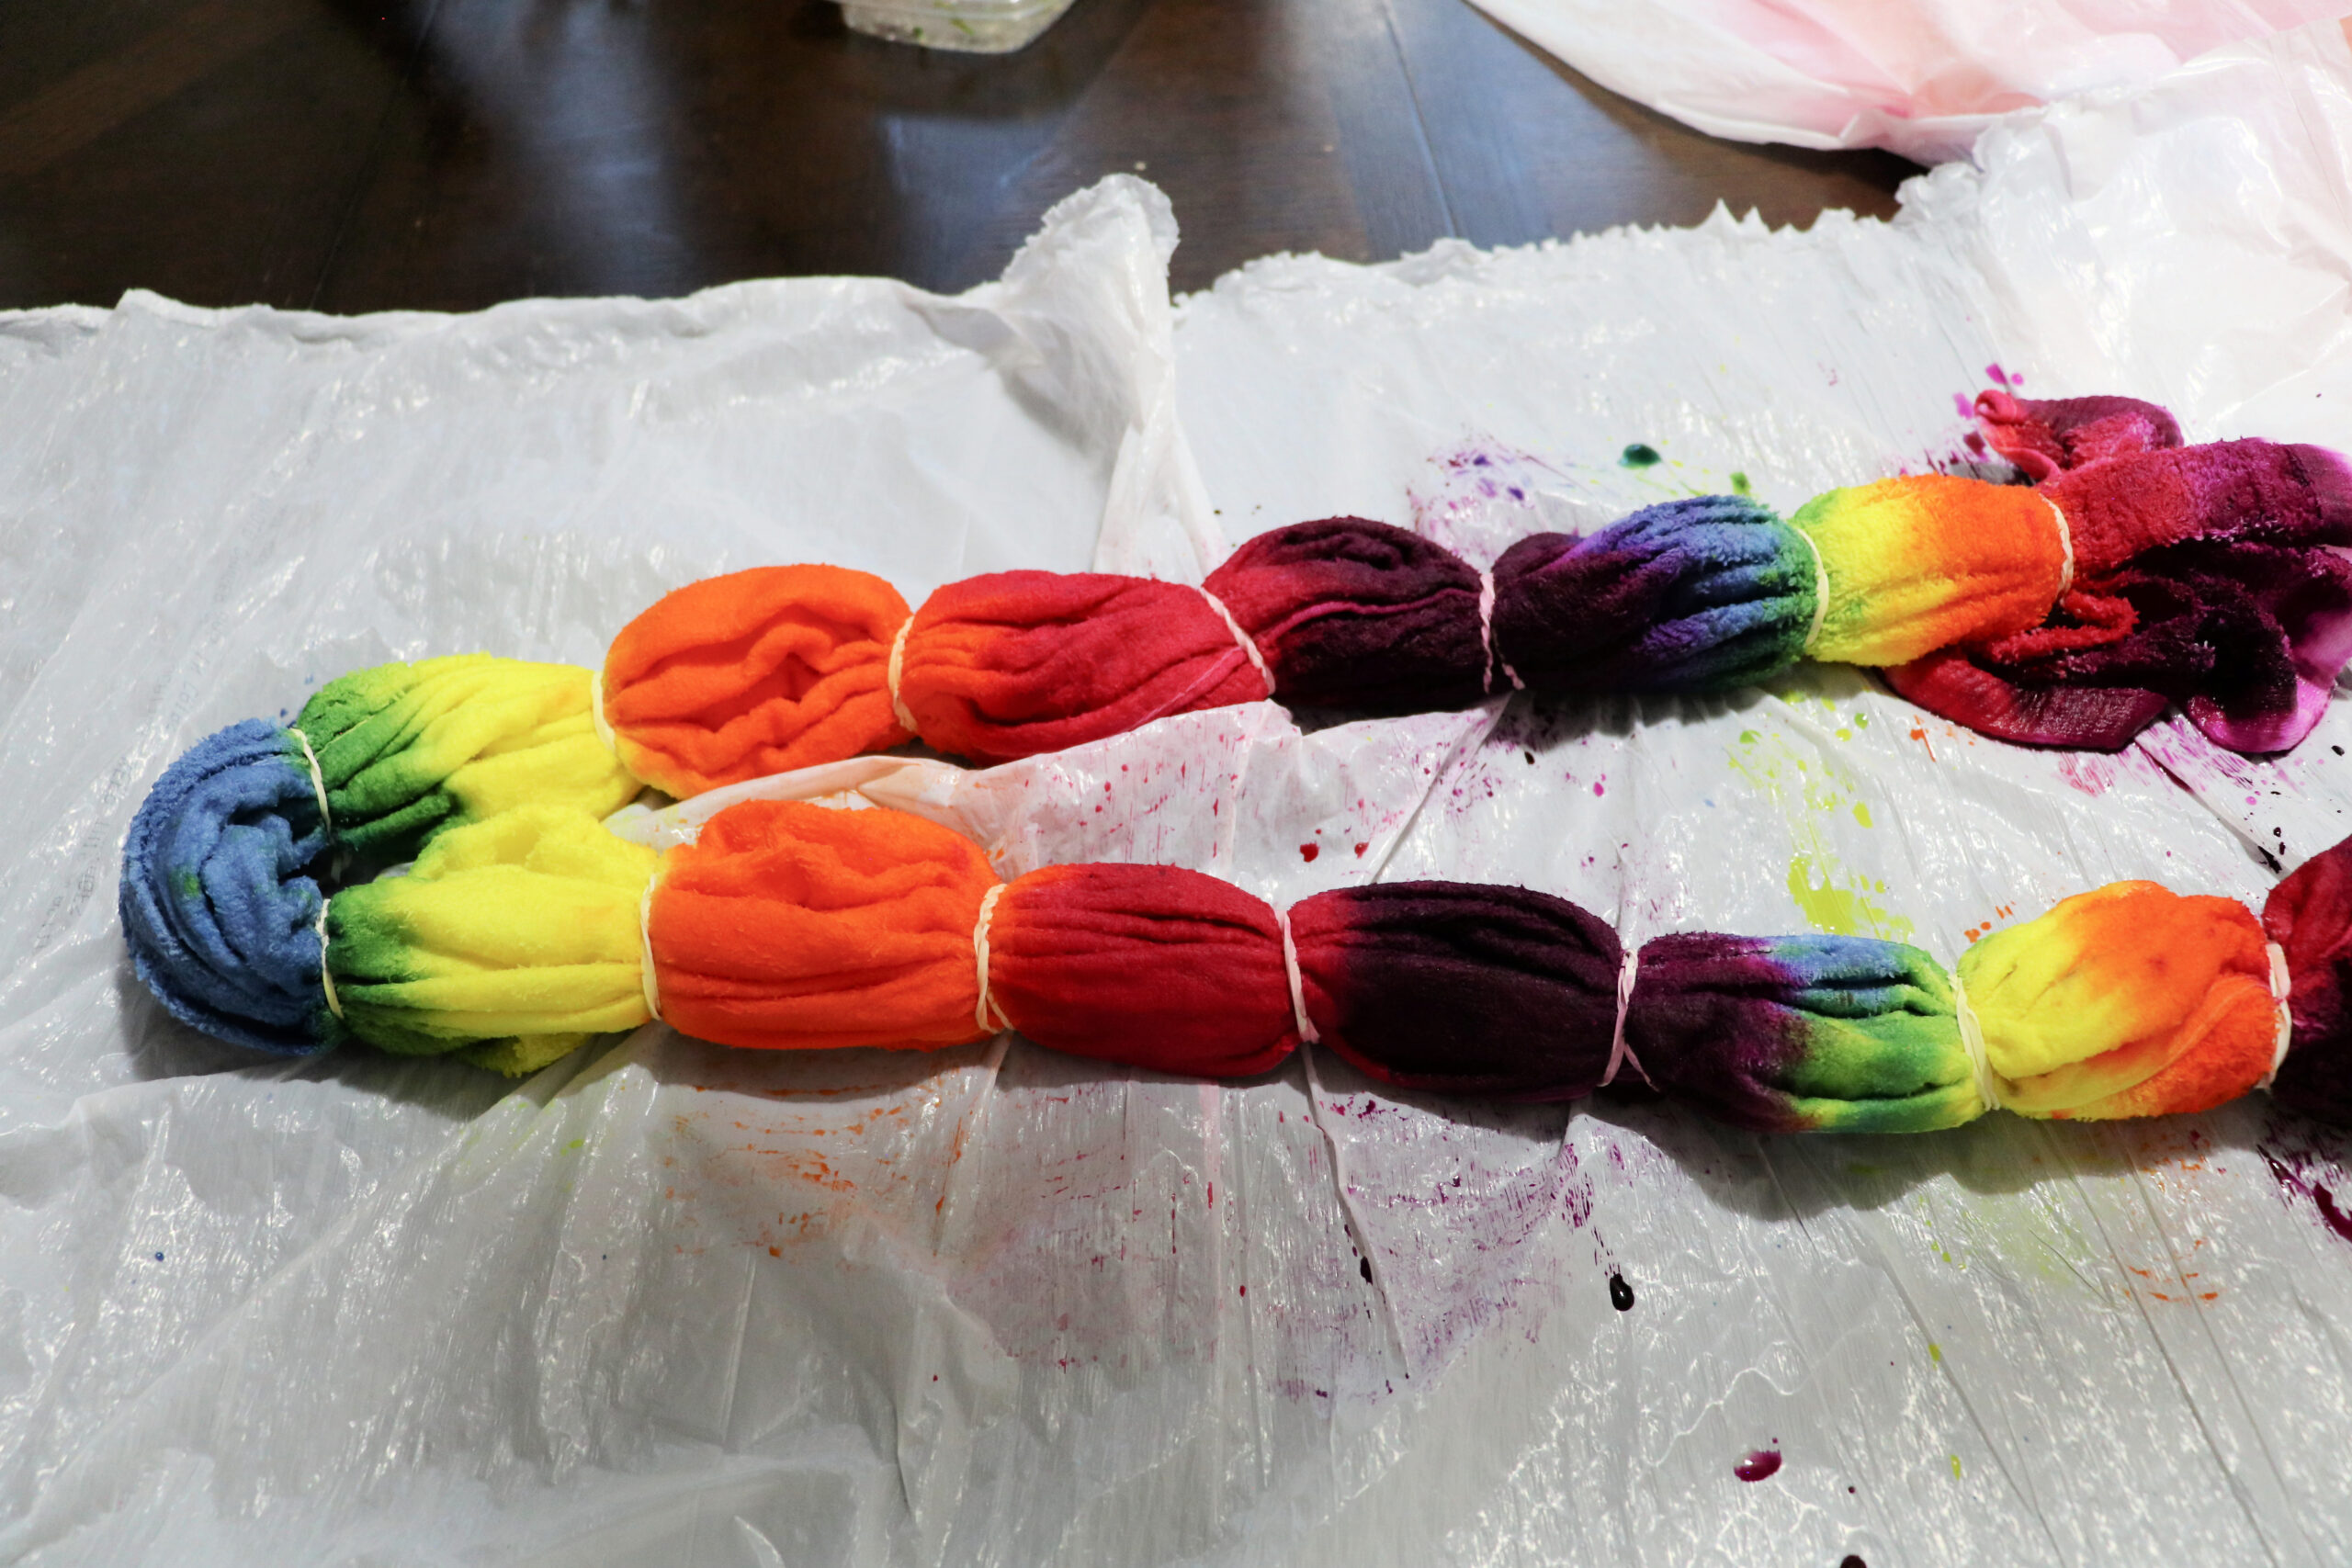
Now that you have your surface protected and your towel ready to go you’ll want to figure out your tie dye pattern. You can google different patterns to use, but I went with a basic swirl and then scrunched up patterns.
For the swirl: you’ll lay your towel flat on your table and pinch the center. Then swirl/wrap the towel around the center. You’ll then use rubber bands to hold the swirl in place.
For the Scrunched up pattern: lay your towel flat on the table and horizontally scrunch the towel up into an accordion style. Then rubberband sections of the towel.
Mix your dye per the package directions.
Note: For this project, I used spray tie-dye and regular tie-dye. I did not like the spray tie-dye. With the spray, you have to set it with heat and a lot of the color washed out of the towel. Plus the spray tie dye was a pain to apply. The regular tie dye in the bottles is the way to go, in my opinion.
Put on your gloves and apply the dye color to the towel.
Flip over your towel and apply the dye to the other side.
Let your towel sit with the dye for 12-24 hours. The longer you can let it sit the better, but don’t let it sit for too long! I like to place my towels in a garbage bag.
Once your towel is done you’ll cut the rubber bands off and rinse the towel in your sink in COLD water. Rinse it good and ring it out.
Wash your towel in hot water with laundry soap, but make sure no fabric softener is used. Be careful when washing your towels for the first time because the dye could bleed while in the wash. I was my tie dye towels alone the first time. Dry towels once washed.
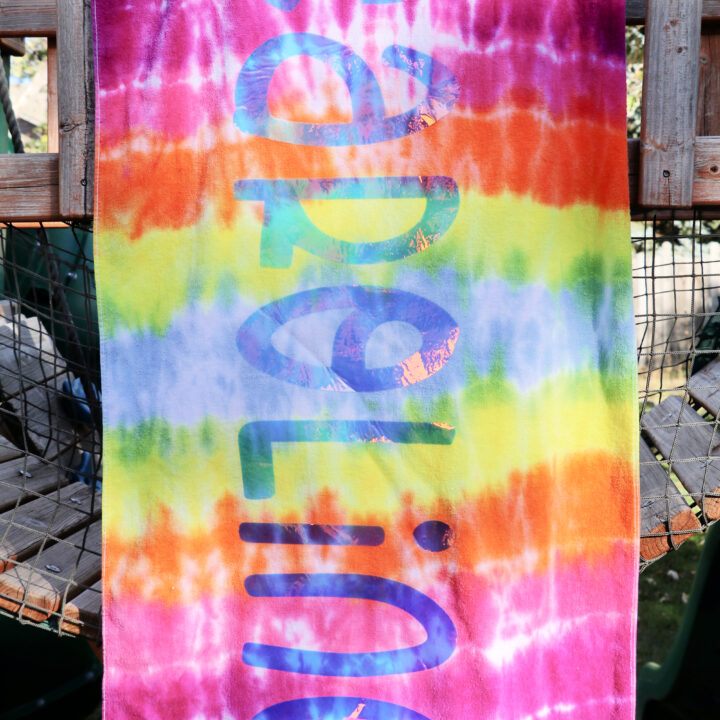
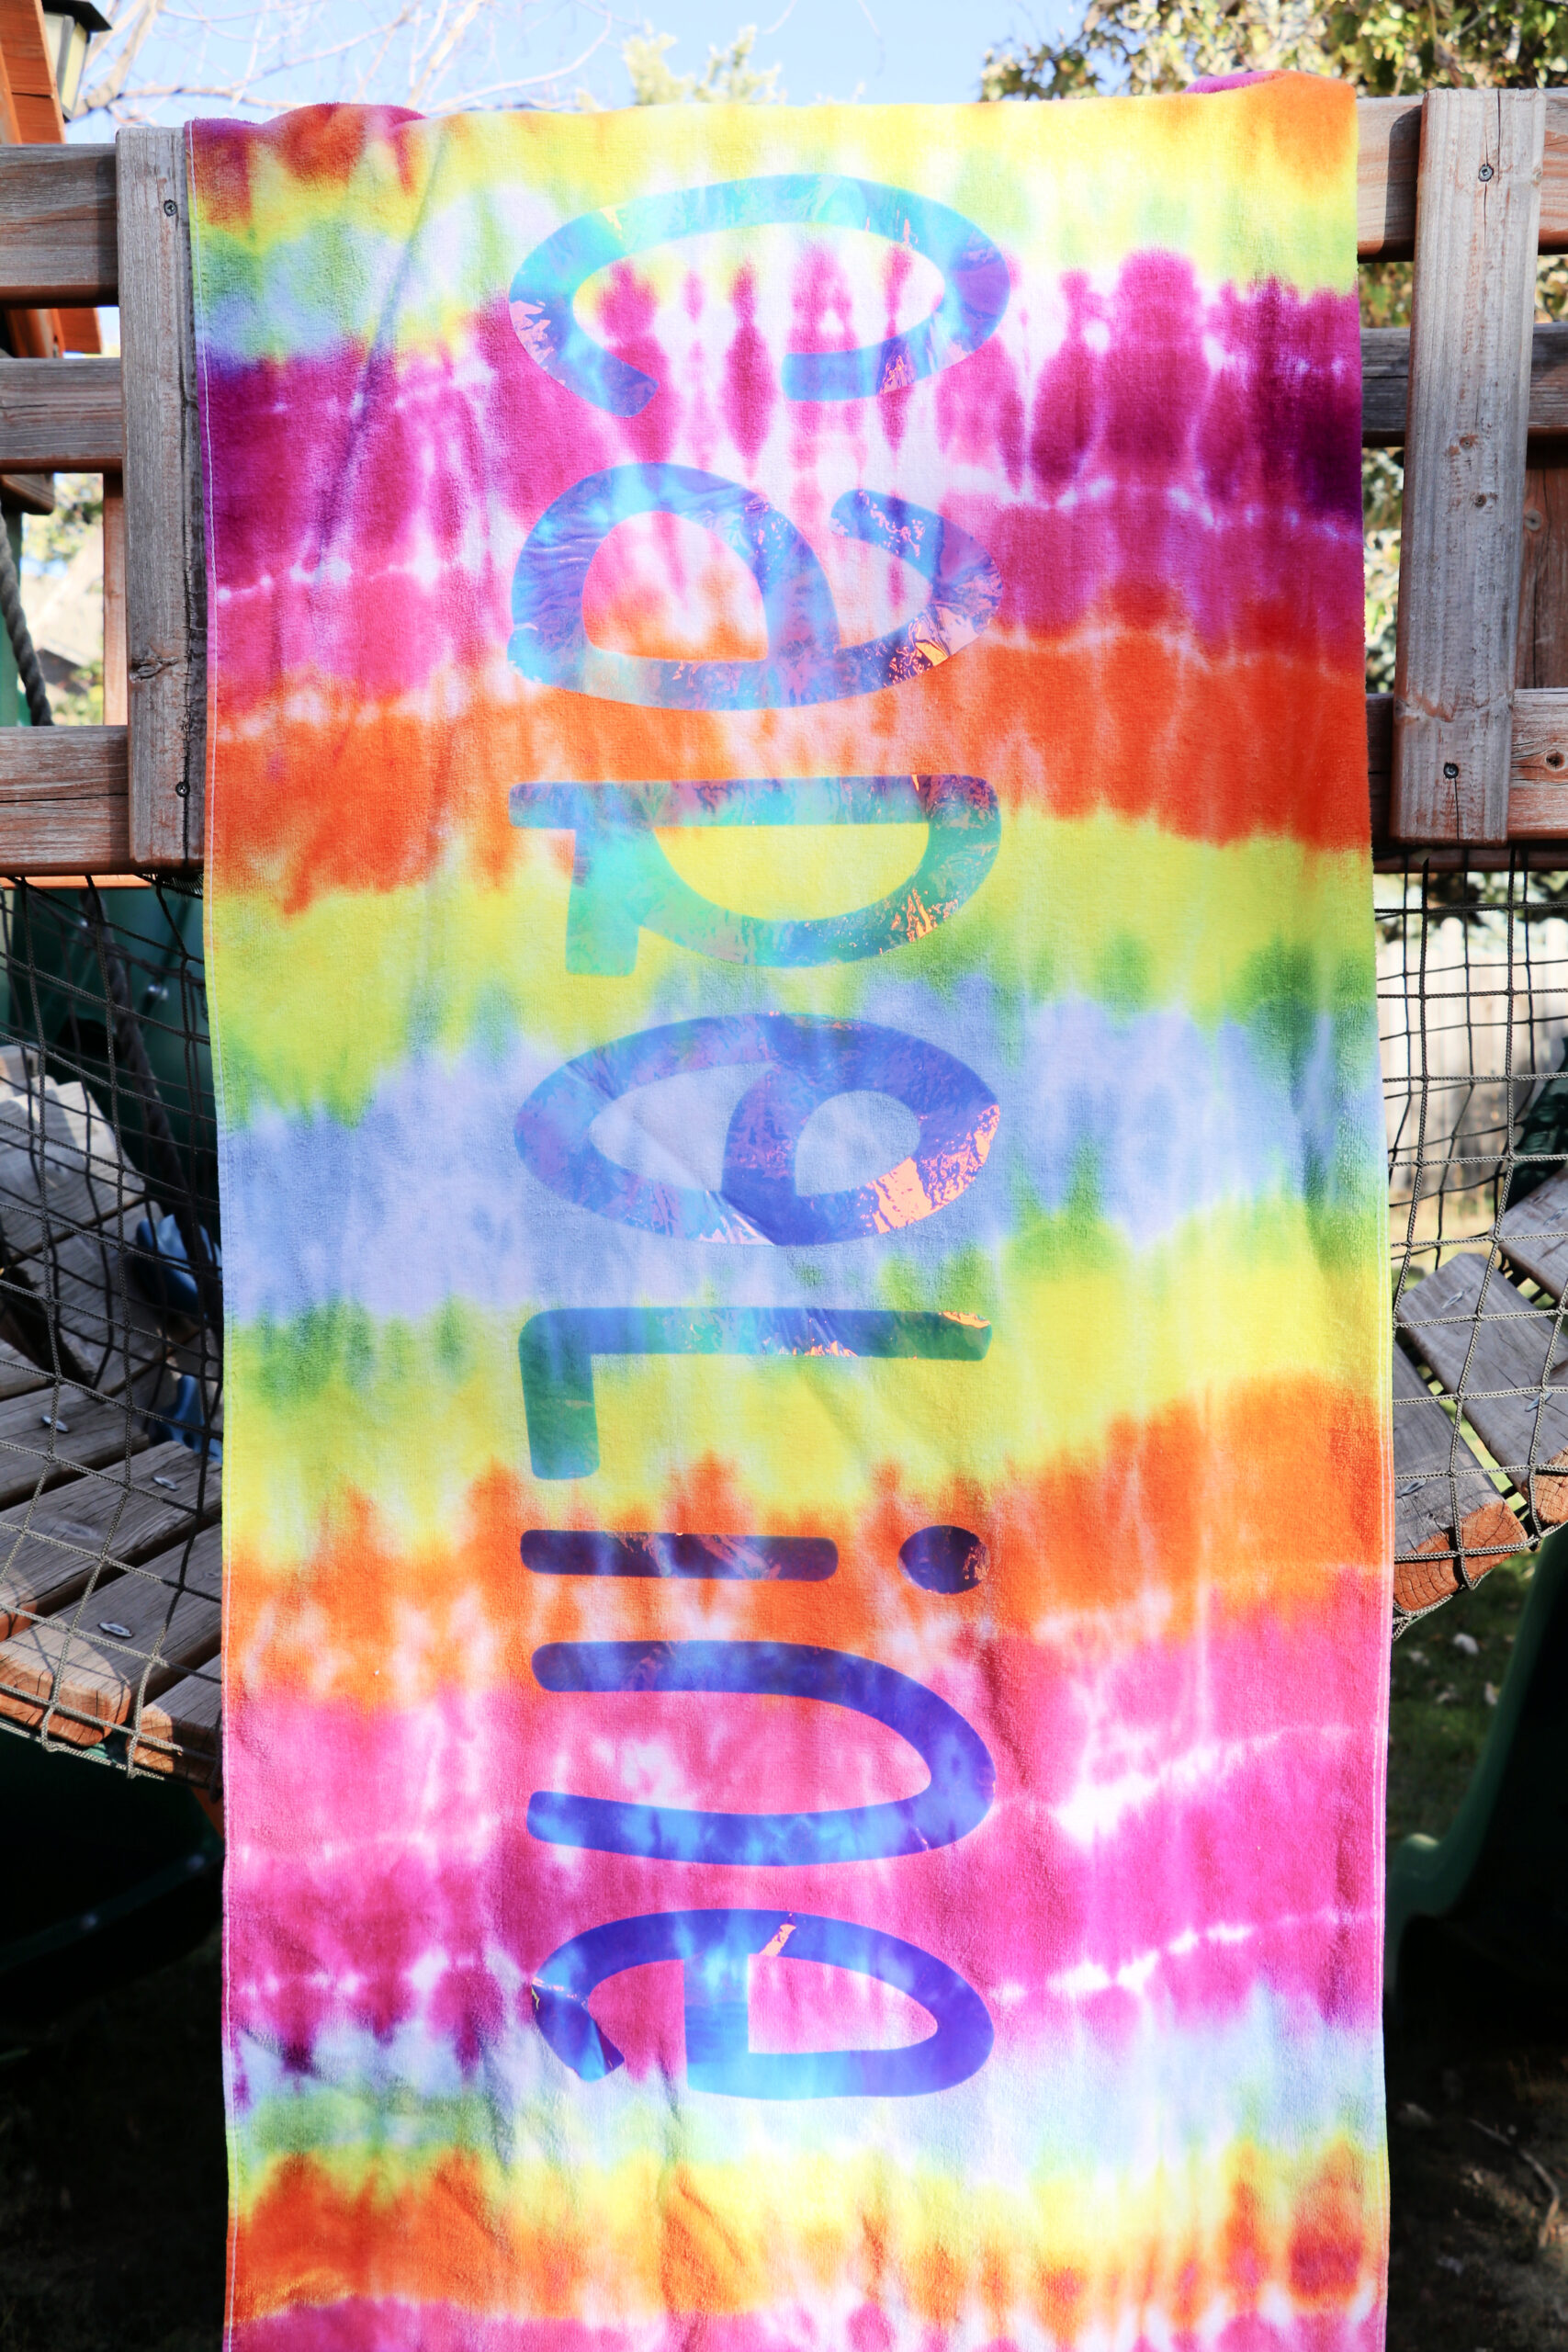
Now it’s time to apply your personalized names and/or designs.
How to Apply Names to Tie Dye Towels
Measure your towel.
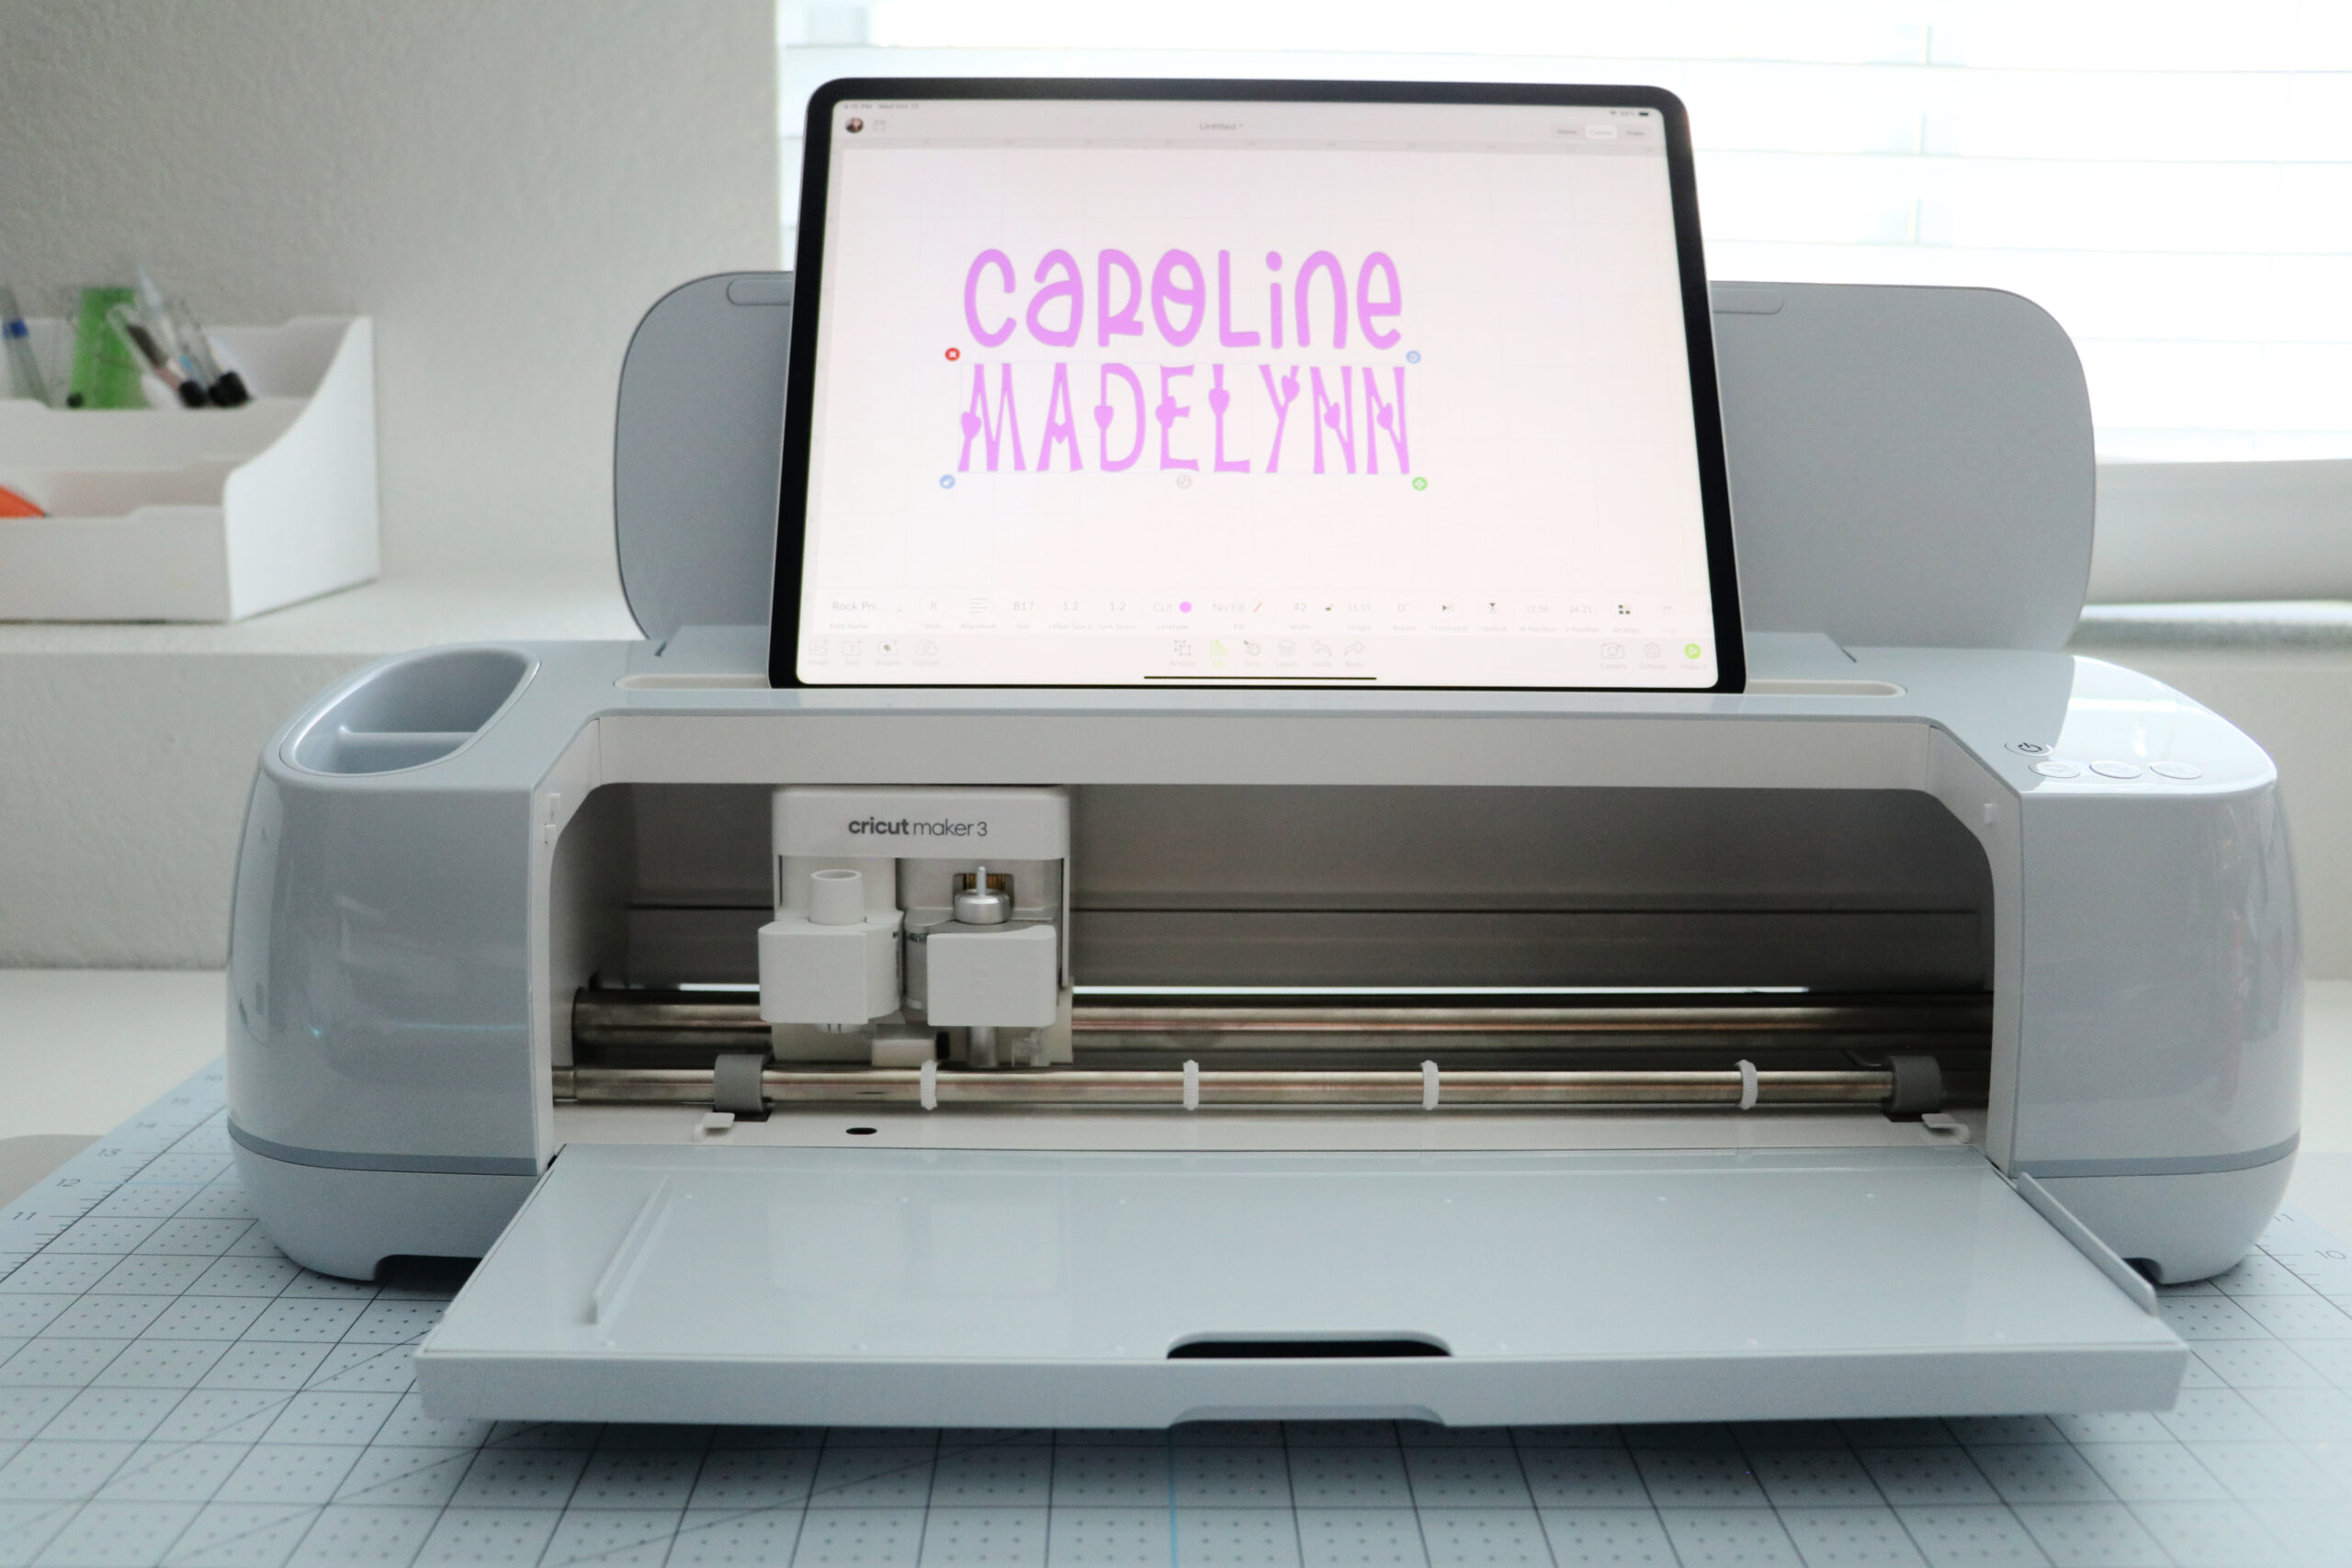
Open up Cricut Design Space and type out your name. Pick a font you like.
Size your name to fit onto your towel. Since our towels are 30×60 beach towels. I want our names to go across the middle of the towel. To make this easy I make a box the size of the towel in design space. You’ll have to zoom out on the canvas screen to see the whole box.
Once your name is typed out you’ll want to size it. Click the padlock to unlock lock proportions and size your name to a size of your liking. I made our names 45×10.
Once you’re ready to cut click the make it button.
When you get to the prepare screen make sure to hit MIRROR. Then continue.
Select your material from the drop down.
Load your smart vinyl and begin cutting.
Once cutting is done weed your design.
Give your towel and good roll with your lint roller and lay your towel on a smooth, flat surface.
Make sure your surface is protected from the heat with a heat press mat. You can also put another towel or two under it.
If your towel is a little wrinkly give it a quick iron with your heat press.
Press your name onto your towel per the directions on cricut.com/heatguide for your material.
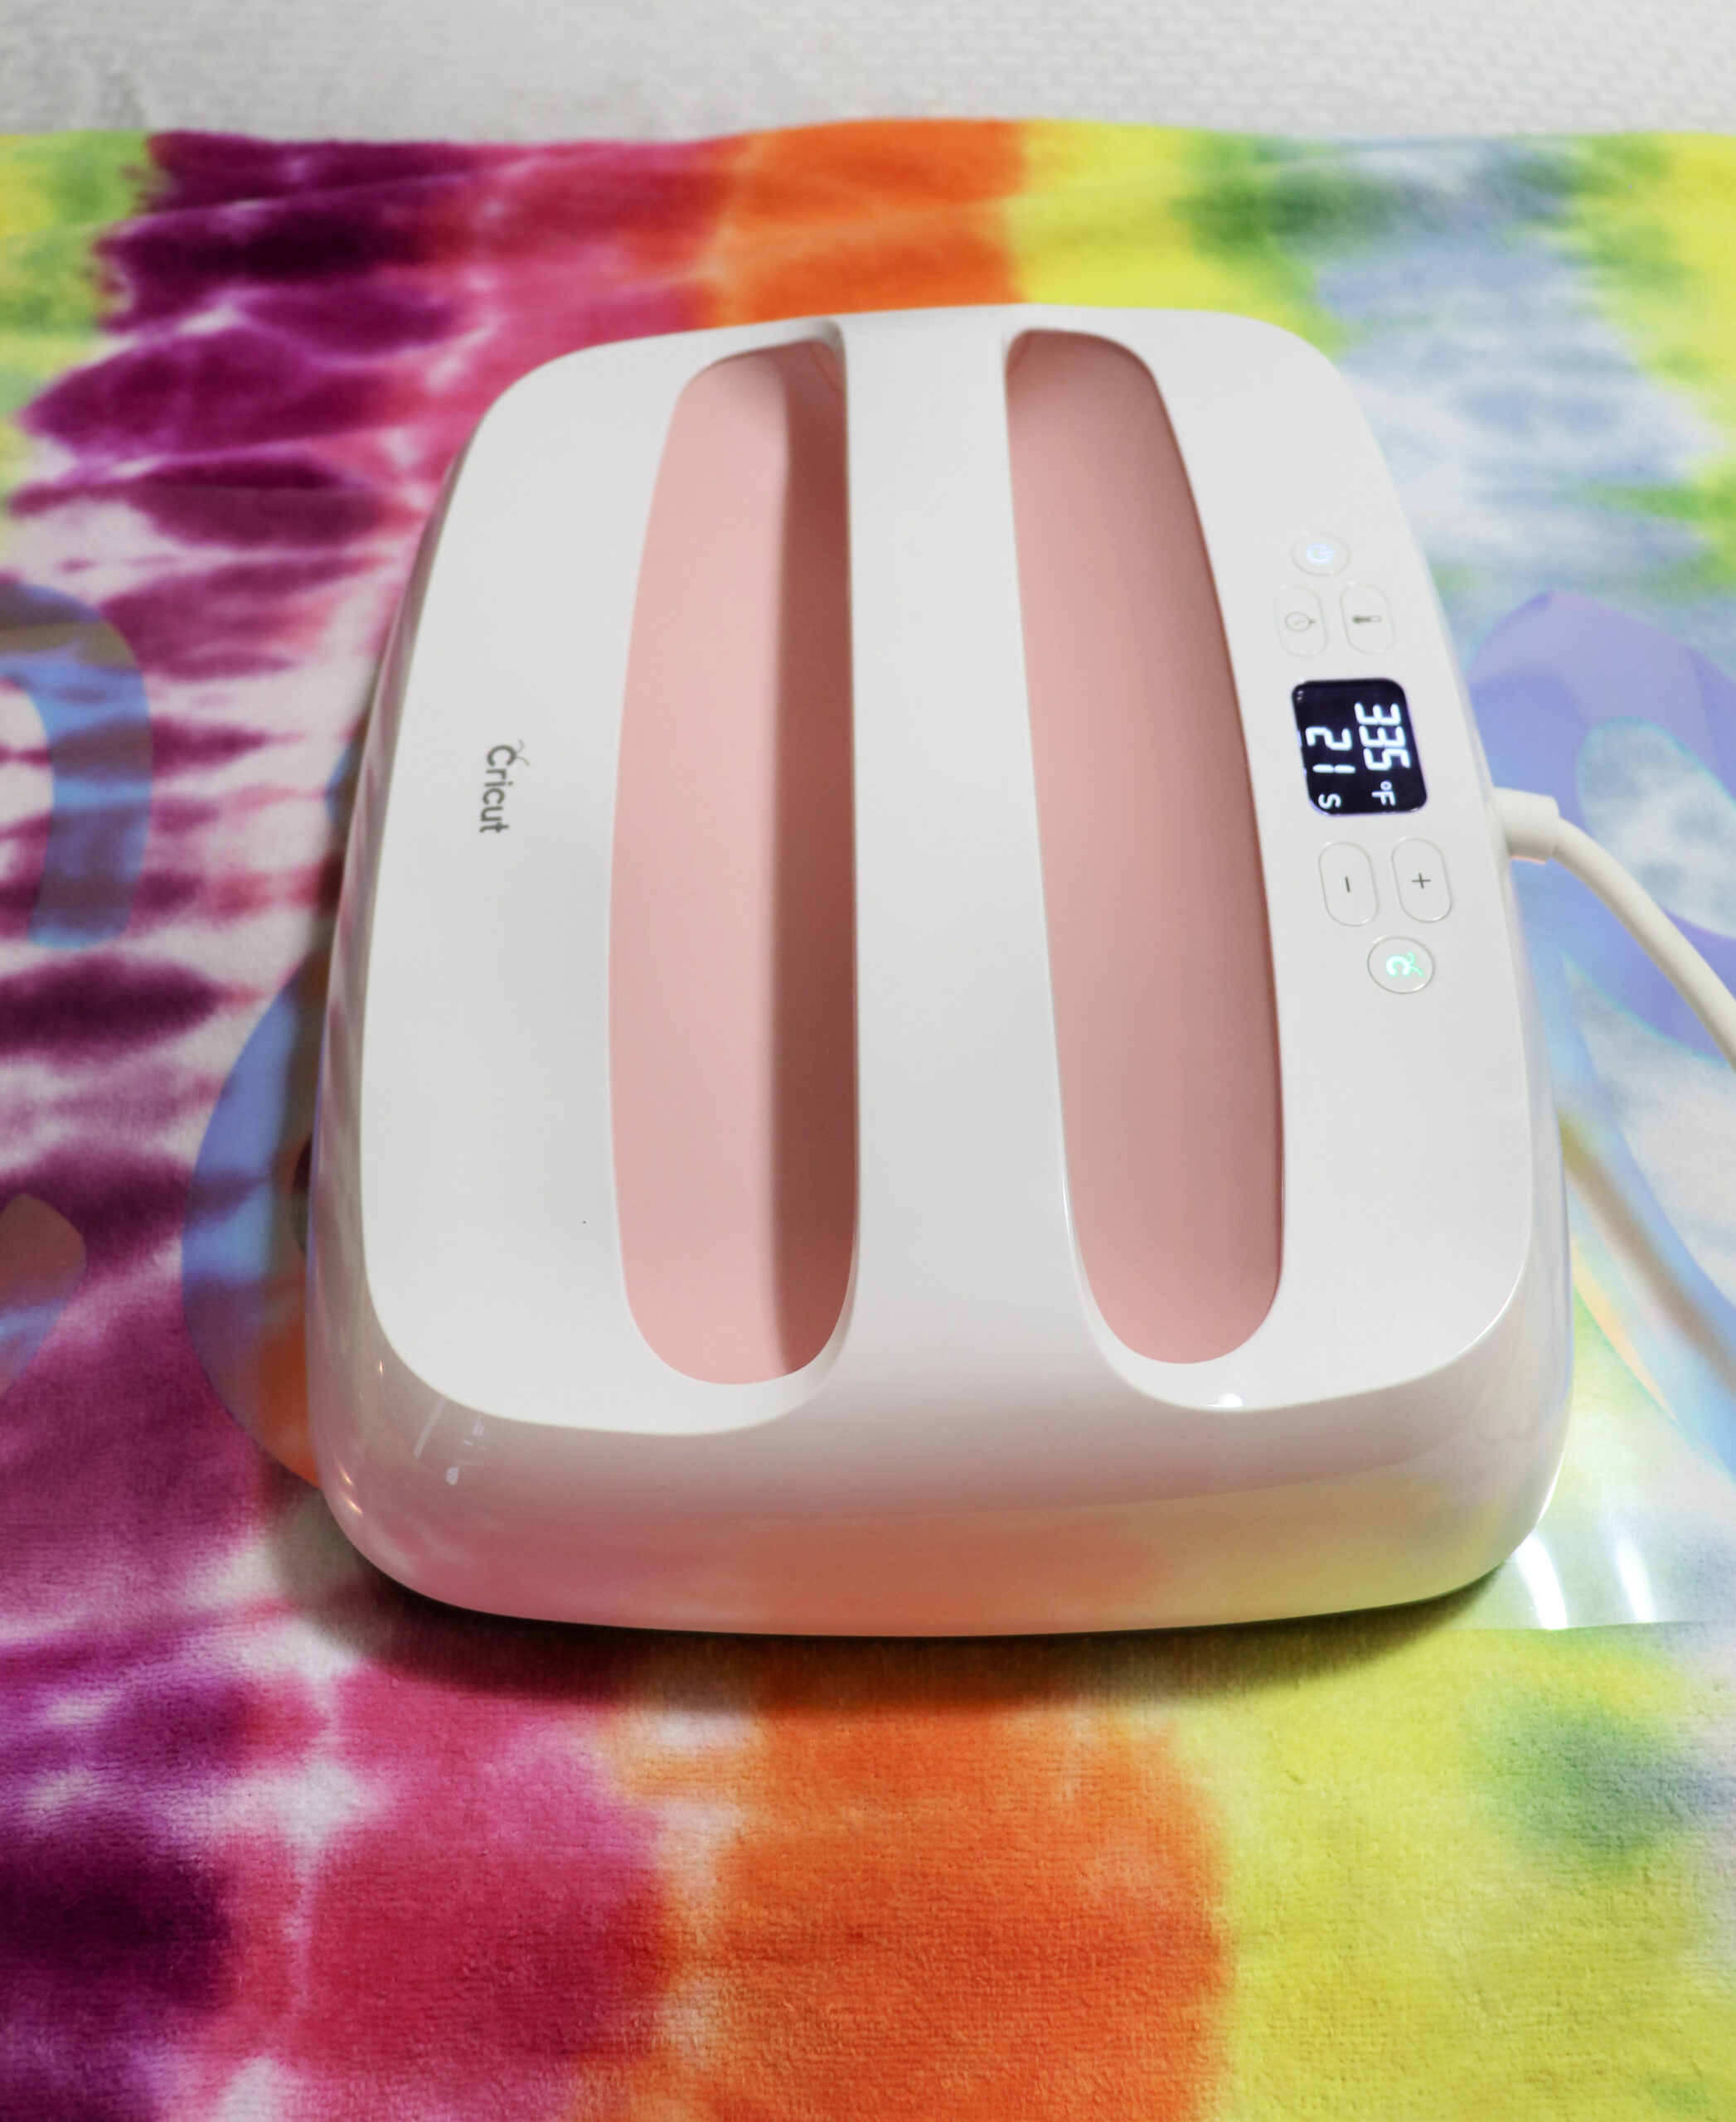
Flip your towel over and press the backside.
Your towel is all ready to use!
About the Cricut Maker 3
Want to learn more about the Cricut Make 3 and all its fun features? Check out my informational guide all about the Cricut Maker 3.
The Cricut Maker 3 is worth getting for the longer cutting with smart materials. It cut my 84 inches of vinyl without me having to use a mat, I didn’t have to piece my project together, and it was really fast. My project was done cutting in just a few minutes.
The added iPad or phone holder is a wonderful addition and I really can’t get over how fast it cuts. I’ve made a few projects on my new Cricut Maker 3 and all of them were cut so quickly!