
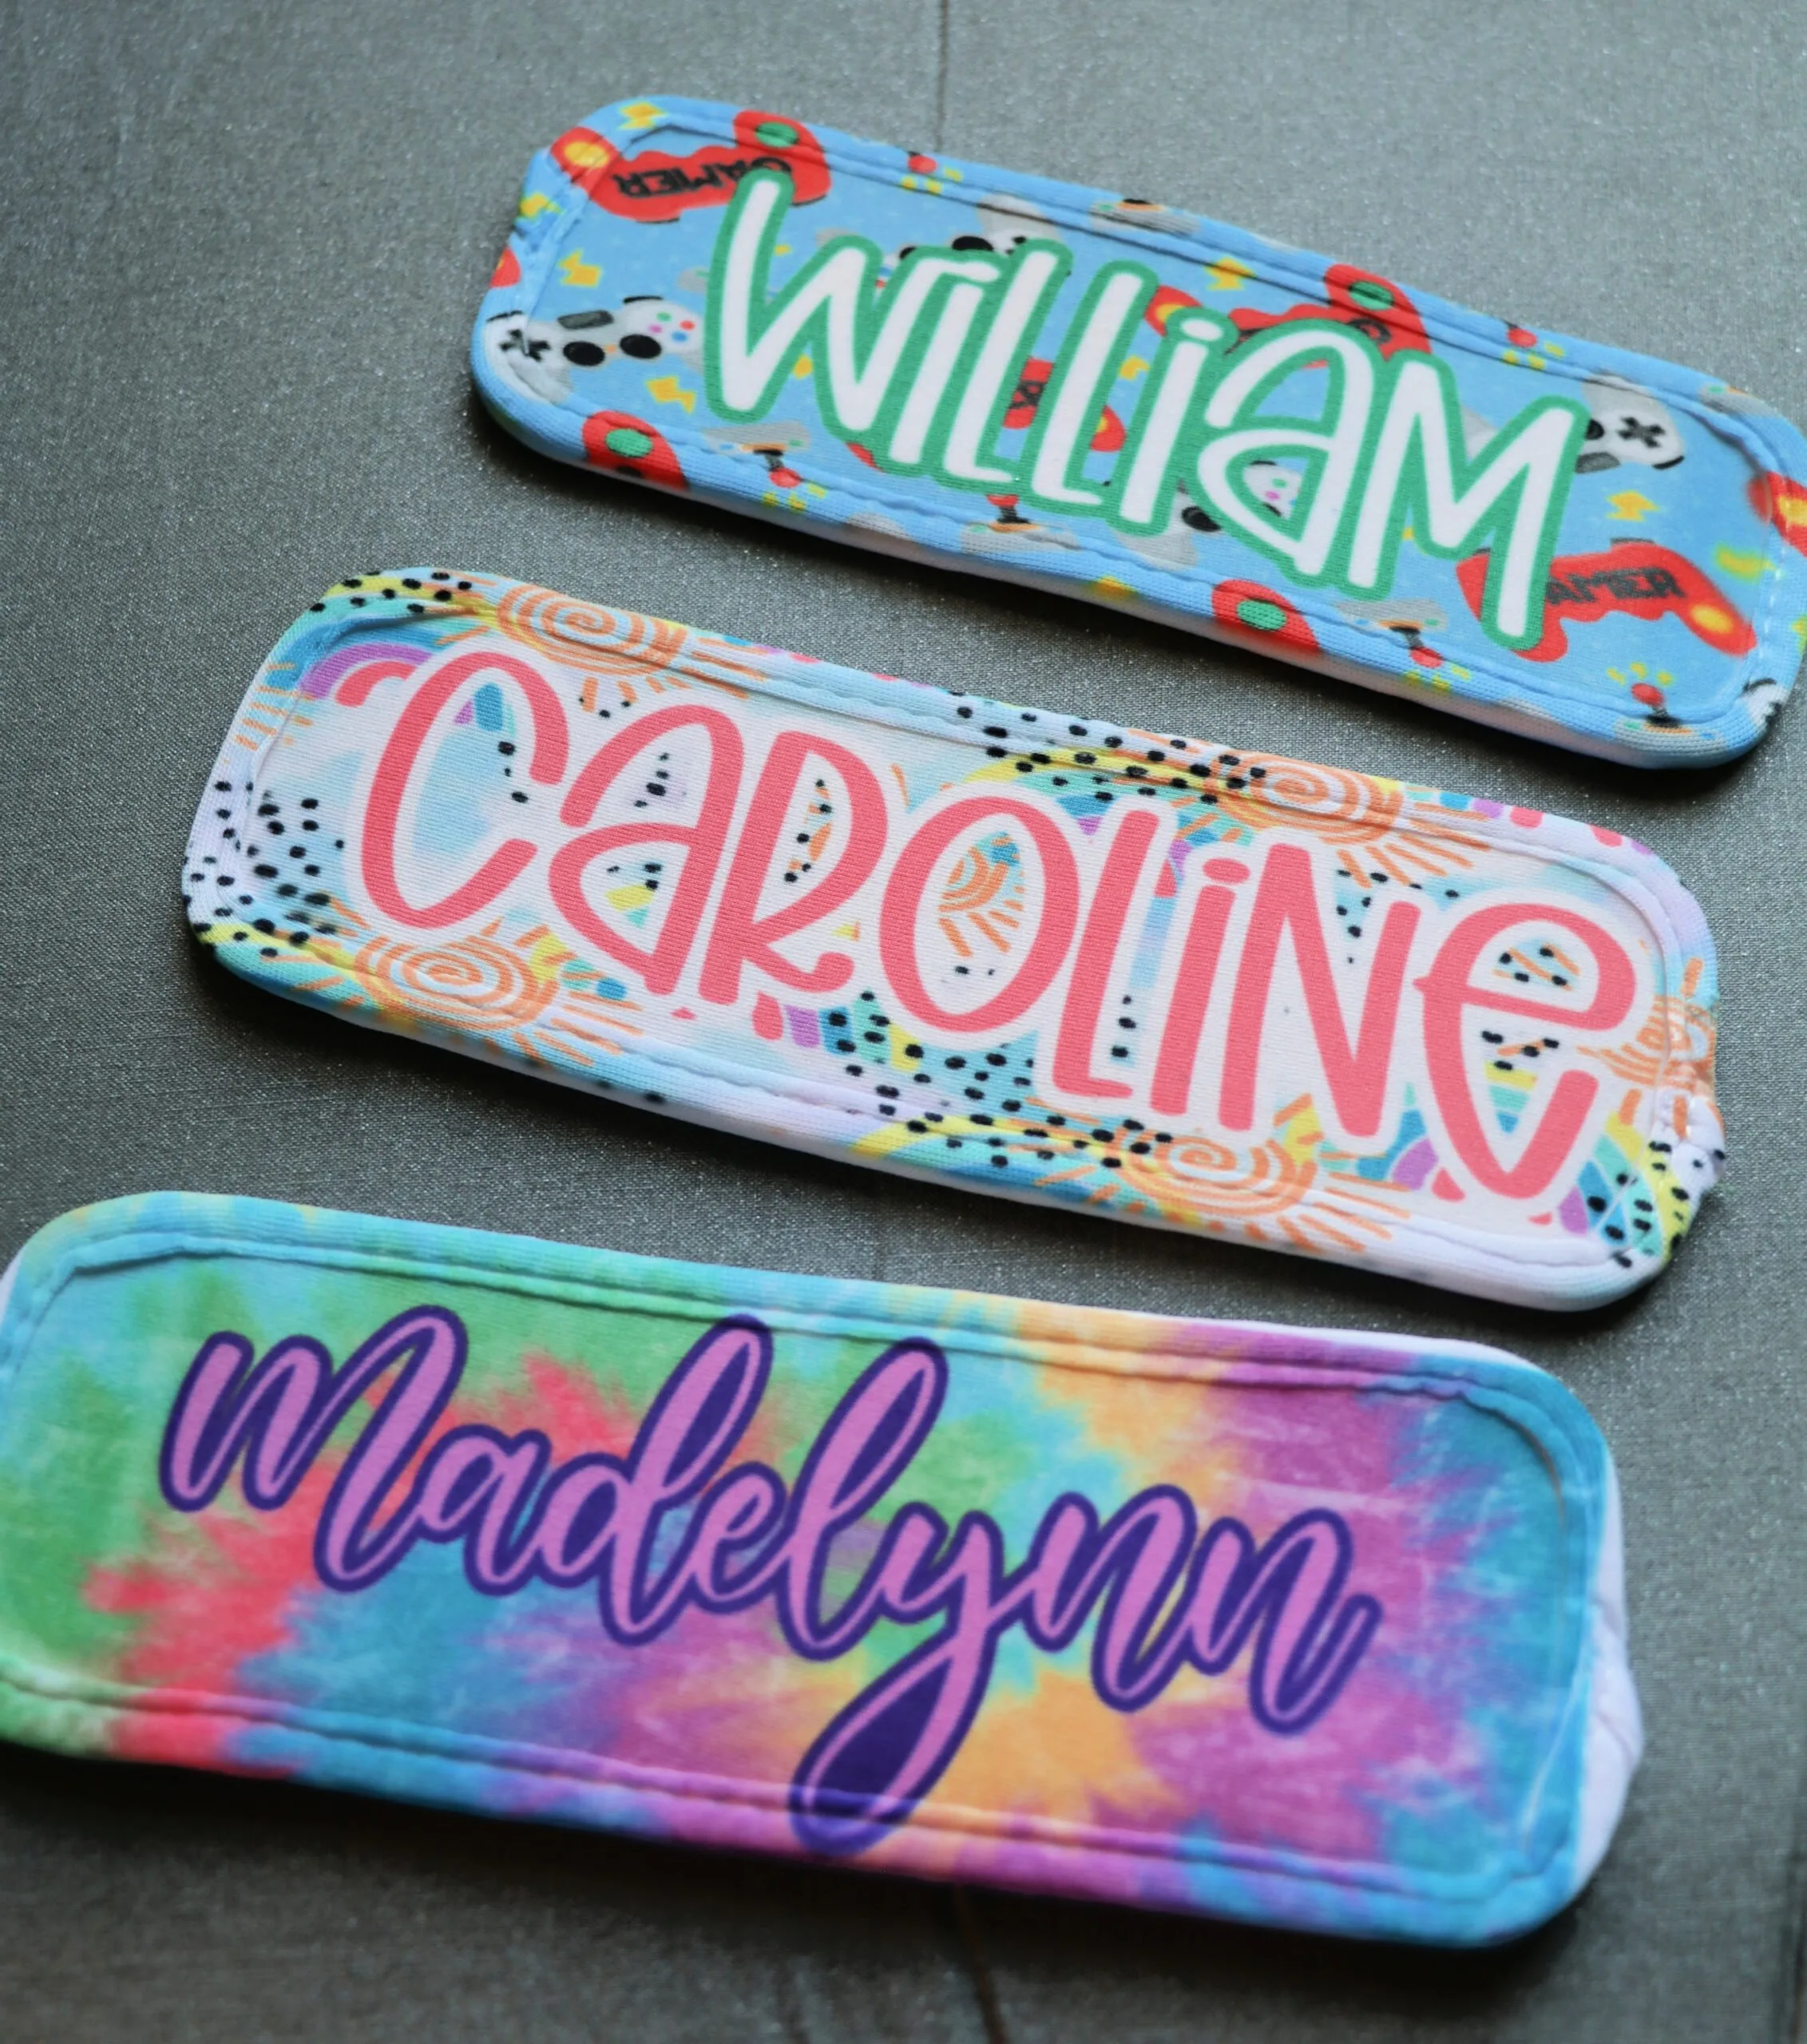
Sublimation or Infusible Ink Popsicle holder that are perfect for summer.
Summertime means lots of popsicles and these popsicle holders are perfect for keeping little hands from getting cold while enjoying a popsicle, ice pop, or otter pop on a hot day. In this tutorial, I will show you how to customize your popsicle holders with Sublimation and Infuisible Ink Sheets from Cricut.

Sublimation Popsicle Holders
For this tutorial I am going to be using the print and cut option in design space. I’ll walk you through the steps of uploading your paper design, adding a name, and cutting it out.
What are popsicle holders?
Before we get started lets talk about what popsicle holders are. They’re made from neoprene, like a can koozie. It’s a rubber fabric material that is water resistant. It helps to keep little hands dry, keep ice pops cold, and keep hands warm.
You slide your ice pop or otter pop into the popsicle sleeve and kids can hold it so their hands don’t get cold and slippery from the ice pop. When they’re done remove the ice pop and save it for next time. If they get dirty you can toss them in the wash or wash them in your sink, rinse them out well, and let them air dry.
Fonts Used
These are the two fonts I used to make the popsicle holders:
How to make Sublimation Popsicle Holders
To get started with this project you are going to need:
- Sublimation Popsicle Holders – they need to be made for sublimation
- Sublimation Printer with Sublimation Ink
- Sublimation Paper
- Scissors
- Heat Tape
- Butcher Paper
- Heat Press or EasyPress
- Lint Roller
How to make Sublimation Popsicle Holders
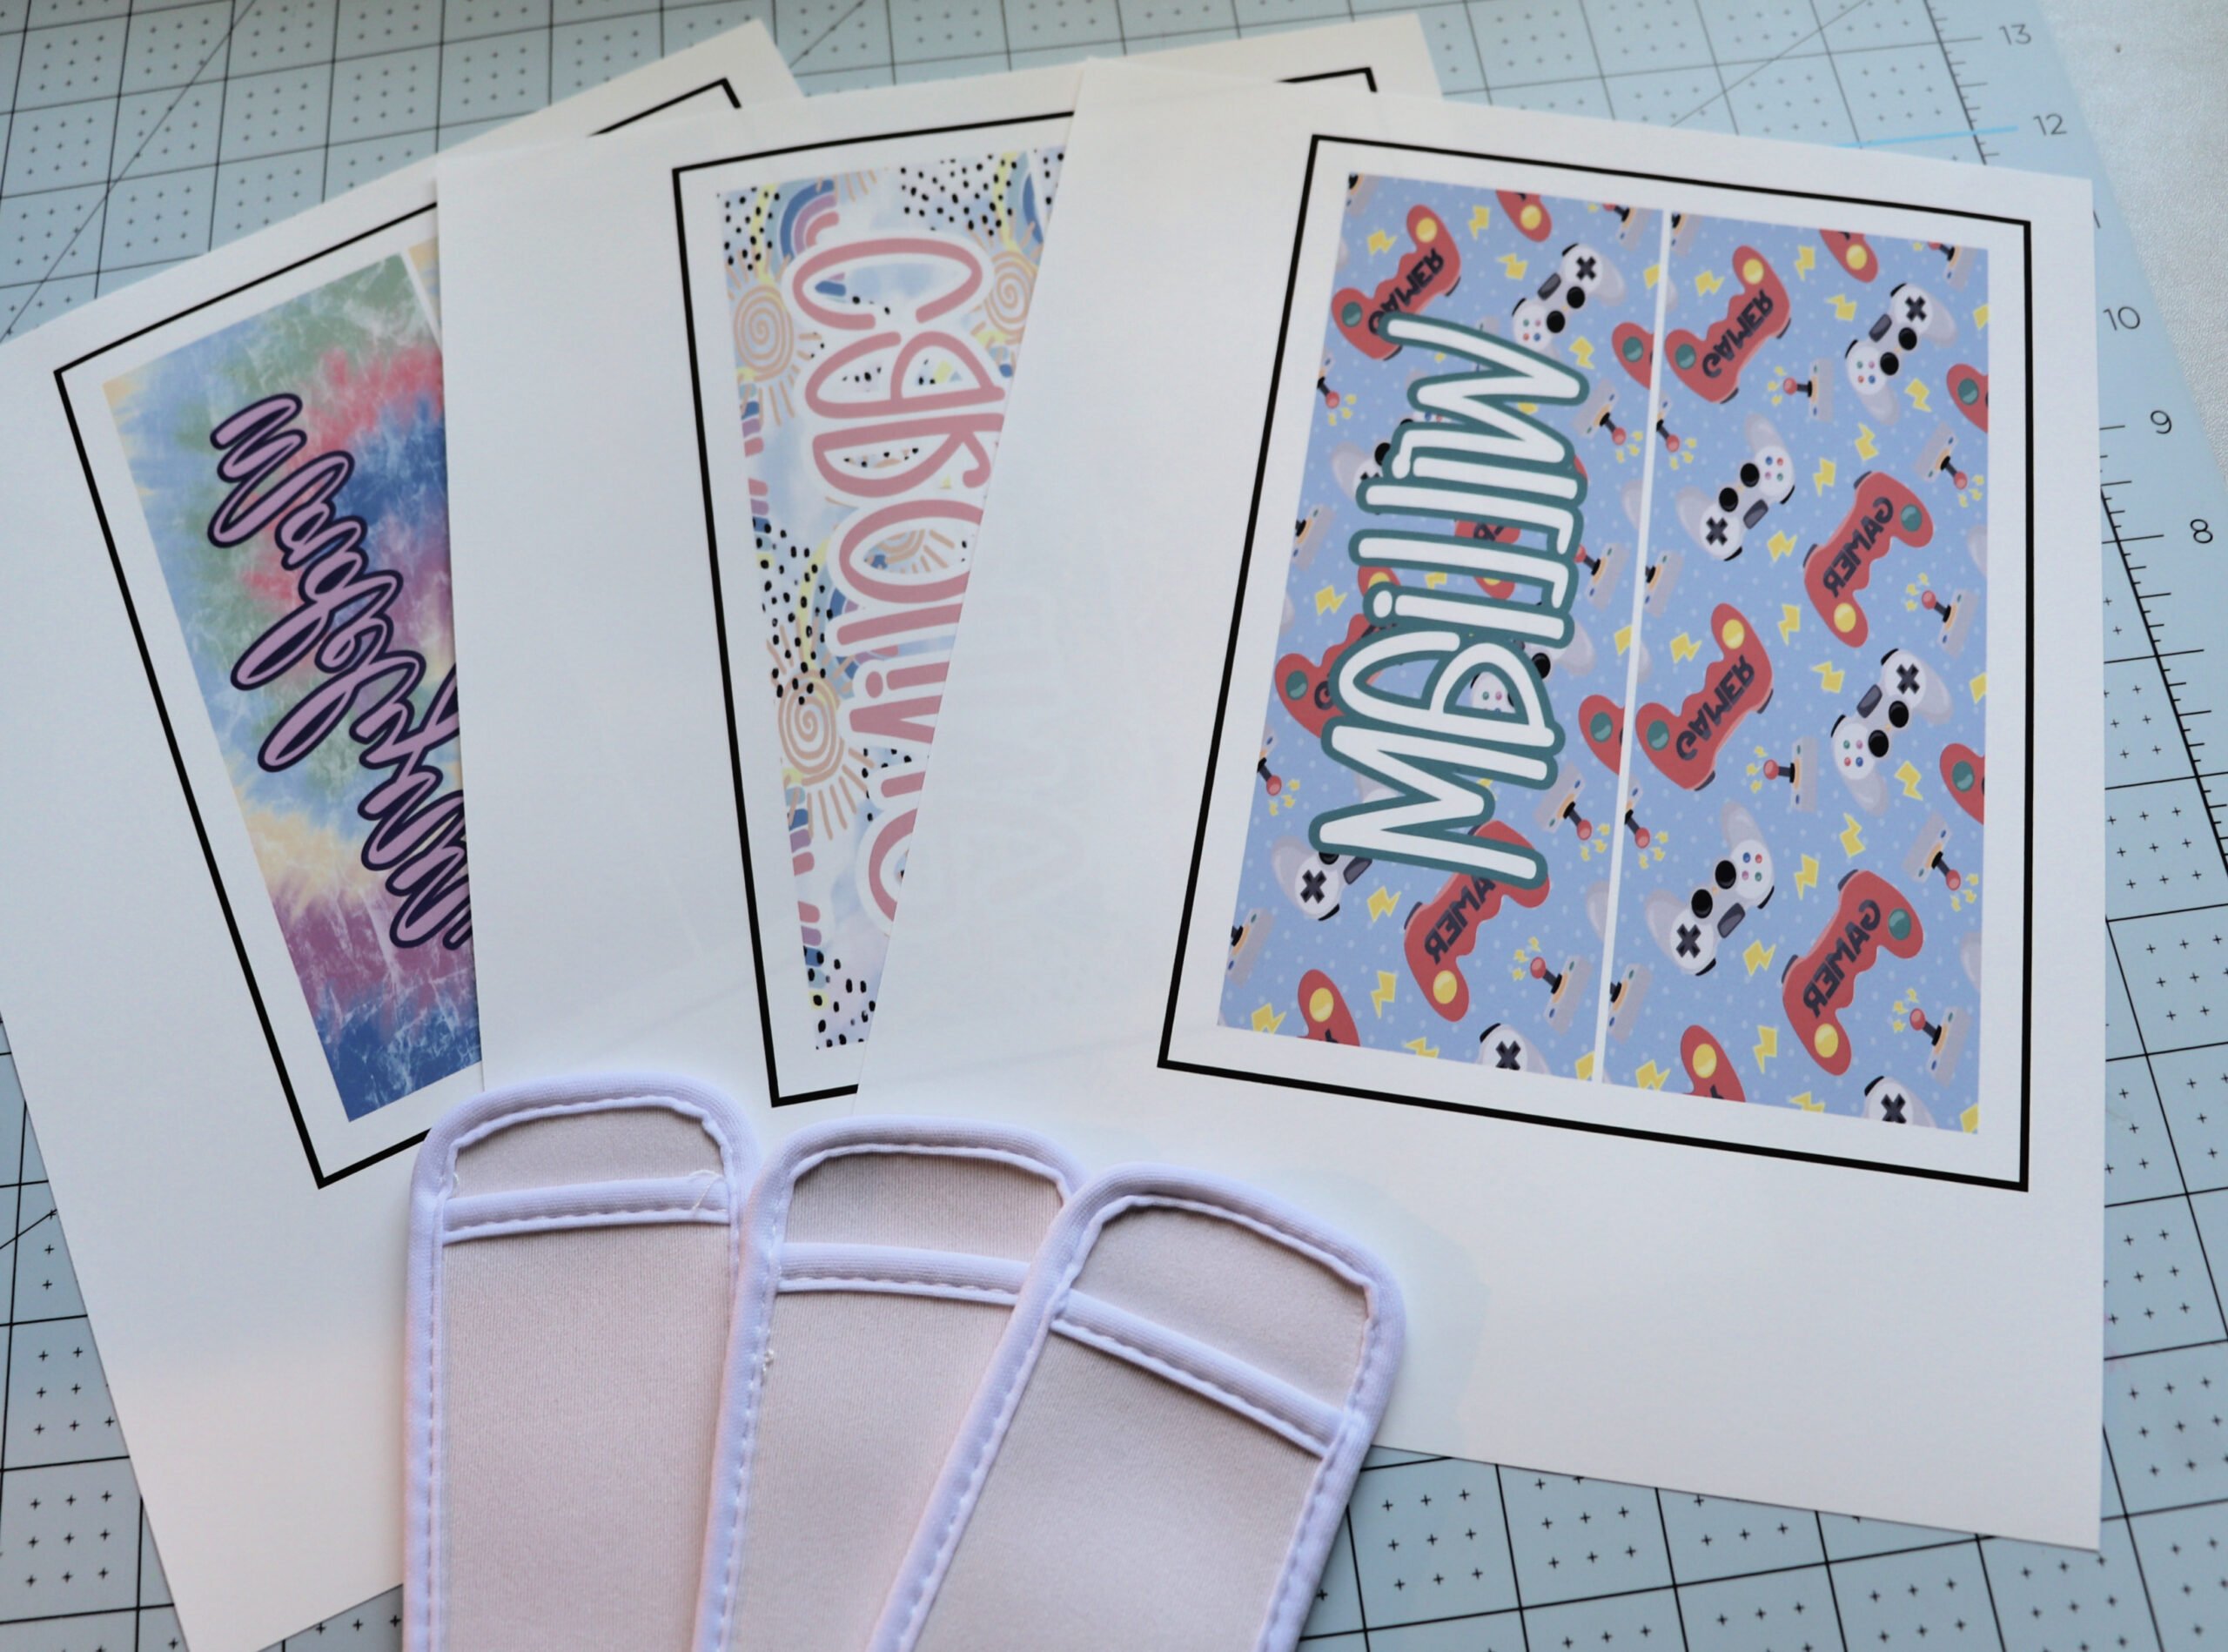
First up you are going to need a digital paper pattern that you like. I get most of mine from DesignBundles. Download your paper and unzip the file to your computer. You can unzip it by right-clicking on the downloaded file and clicking Extract All. A screen will pop up to make a folder and click Extract. A new screen with your folder should automatically open. My folder automatically saves to my download folder, but you can drag your folder to your desktop or anywhere that it will be easier for you to find.
Open Design Space and start a new project.
Click the upload button (bottom left) and upload pattern. Find your paper design and upload it.
Now that you are back on your canvas use the shapes tool and make a rectangle for the size you are going to need for your popsicle holder. I measure my popsicle holder and it’s 7.25″ x 2.5″. Then I made a rectangle that is a tiny bit bigger than the size I need. So I went with 7.5″ x 2.75″. This will give the design a little extra room on the edges.
Now hit the upload button again, find your paper design, and insert images. It will probably be big. That is ok because we are going to size it down.
Now we need to size our paper design down. This is how I do mine. I change the width to the size I need for my design. So I change it to 7.75″. Now hit the lock button so you can unlock the sizing proportions. When it comes to the height you might want to play around with this a little. If you drop it down to the 2.5″ size it will look too squished. For me, I found that changing it to 5″ was perfect. You will want to size it down otherwise the design pattern will be too big.
So now my paper is 7.75″ x 5″. Take your rectangle and place it over the pattern paper. If your rectangle is showing behind the paper right-click the rectangle and click send to the front.
Place the rectangle over an area of the design you like. Highlight the paper and the rectangle together and click slice. You should have 3 pieces. Your original rectangle, the pattern rectangle, and the excess of the paper design. Delete the original rectangle and the excess design.
Right click your rectangle with the pattern and duplicate it. You are going to need one rectangle for each side of your popsicle holder.
On one of the rectangles we are going to add a name.
Click the text box and type your name out.
Use the arrows to size your text. If your text connects in any parts use the weld option when you get it to the size you like. Since my popsicle holder has a border I want the text to fit inside the border. Measure the area inside the border and make sure your text is a little bit smaller than that sizing.
Highlight your text and hit offset.
Adjust the offset to a size you like. Click apply.
Now change your offset and text to colors you like.
You can skip the offset step, but I find this helps the text to pop against the pattern.
Highlight your text, offset, and paper and hit the align button at the top. Do align center horizontally and align center vertically. This will make sure your text is in the middle of the image.
Highlight everything again and click flatten.
Click make it. You do not need to use your Cricut machine to cut these out if you don’t want to. You’ll should be able to get both pieces printed on 1 piece of paper.
My printer is set to automatically mirror, so I am skipping that step. If your printer is not set to mirror you’ll need to do that.
Send to Printer
Select your printer.
Turn off bleed.
Print.
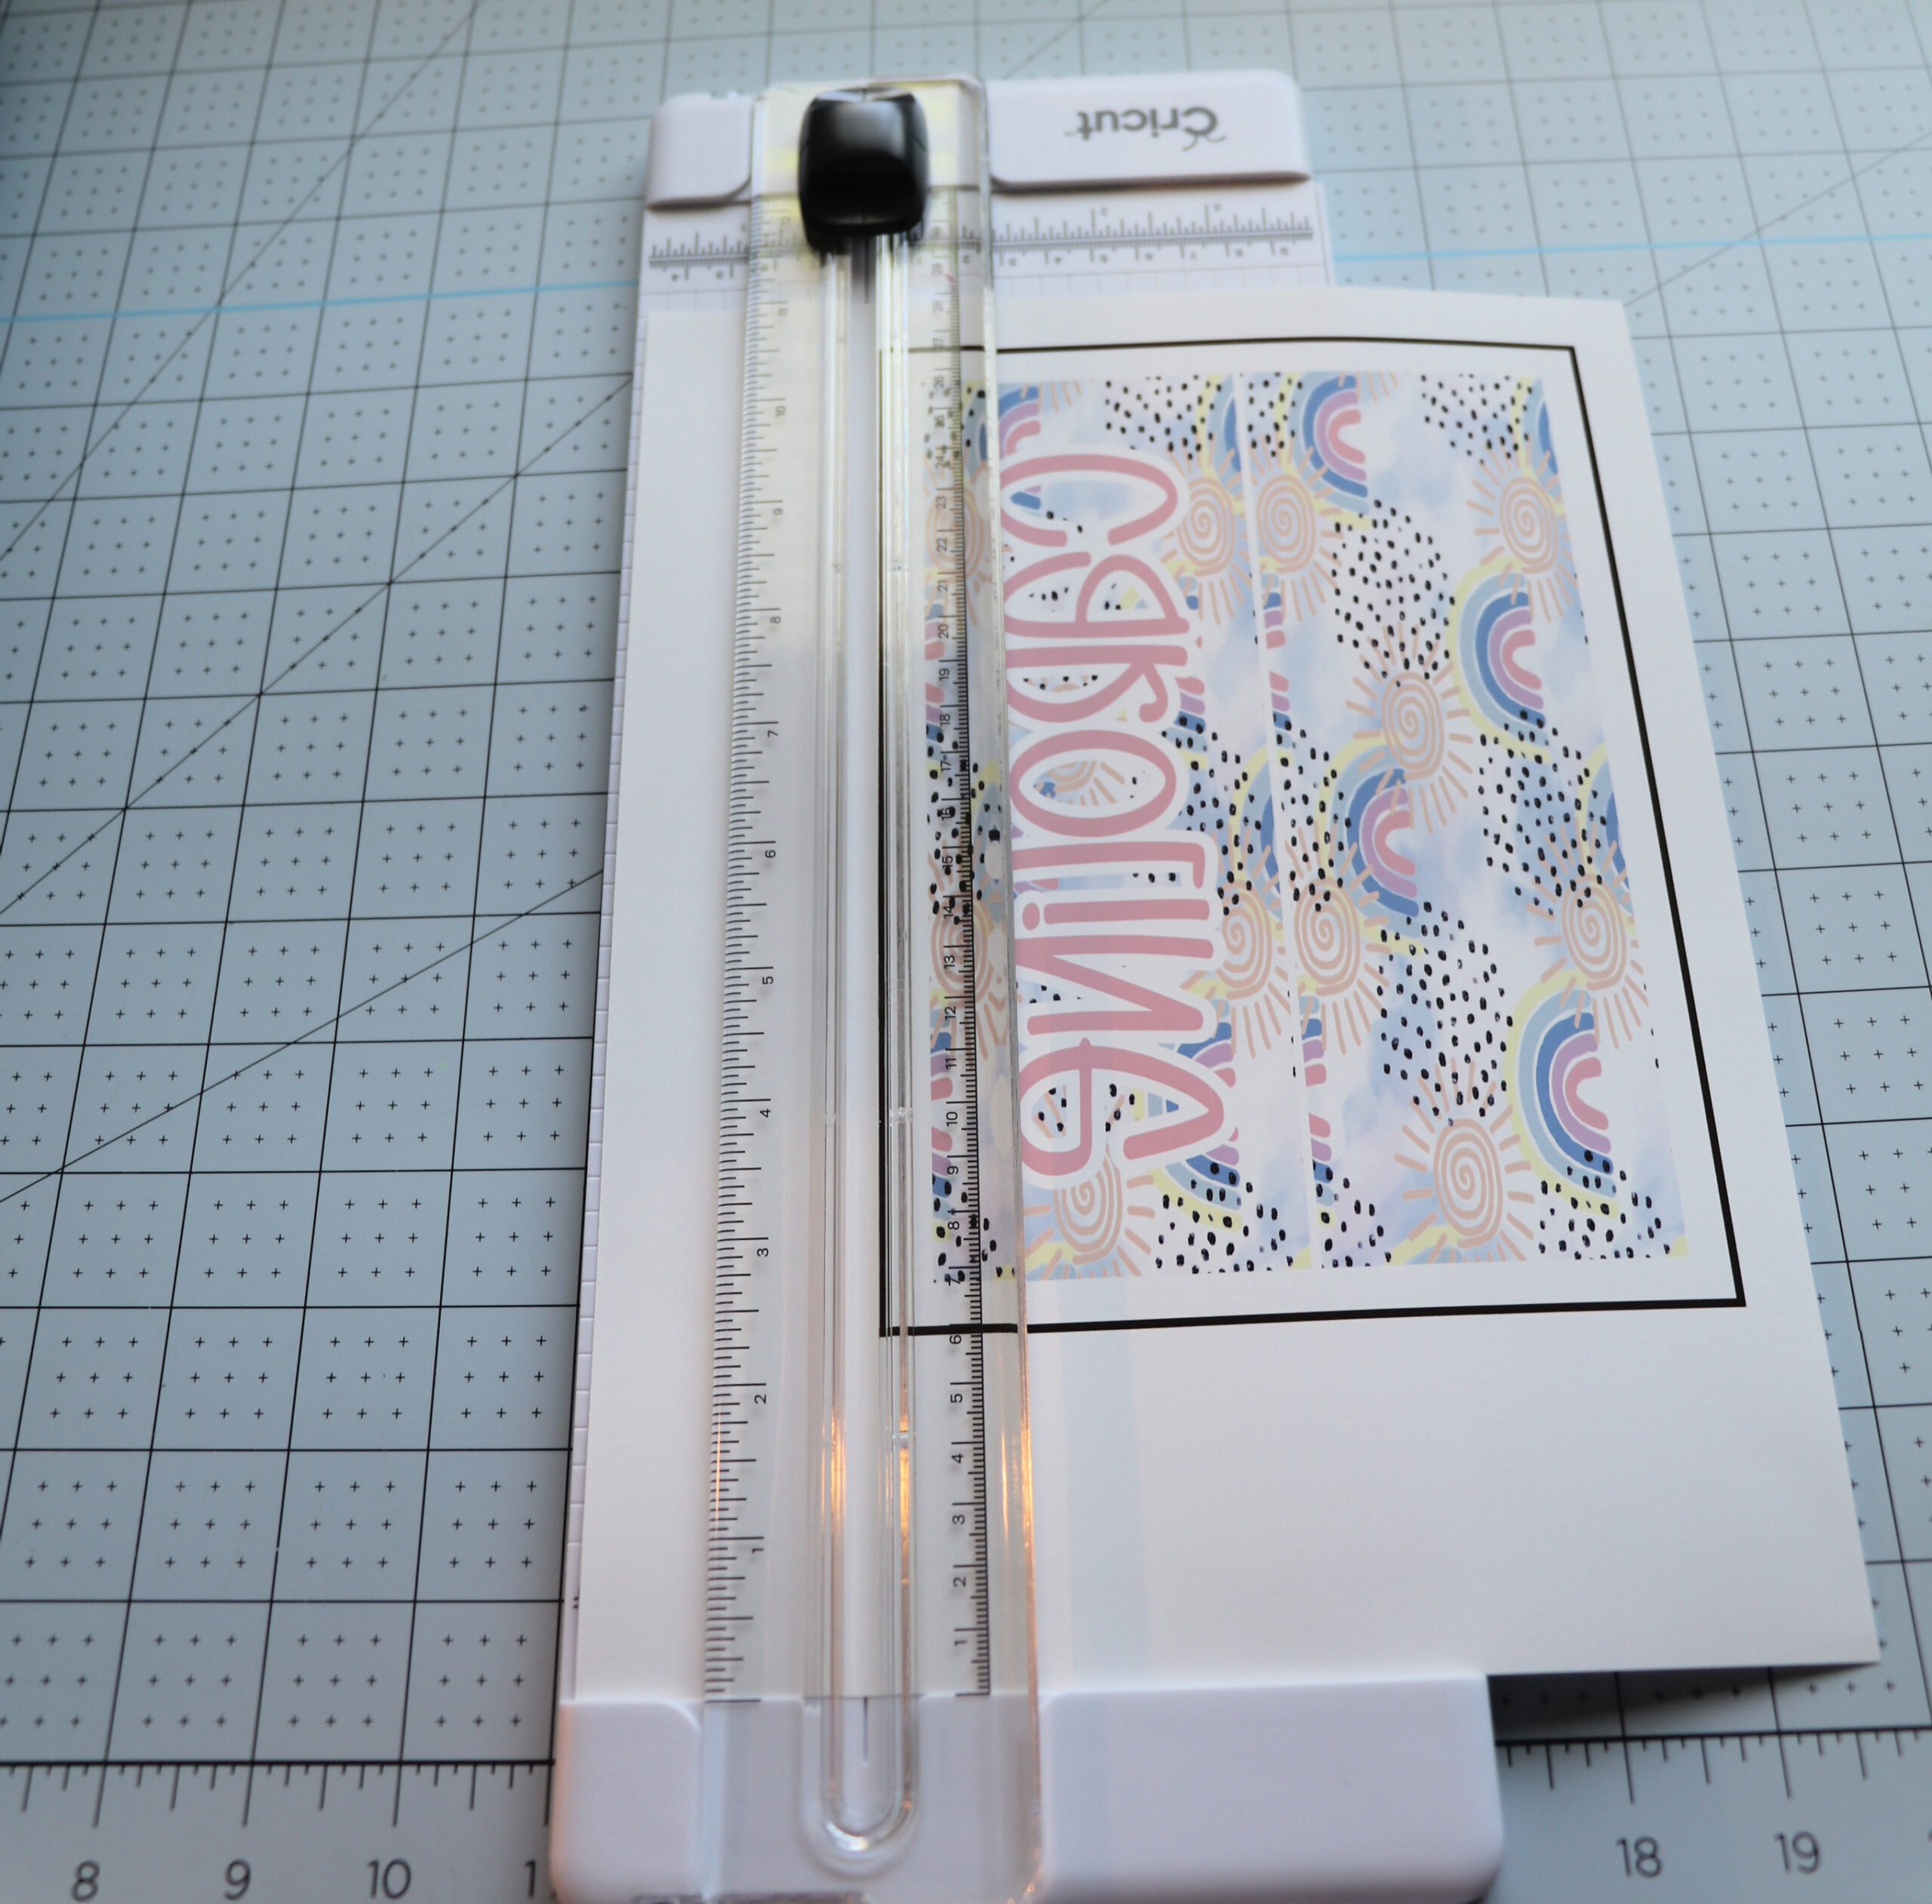
Cut out your rectangles. I use a paper cutter.
Lint roll your popsicle holders to remove any dust and stuff.
I applied my names to the side without the pocket and the solid side on the pocket side.
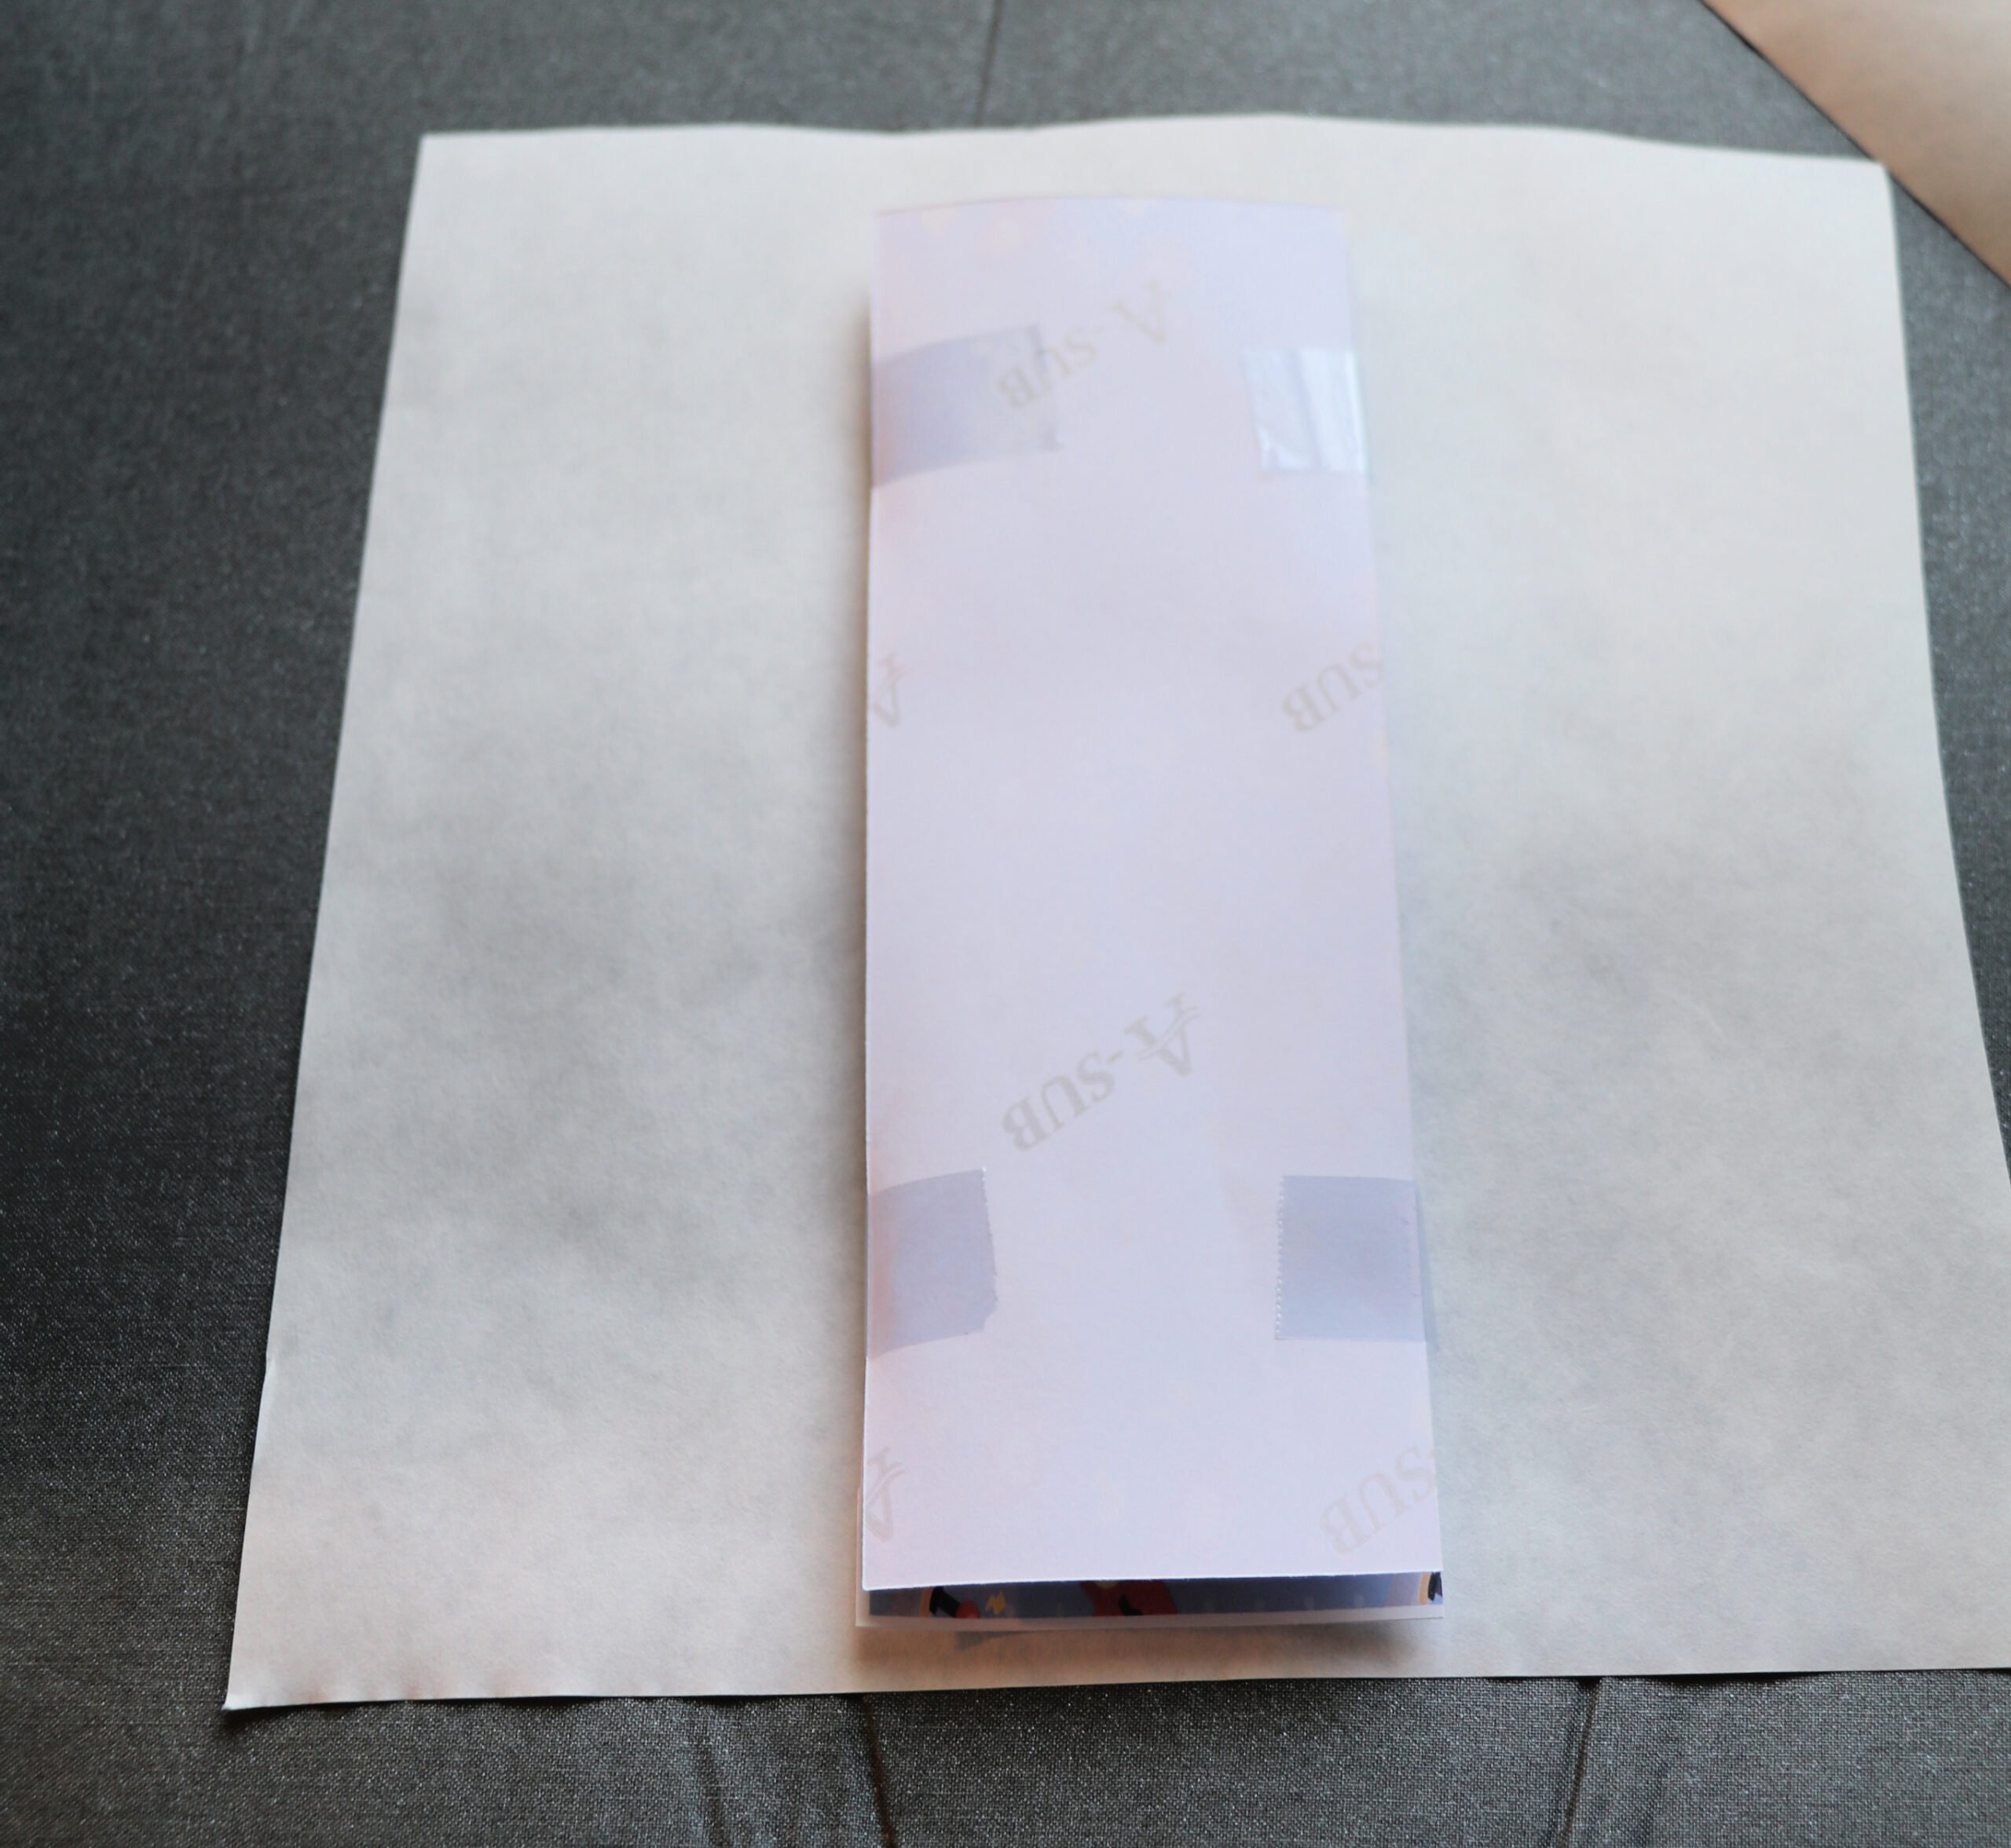
You are going to apply both piece of paper to the popsicle holder. I hold my name piece up to the light to make sure it’s facing the right direction and then line it up with my popsicle holder. Then apply the other piece to the other side. Make sure the design is touching the popsicle holder.
Use heat tape to tape the piece of paper together. Like a sandwich.
Press on 400 for 30 seconds.
Flip over and press the other side for another 30 seconds.
Press this in a well ventilated area, with a window open, or with an air purifier running. These give off a smell.
Let cool and remove the paper.
All done!

Maria Samelson
Thursday 10th of July 2025
Hi there, I mostly have a question about the gamer image you used. I cannot find it on Design Bundles. Was this from a long time ago?
Thanks! Maria
Jamie
Monday 14th of July 2025
Hi! I am not seeing it, so it must be gone. This post is a few years old.
Amber Jones
Thursday 22nd of July 2021
Why can’t I use regular neoprene popsicle holders? They are 90% poly. Have you tried them?
Jamie
Monday 26th of July 2021
You can, I just used these.