
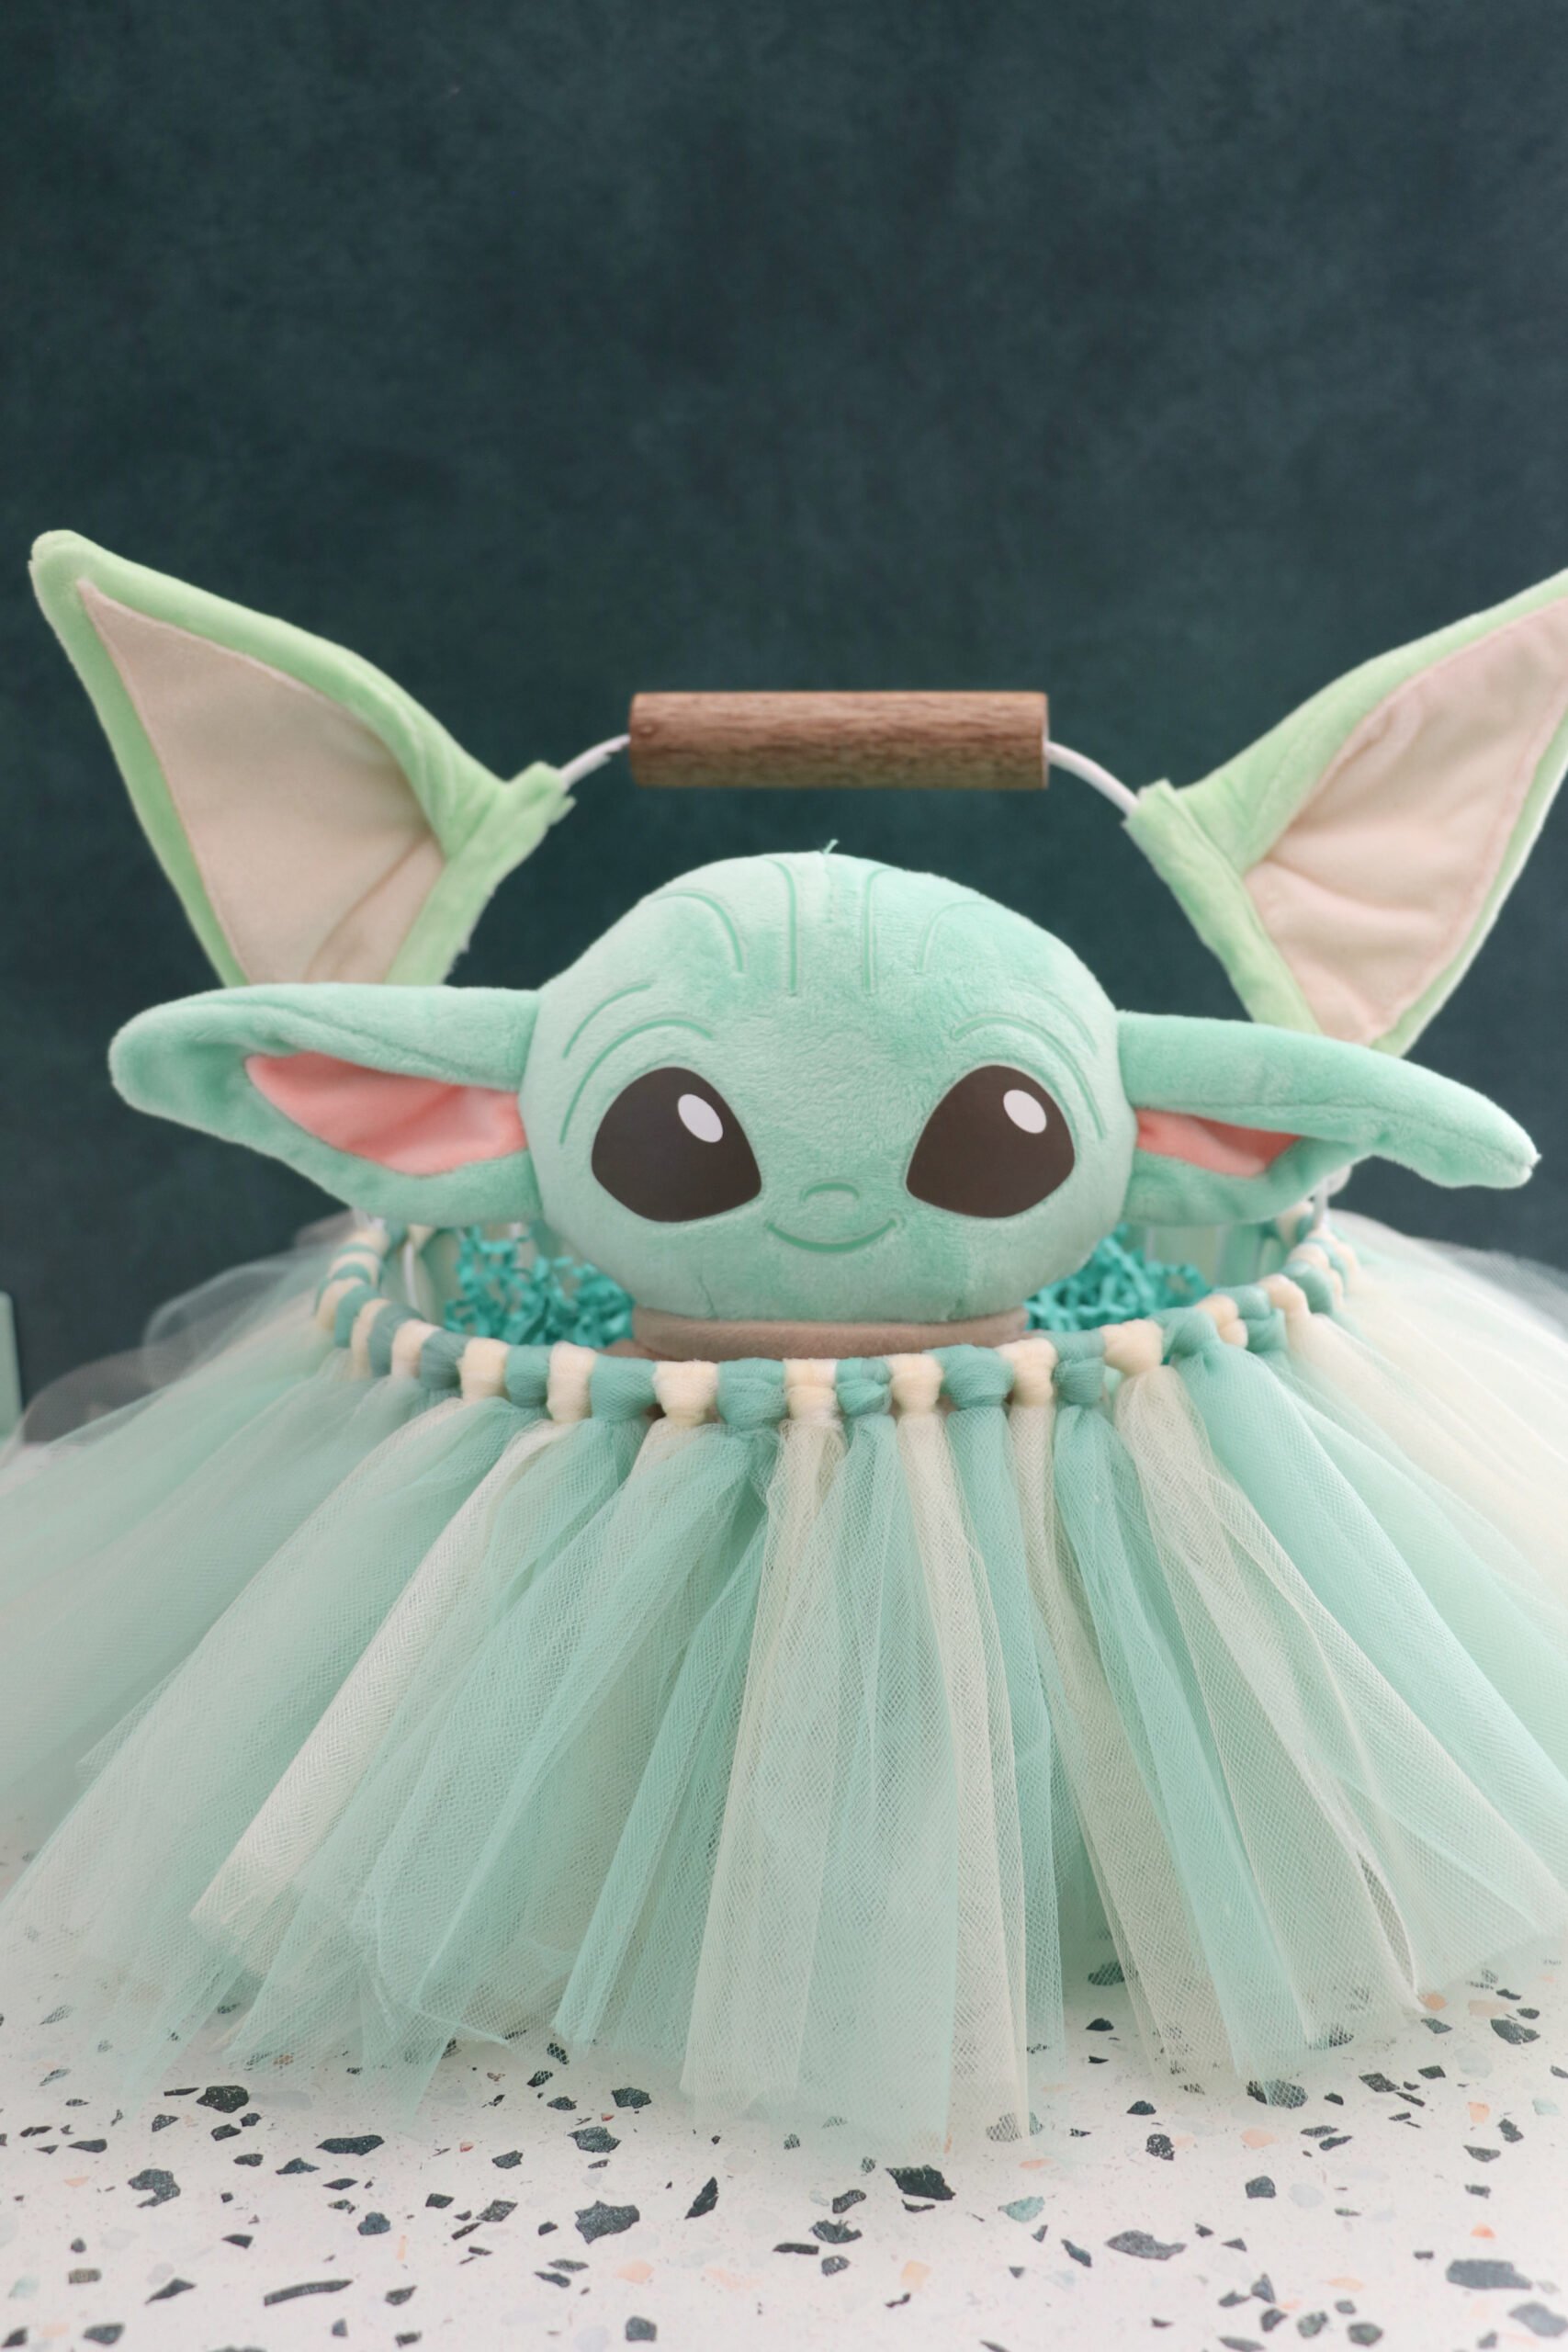
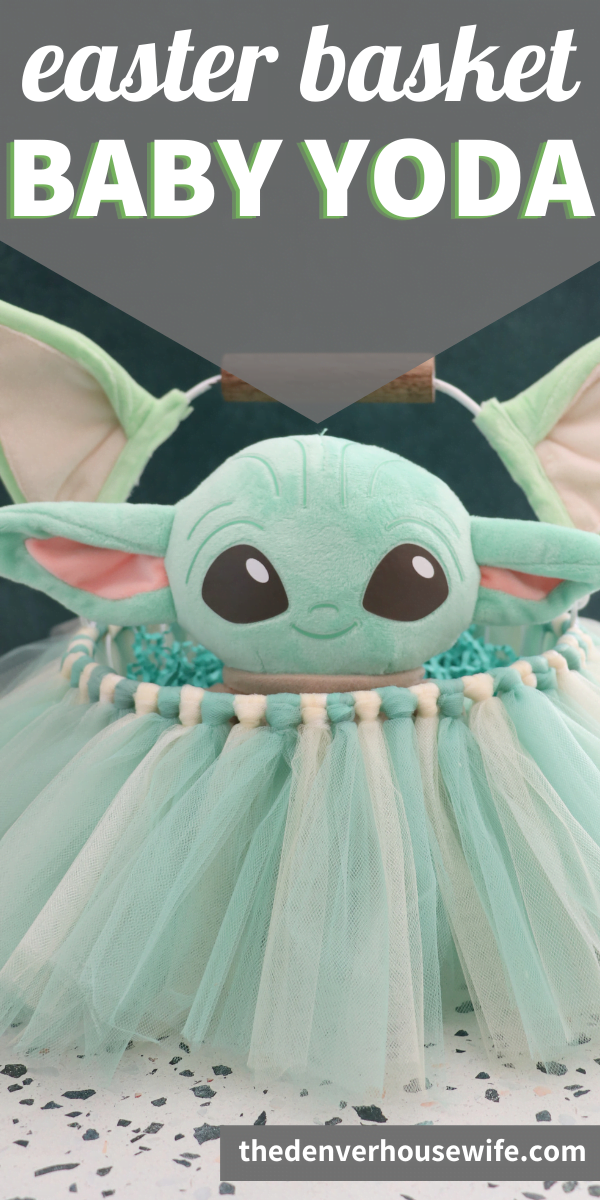
Baby Yoda Easter basket is an adorable way to decorate an Easter Basket. This tutu Easter basket uses a white Easter basket, tulle, and Baby Yoda ears.
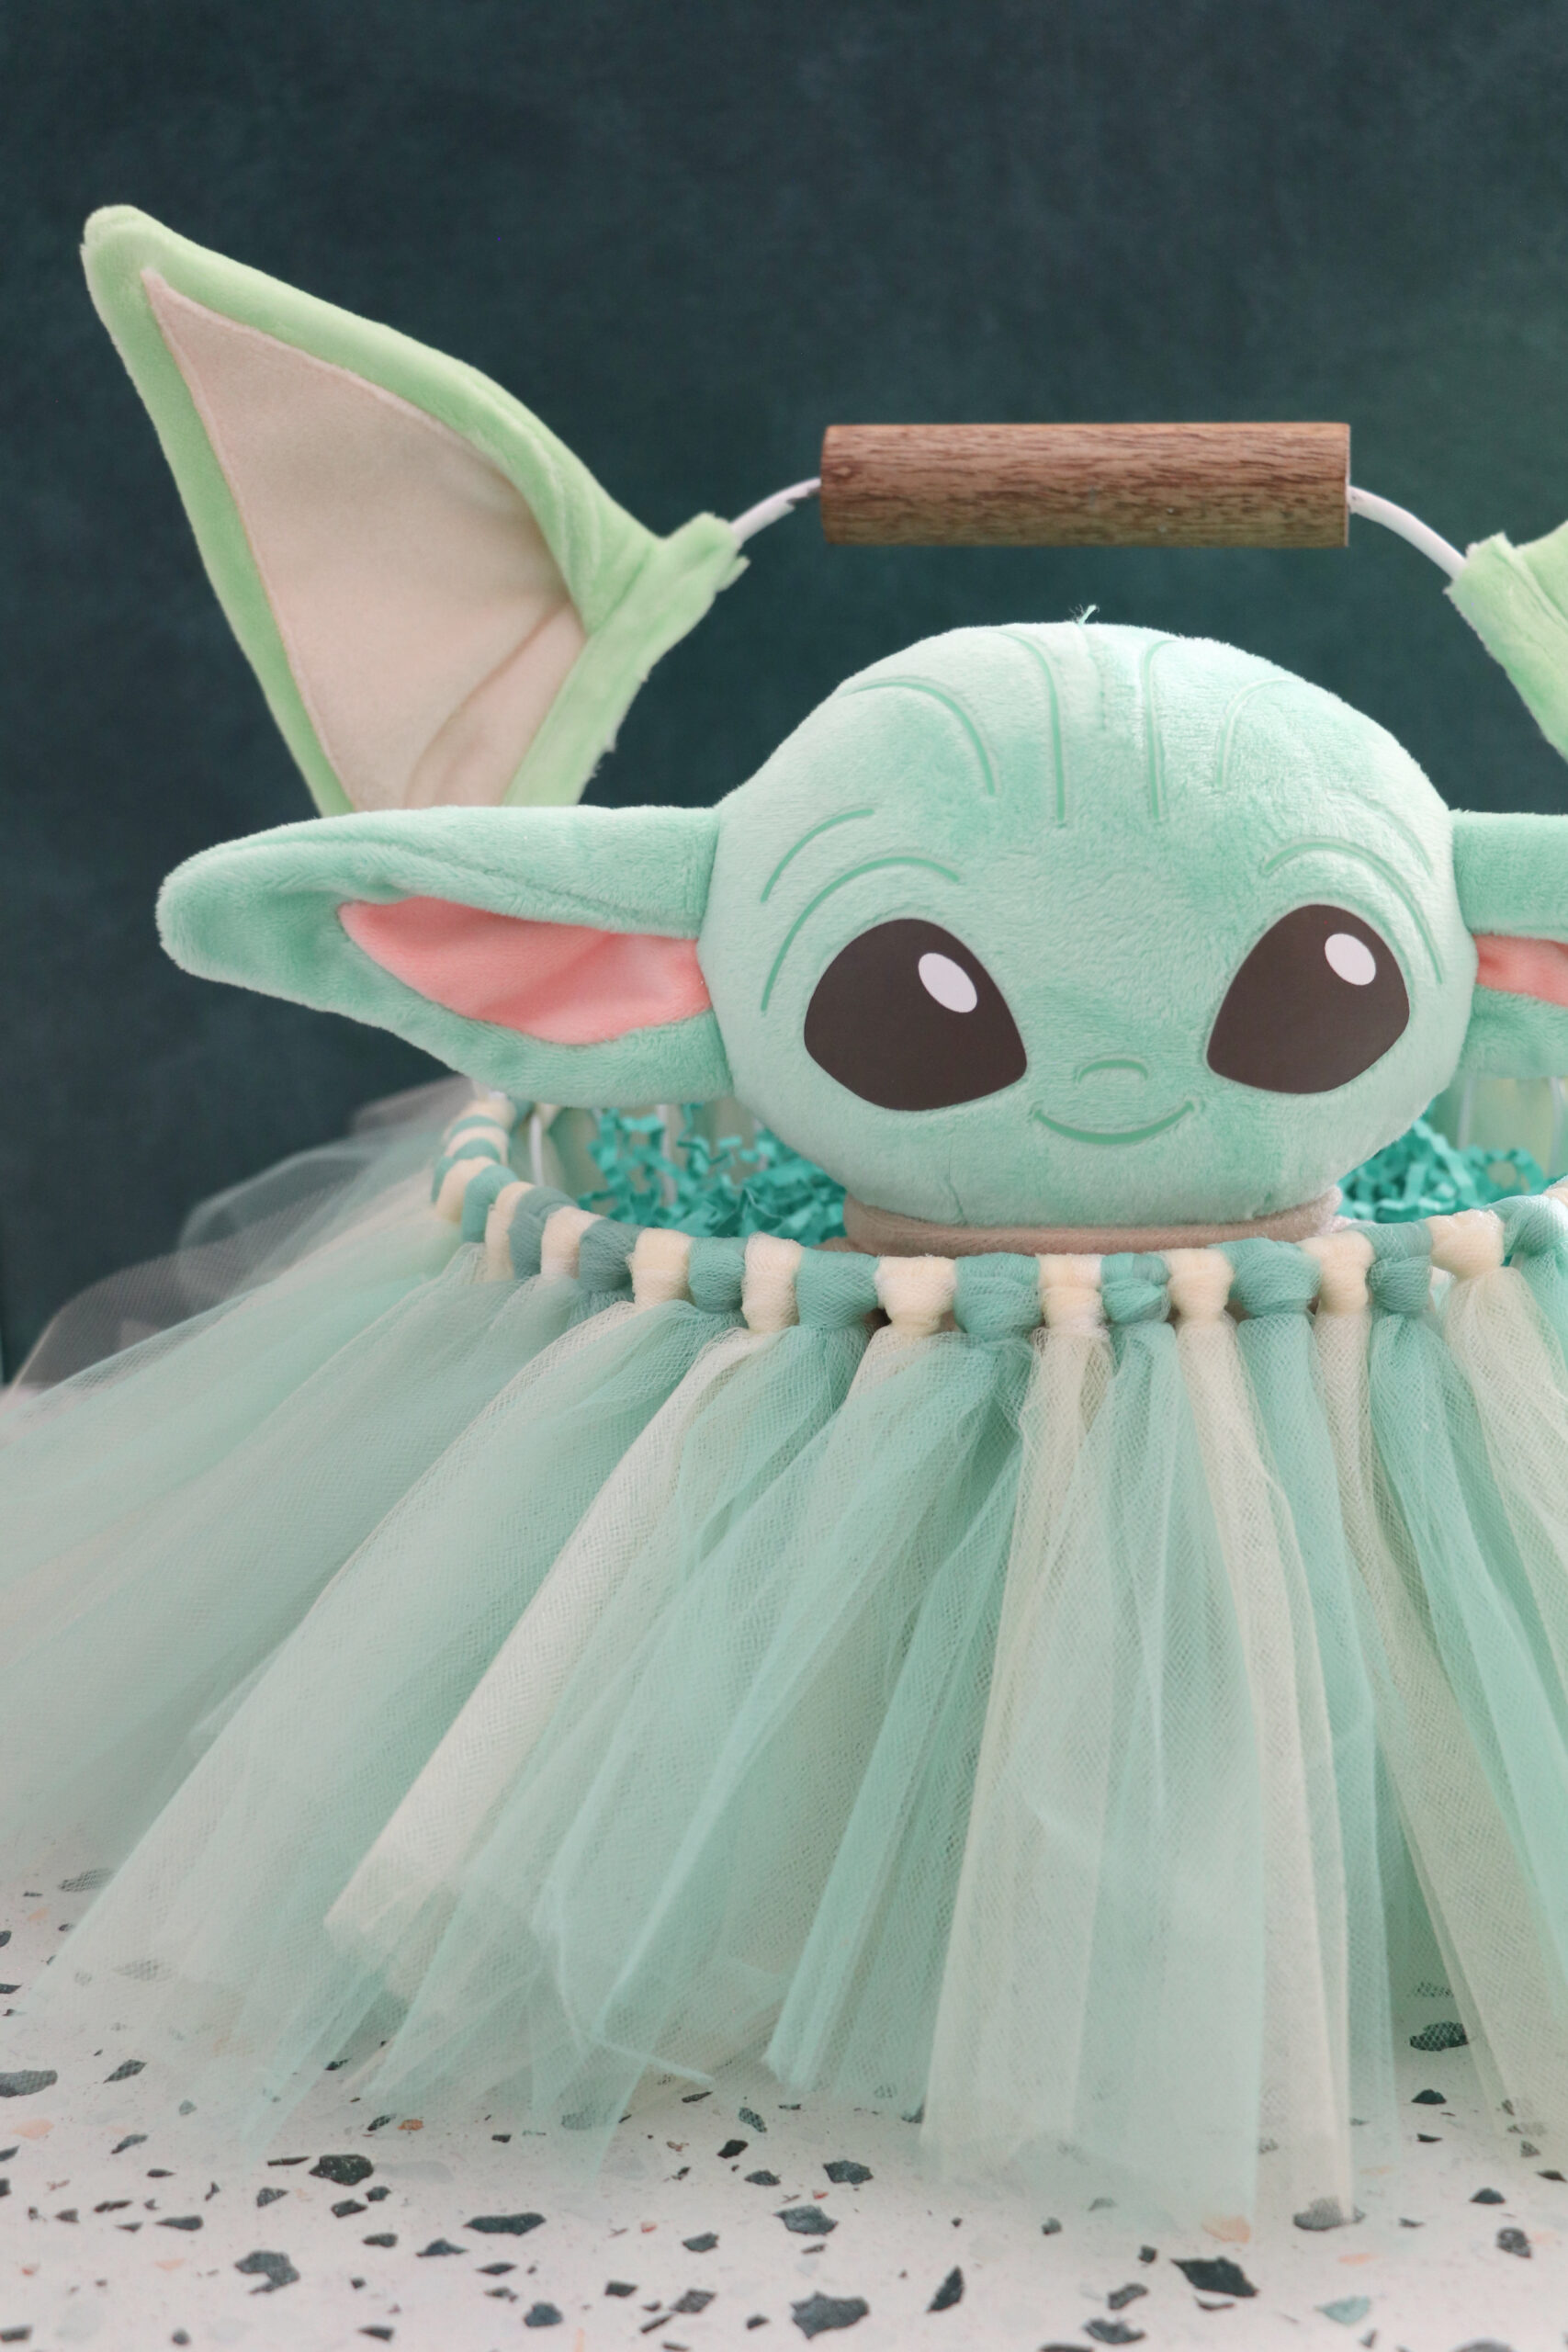
Tutu Easter baskets are my favorite thing to do each year and over the years I have done a few different types. This year is no different and we’re going with the cute, adorable, and everyone’s favorite Baby Yoda.
Baby Yoda Easter Basket
What’s not to love about Baby Yoda? Our family loves him and it seemed fitting that he was our Easter basket theme for this year.
Baby Yoda Easter Basket Fillers
When it comes to your Easter baskets you need items to put inside. Here are some fun Baby Yoda items that are perfect for a Baby Yoda Easter basket.
- Baby Yoda T-shirt, unisex
- Baby Yoda Bluetooth Speaker
- Baby Yoda Blanket
- Baby Yoda Stickers
- Baby Yoda Board Game
- Baby Yoda Stuffie
- Baby Yoda Headphones
- Baby Yoda Headband
- Baby Yoda Nightlight
- Baby Yoda Activity Kit
- Baby Yoda Legos
- Baby Yoda Action Figure
- Baby Yoda Stuffed Animal
- Baby Yoda Cup
- Baby Yoda, Girls T-Shirt
- Baby Yoda Coloring Set
- Baby Yoda Funko Pop Bobblehead
- Baby Yoda Pez
- Baby Yoda Candy

Best Basket for Tutu Easter Baskets
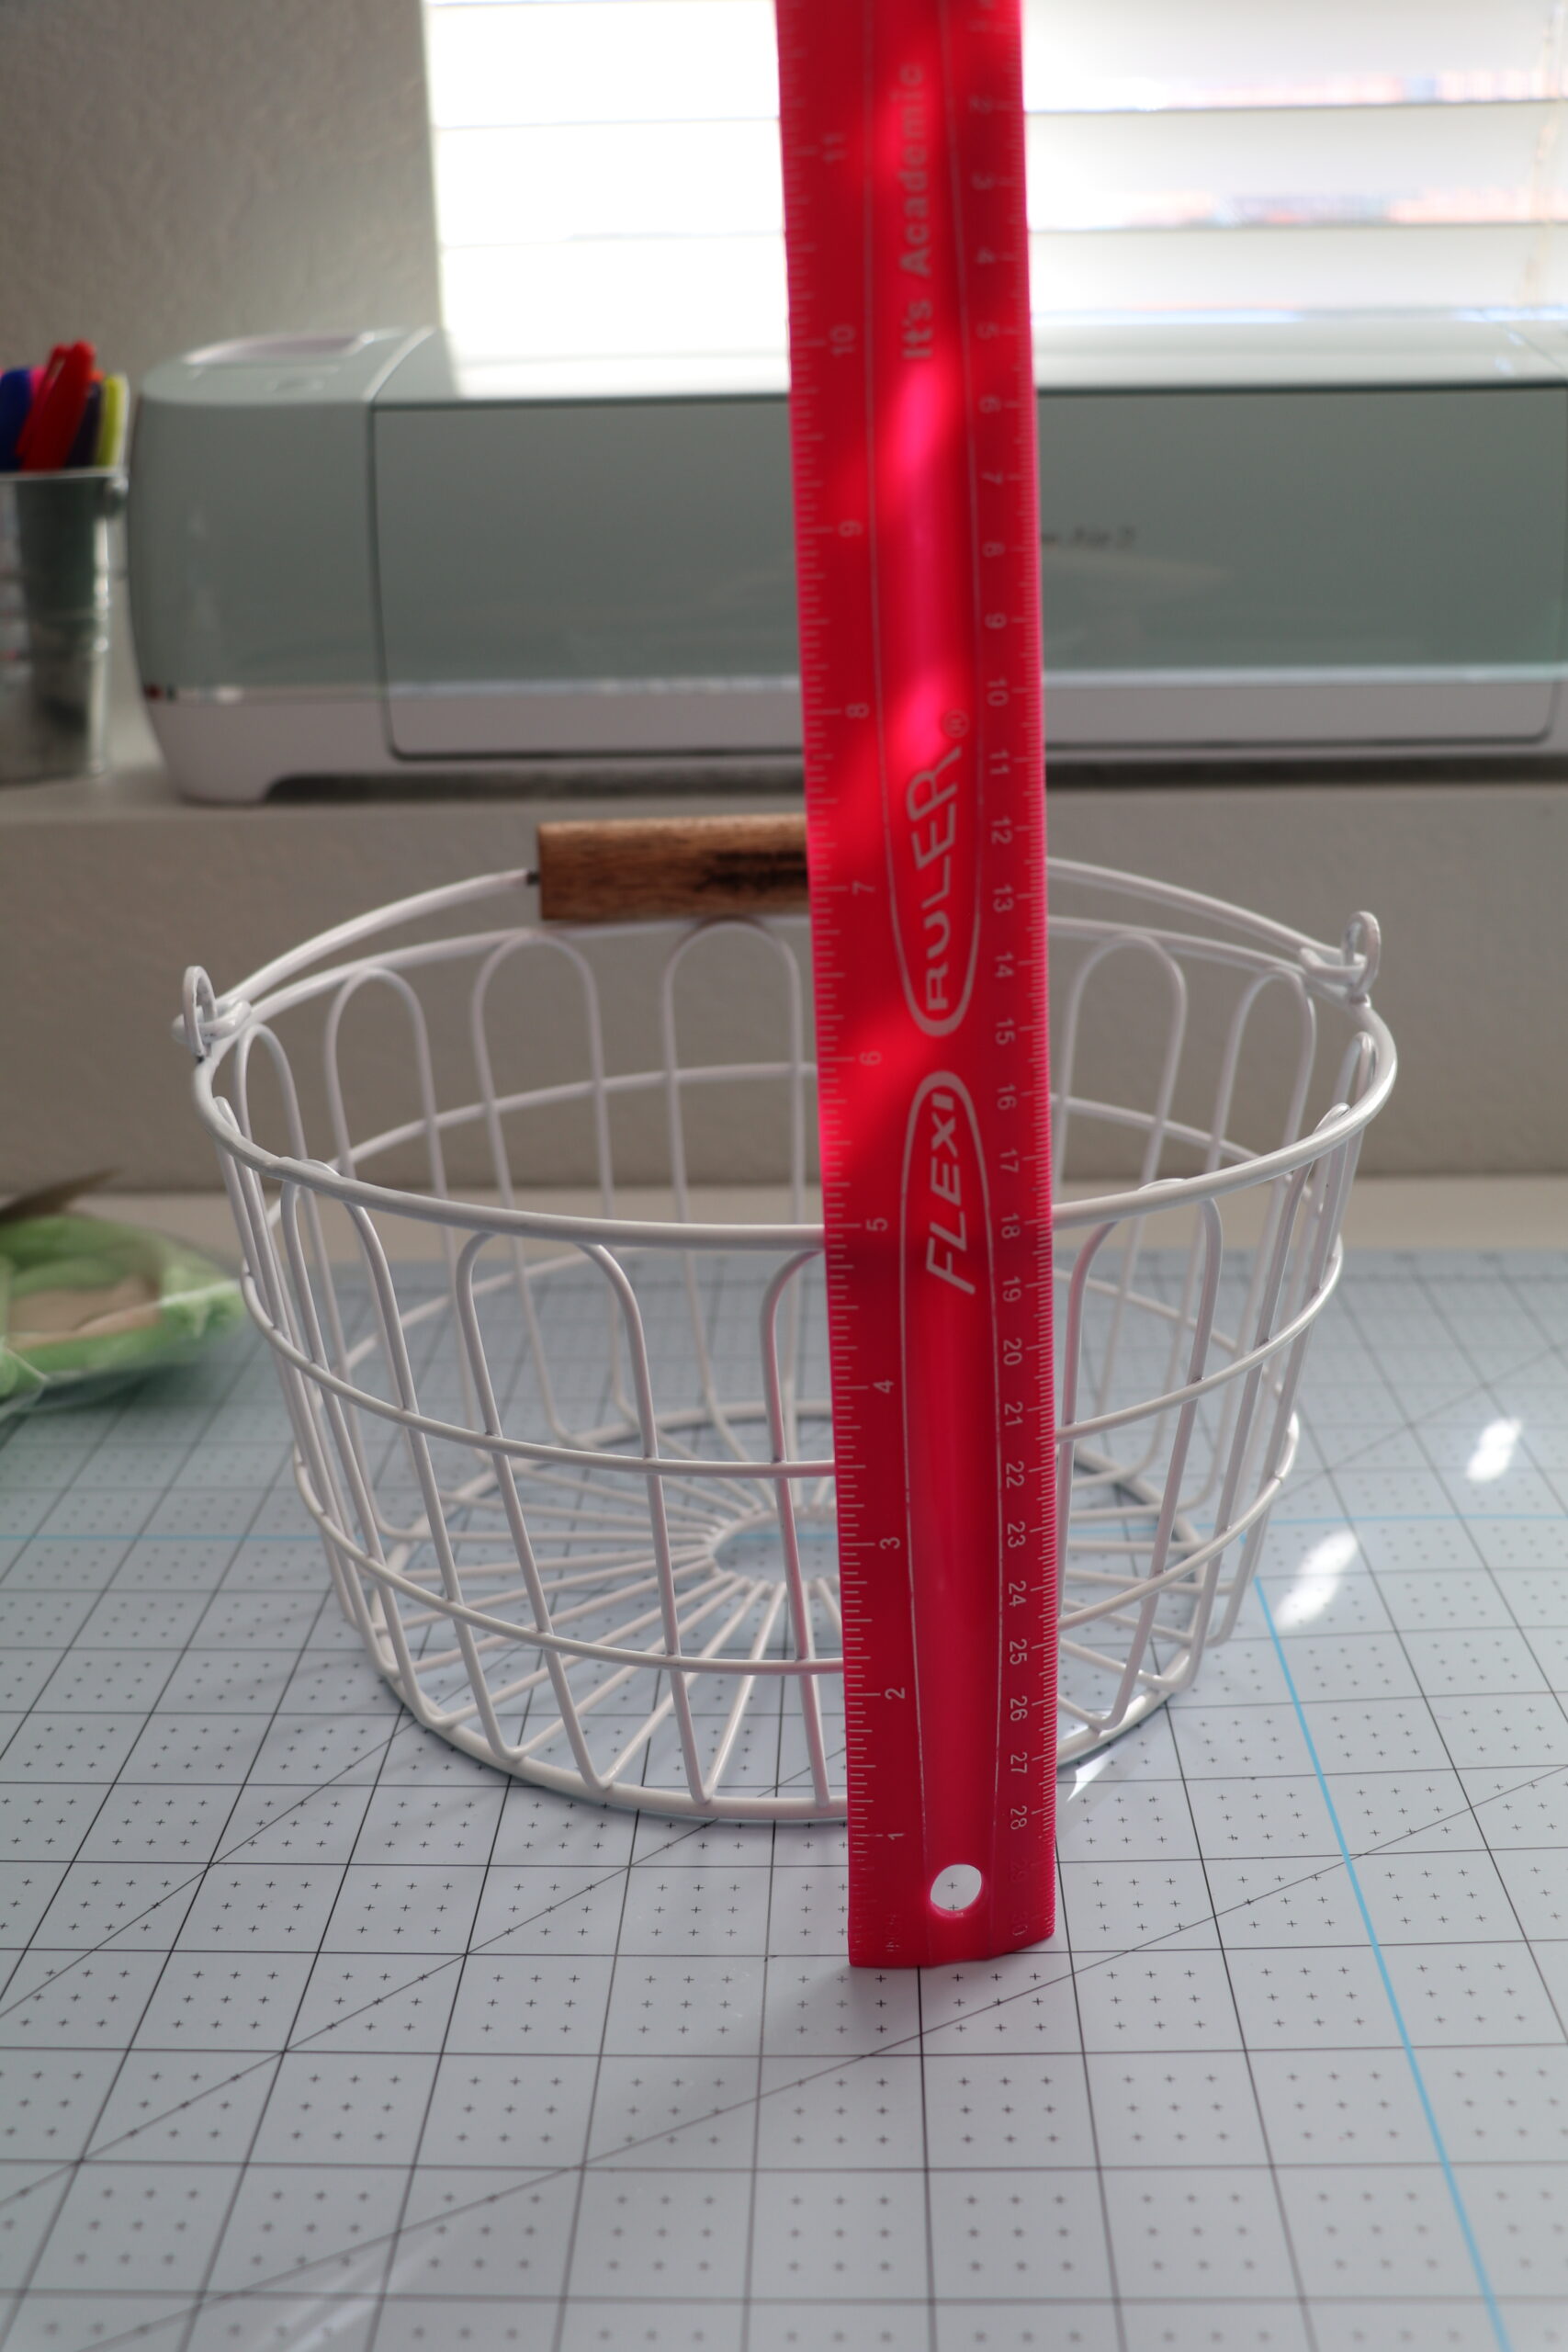
When it comes to making tutu Easter baskets I have had the best luck using metal or wire Easter baskets. You can usually find them in craft stores with the Easter Baskets, Target or Walmart in the Easter section, and on Amazon.
You can use a wooden or plastic Easter basket, but it needs to have openings around the top rim so you can make the tutu knots.
This year I got my basket from Target, the Hearth and Hand Wire Easter Basket. I used small, but large can work too.
But here are some similar options that could work.
Baby Yoda TuTu Easter Basket
When it comes to making your Baby Yoda Easter basket you are going to need a few items:
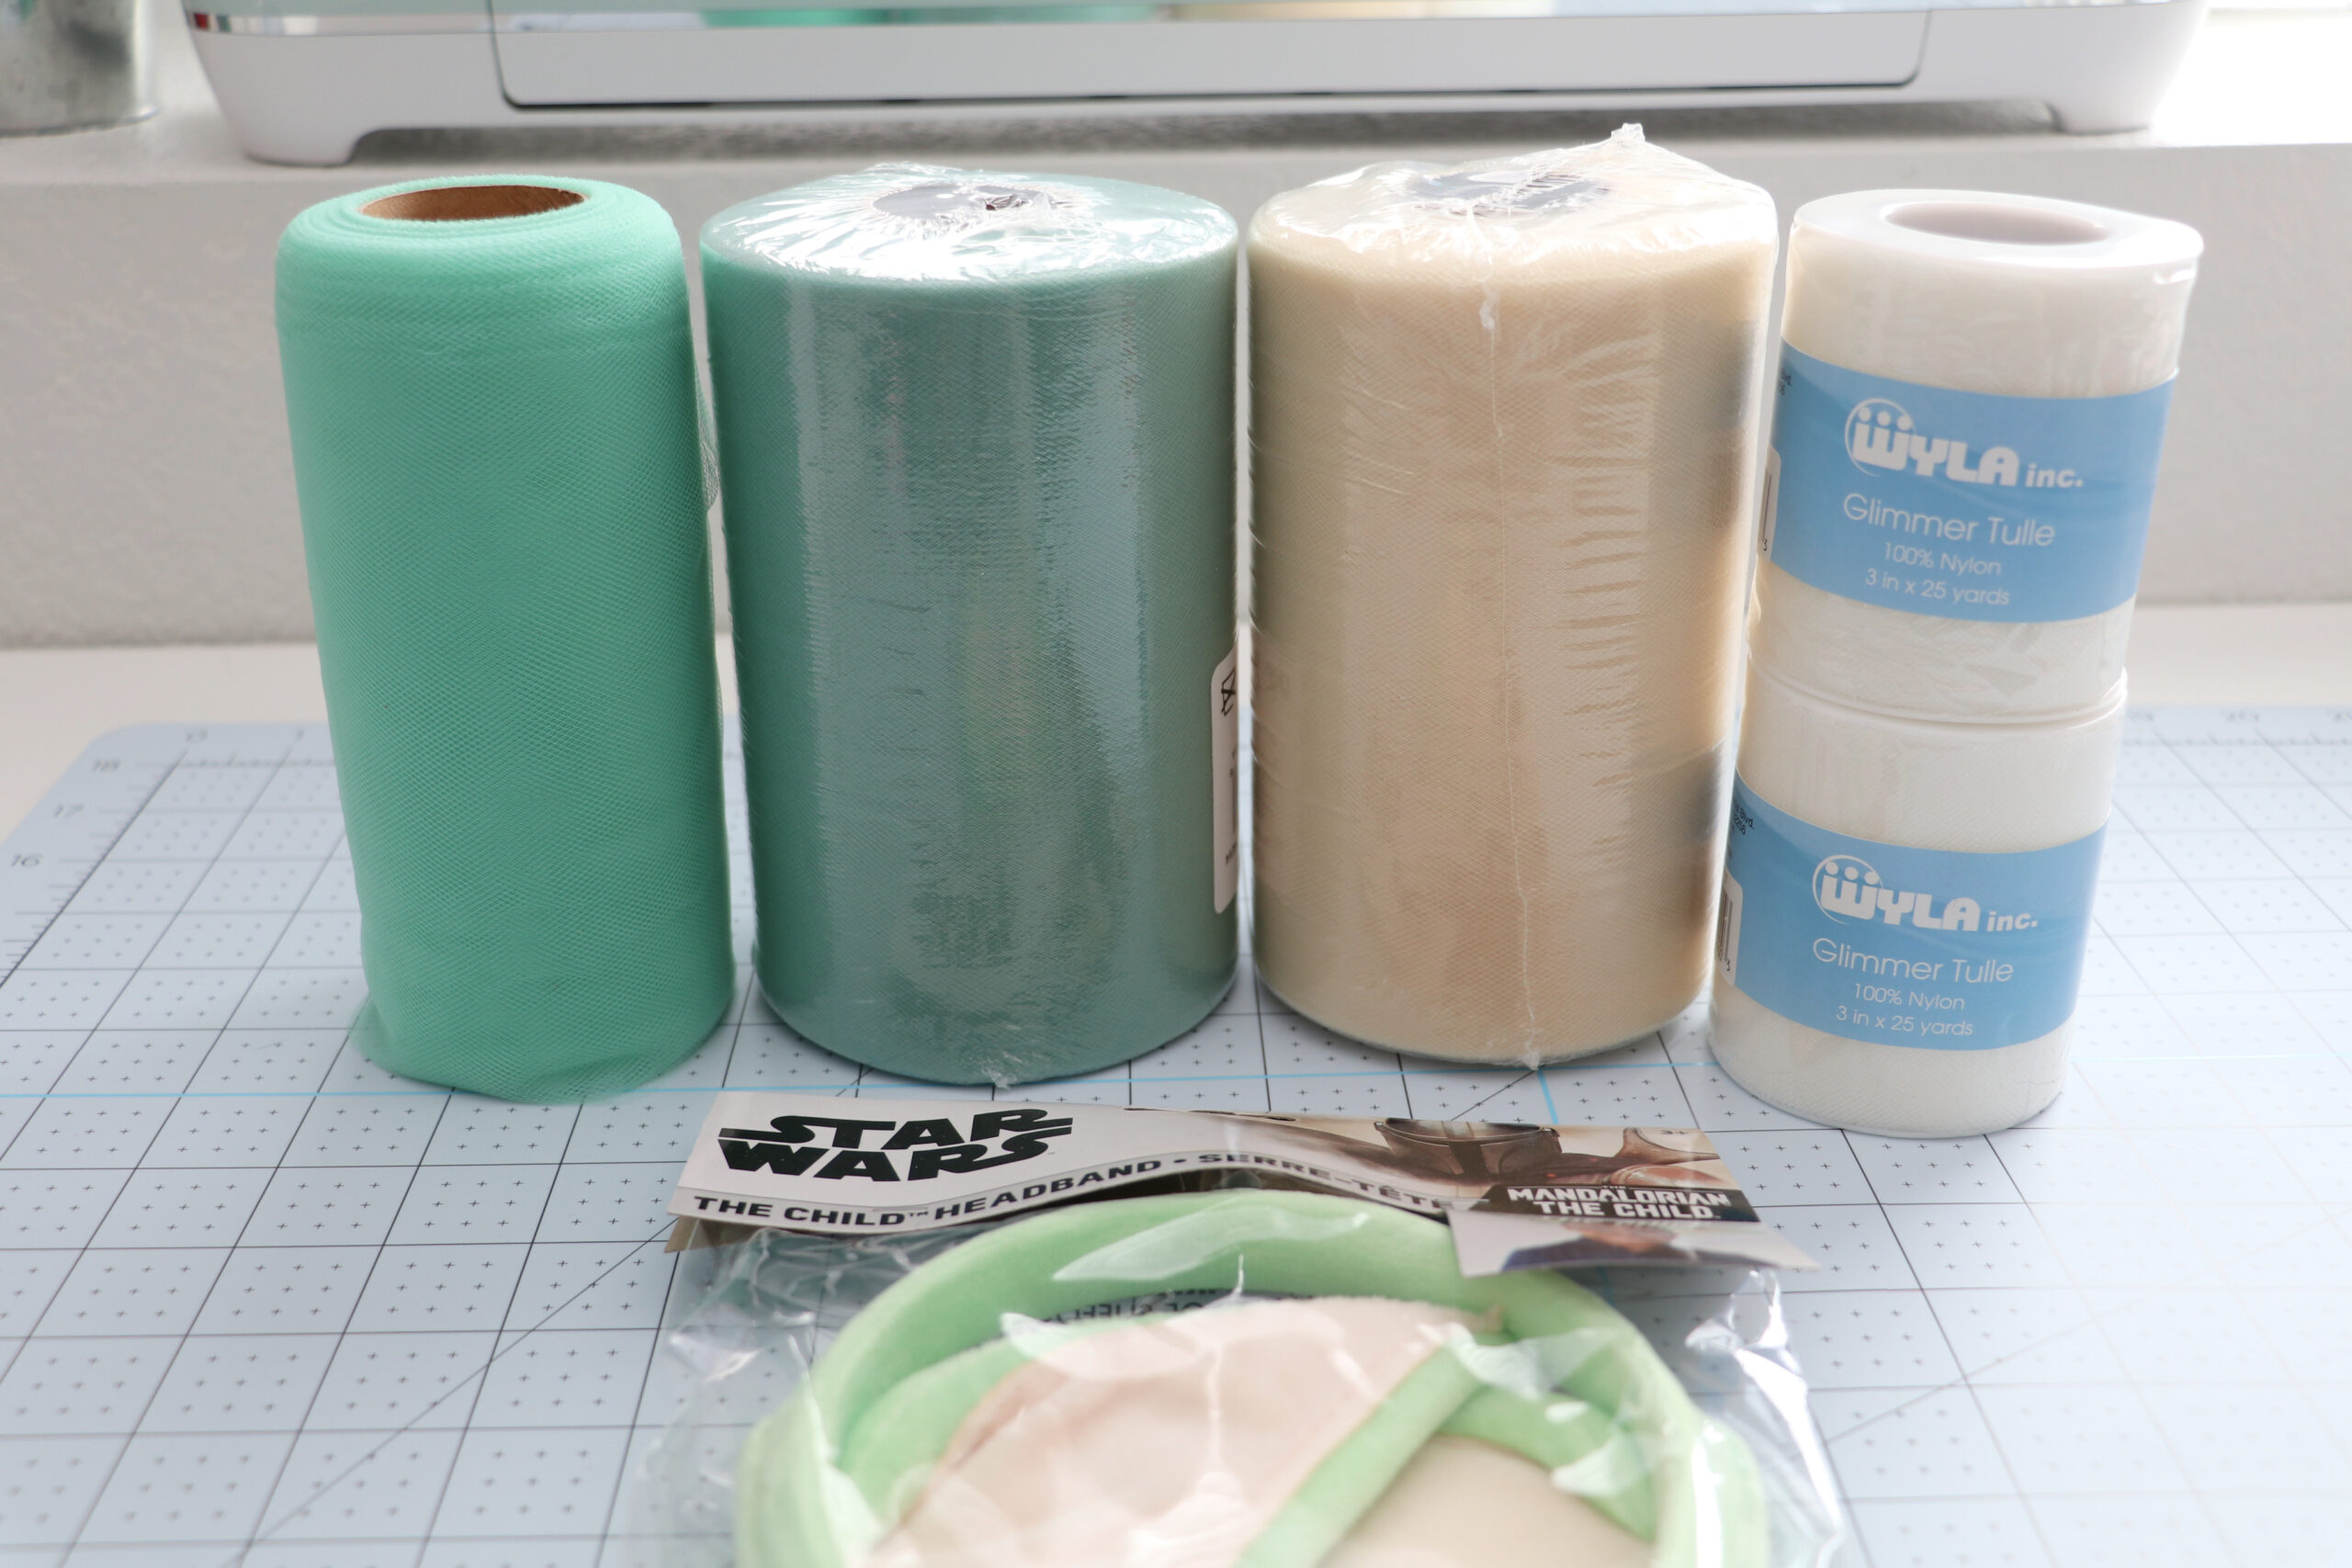
- Wire Easter Basket
- Tulle in Sage or Lime and Ivory
- Glue Gun
- Baby Yoda Ears or these
- Scissors
- Ruler
- Piece of Cardboard
- Tape
Here’s how to make a Baby Yoda Tutu Easter Basket:
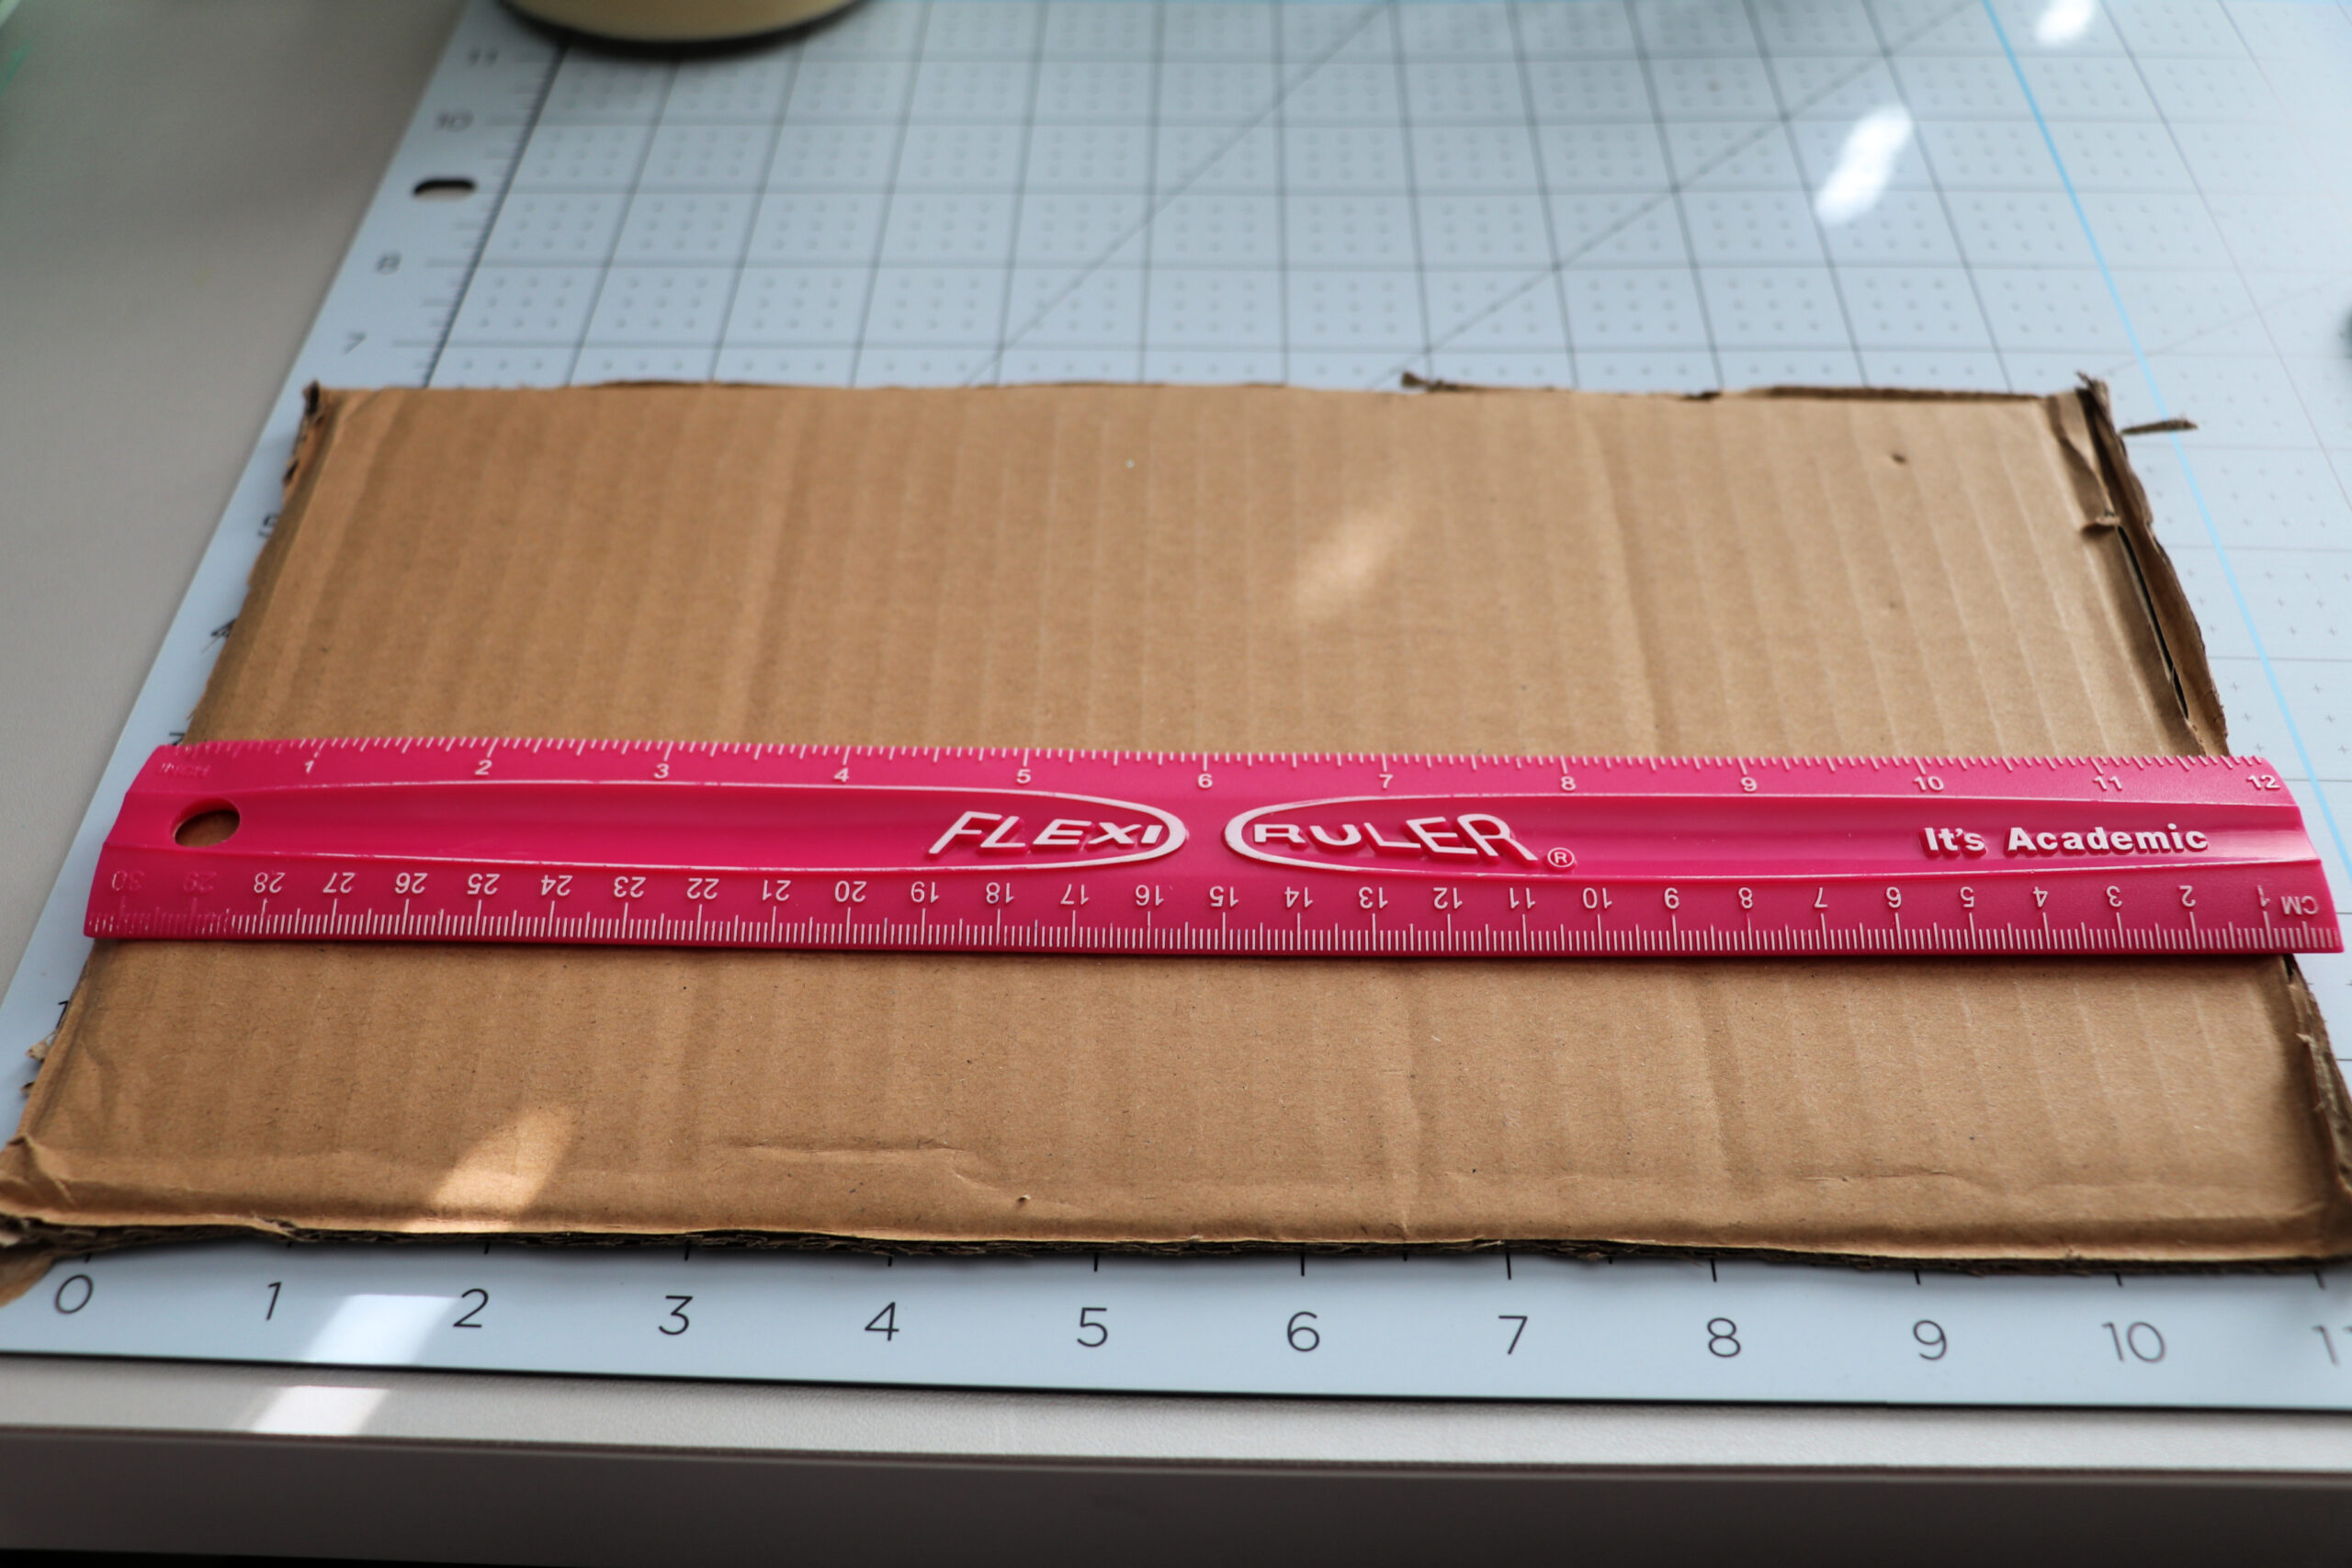
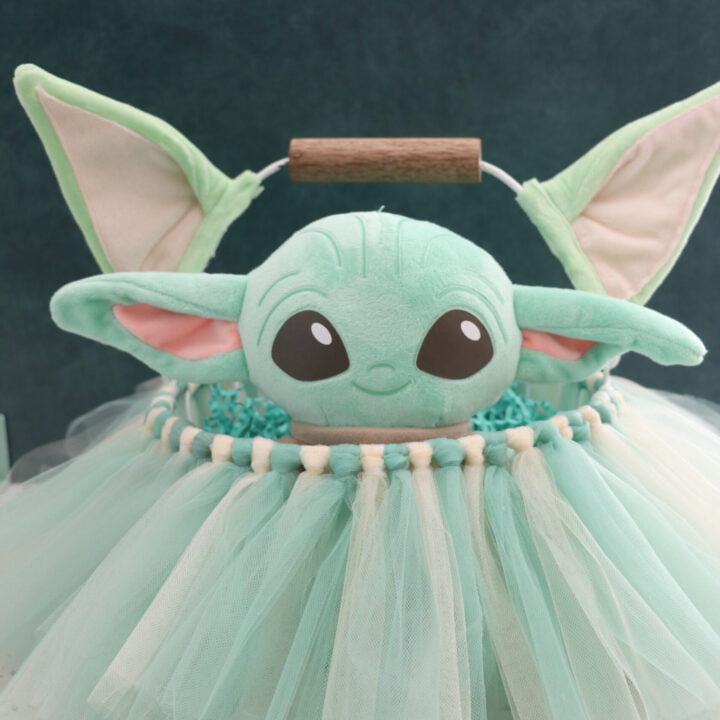
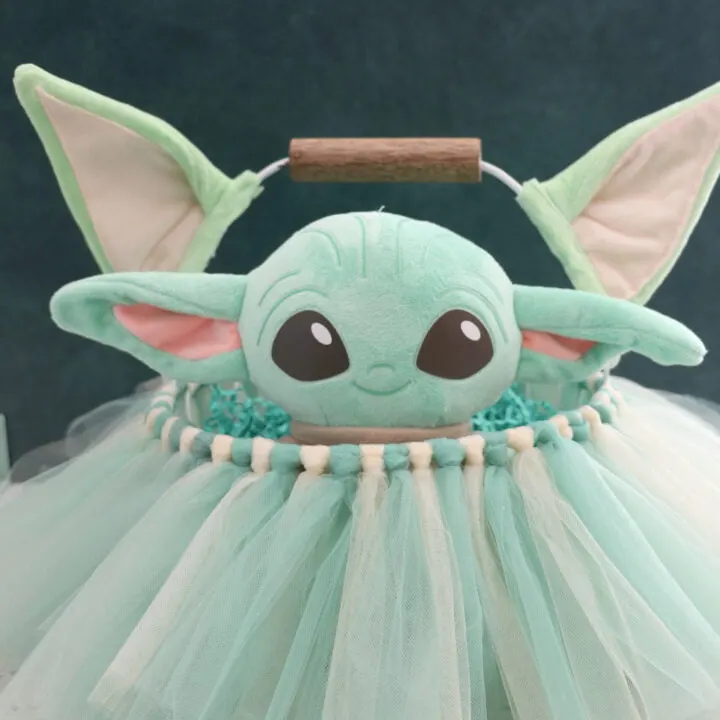
Once you have all of your supplies together you are going to measure your easter basket. Start at the top of the rim and measure to the bottom. Mine is 5 inches, plus you’ll add 1 inch to account for the loop.
You will need your tulle pieces to be the length of your basket X2 plus the 1 inch. Since my basket is 5 inches I would need tulle pieces cut to 11 inches. (I hope this all makes sense)
to figure out the measurement for the cardboard you are going to do you height measurement X1 and add 1. Then you’ll divide that number by 2. For mine, I got 11 so I cut out a piece that is 5.5 inches long. Width doesn’t matter too much.
The easiest way to cut tulle is to wrap it around the cardboard a bunch and then make one cut, but you could also cut each 11-inch piece out individually. This is very time-consuming though.
I used 60 strips of each color tulle because I double-layered my tulle. You can do a single layer and only cut out 30 strips per color, but I love the double layer look. I cut my tulle out in batches, because cutting out that much at once would be a pain. Do whatever is easier for you.
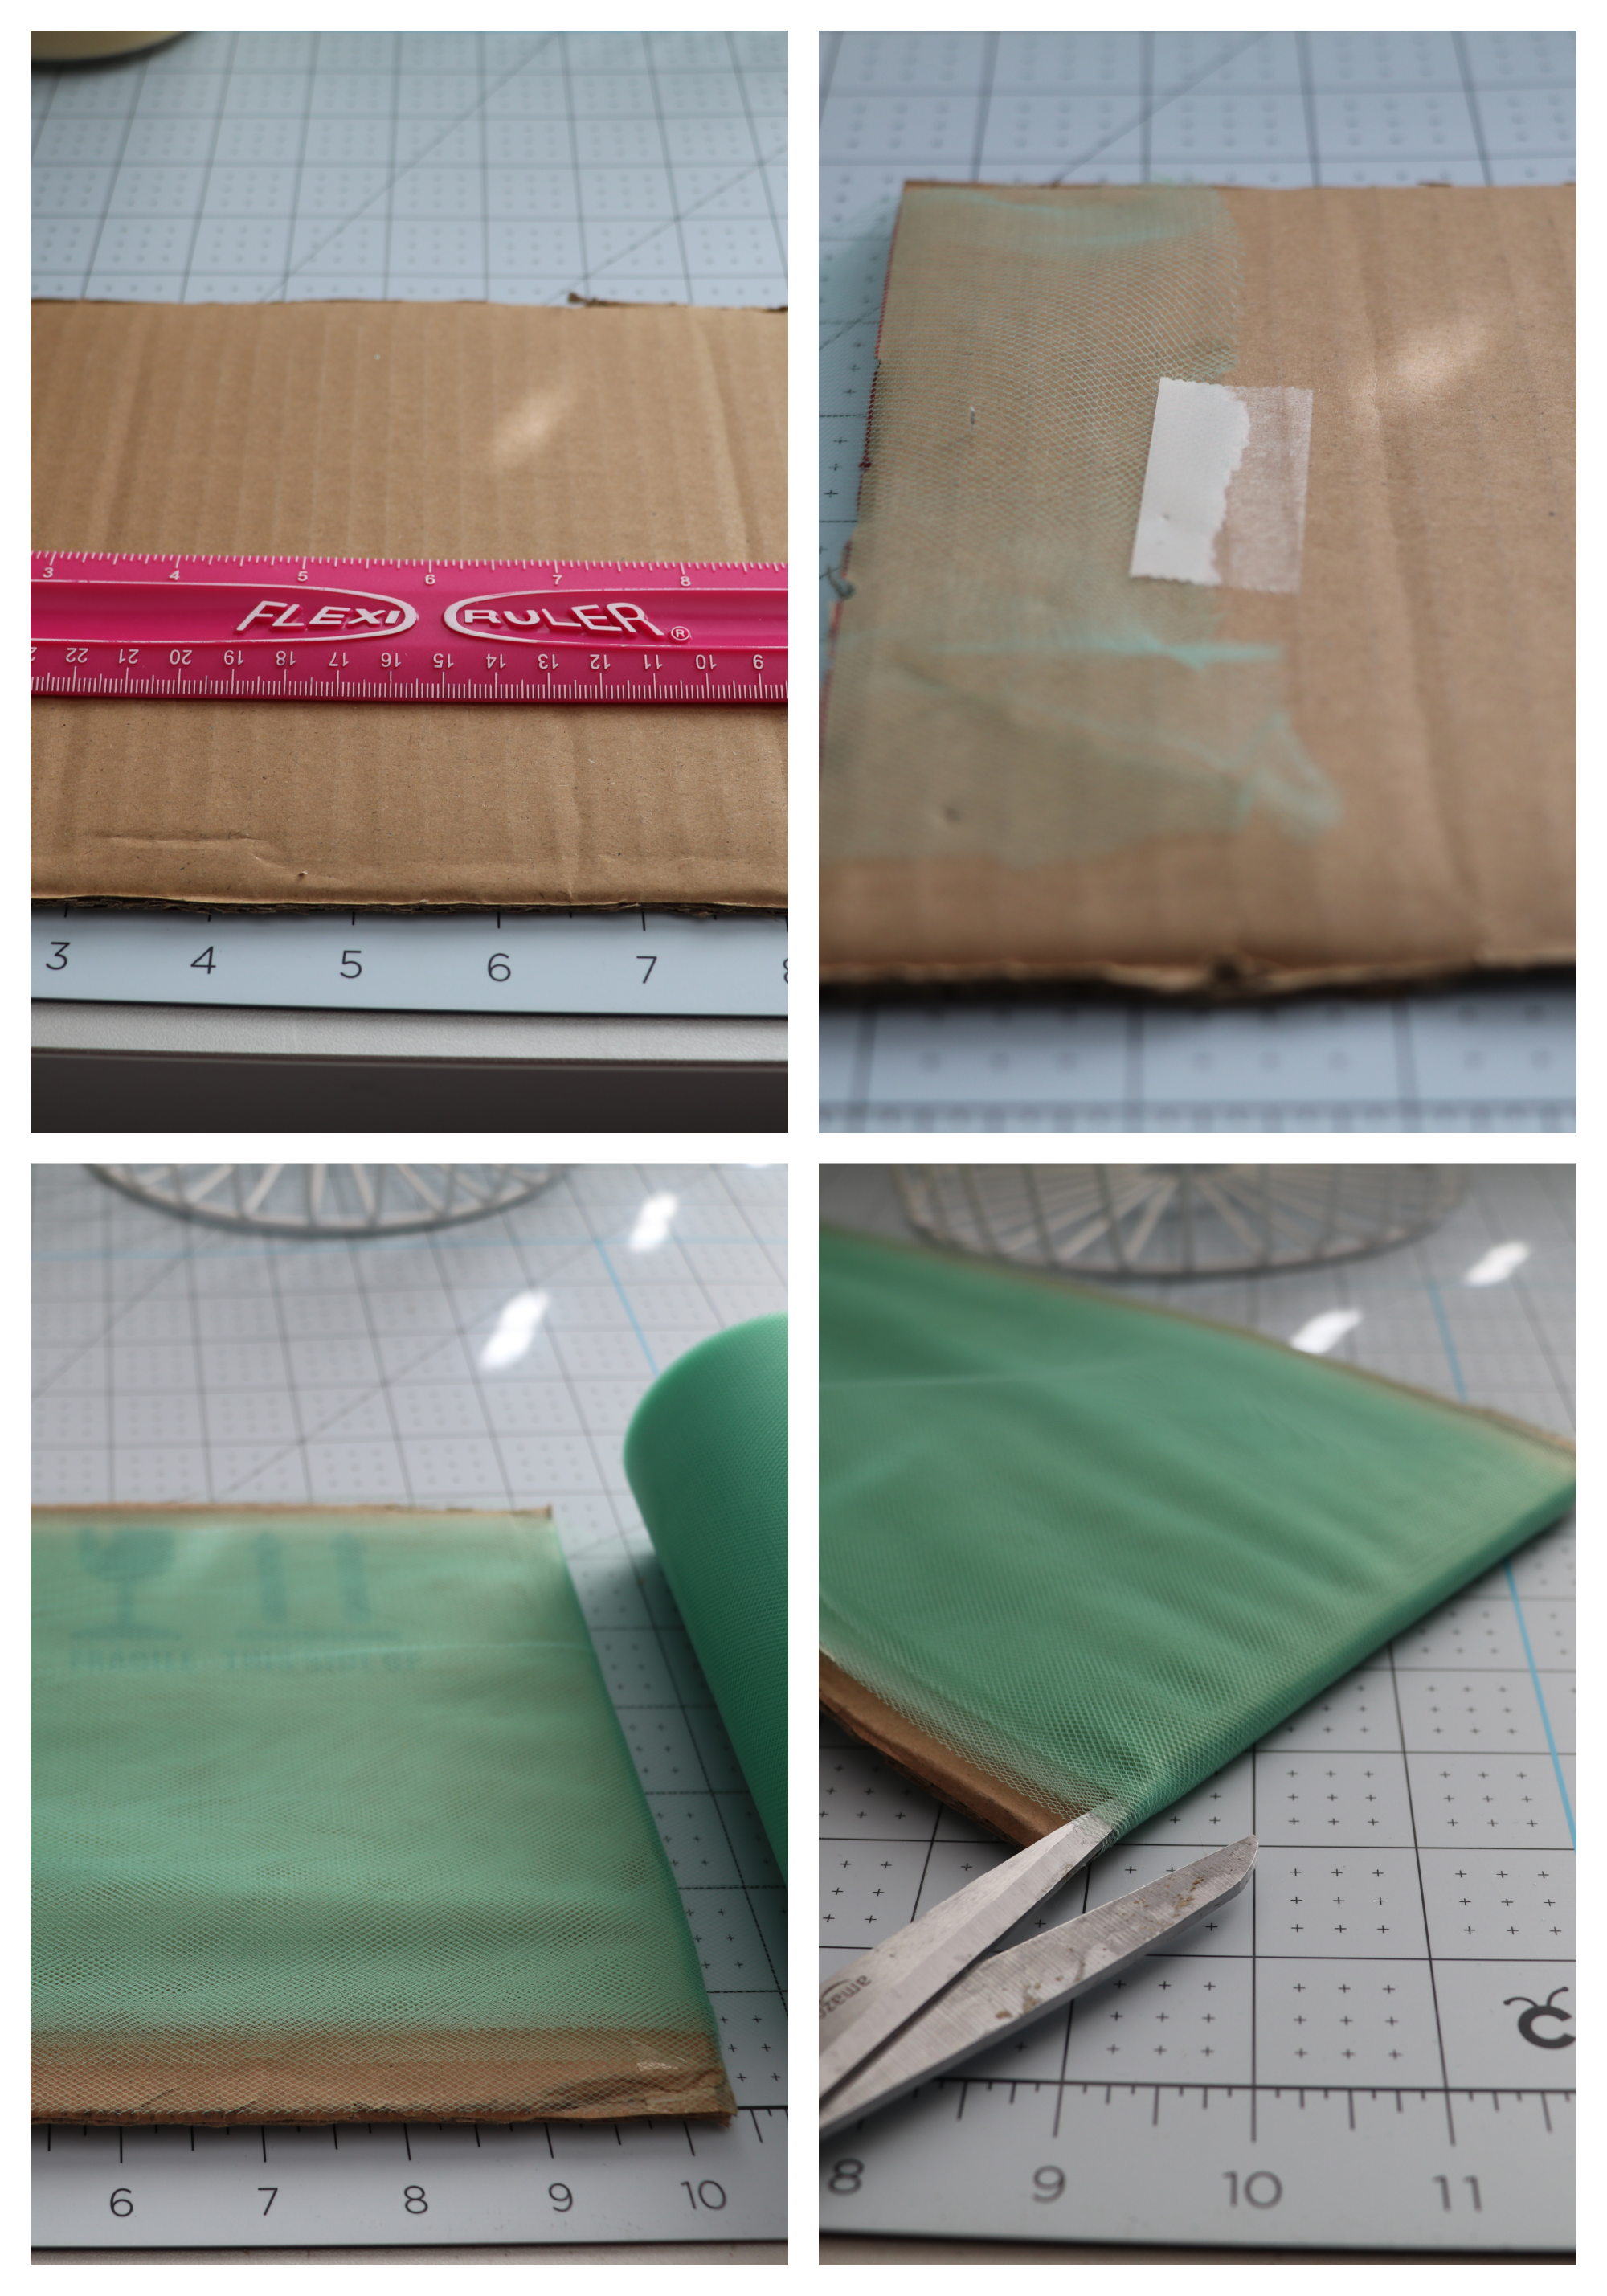
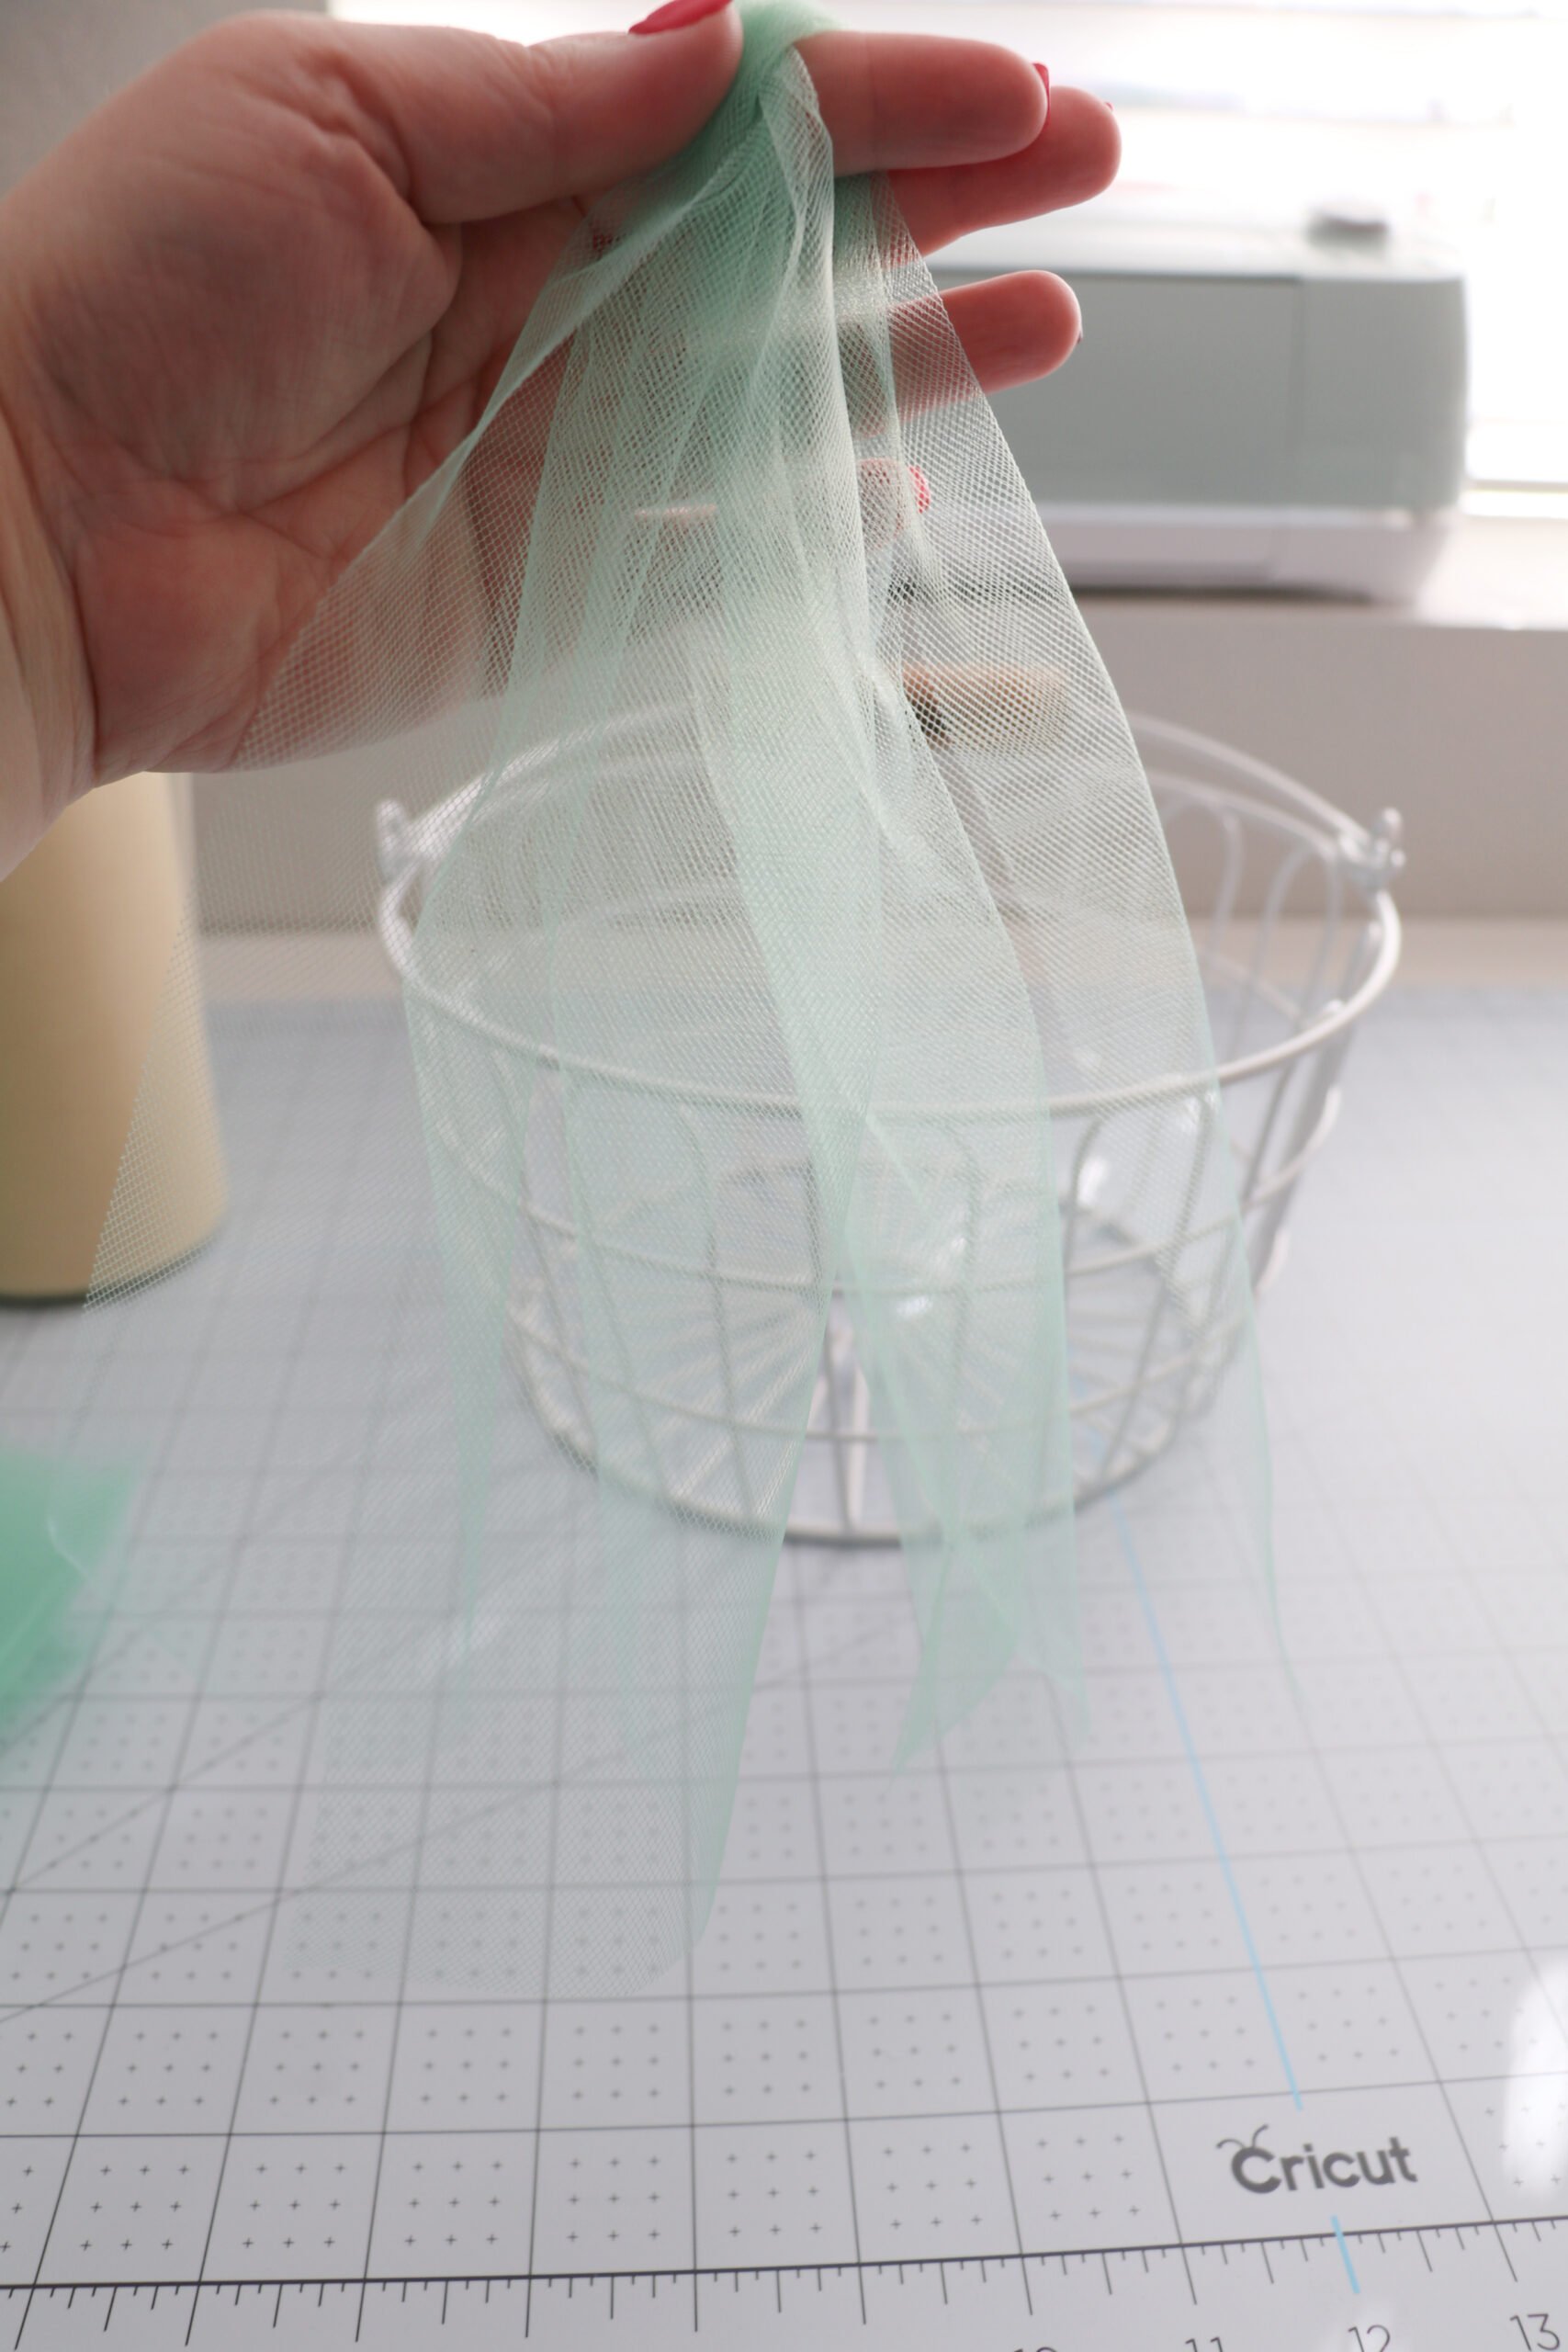
Wrap your tulle around the cardboard and when you feel done you are going to cut only ONE SIDE of the tulle. You’ll be left with long strips of tulle.
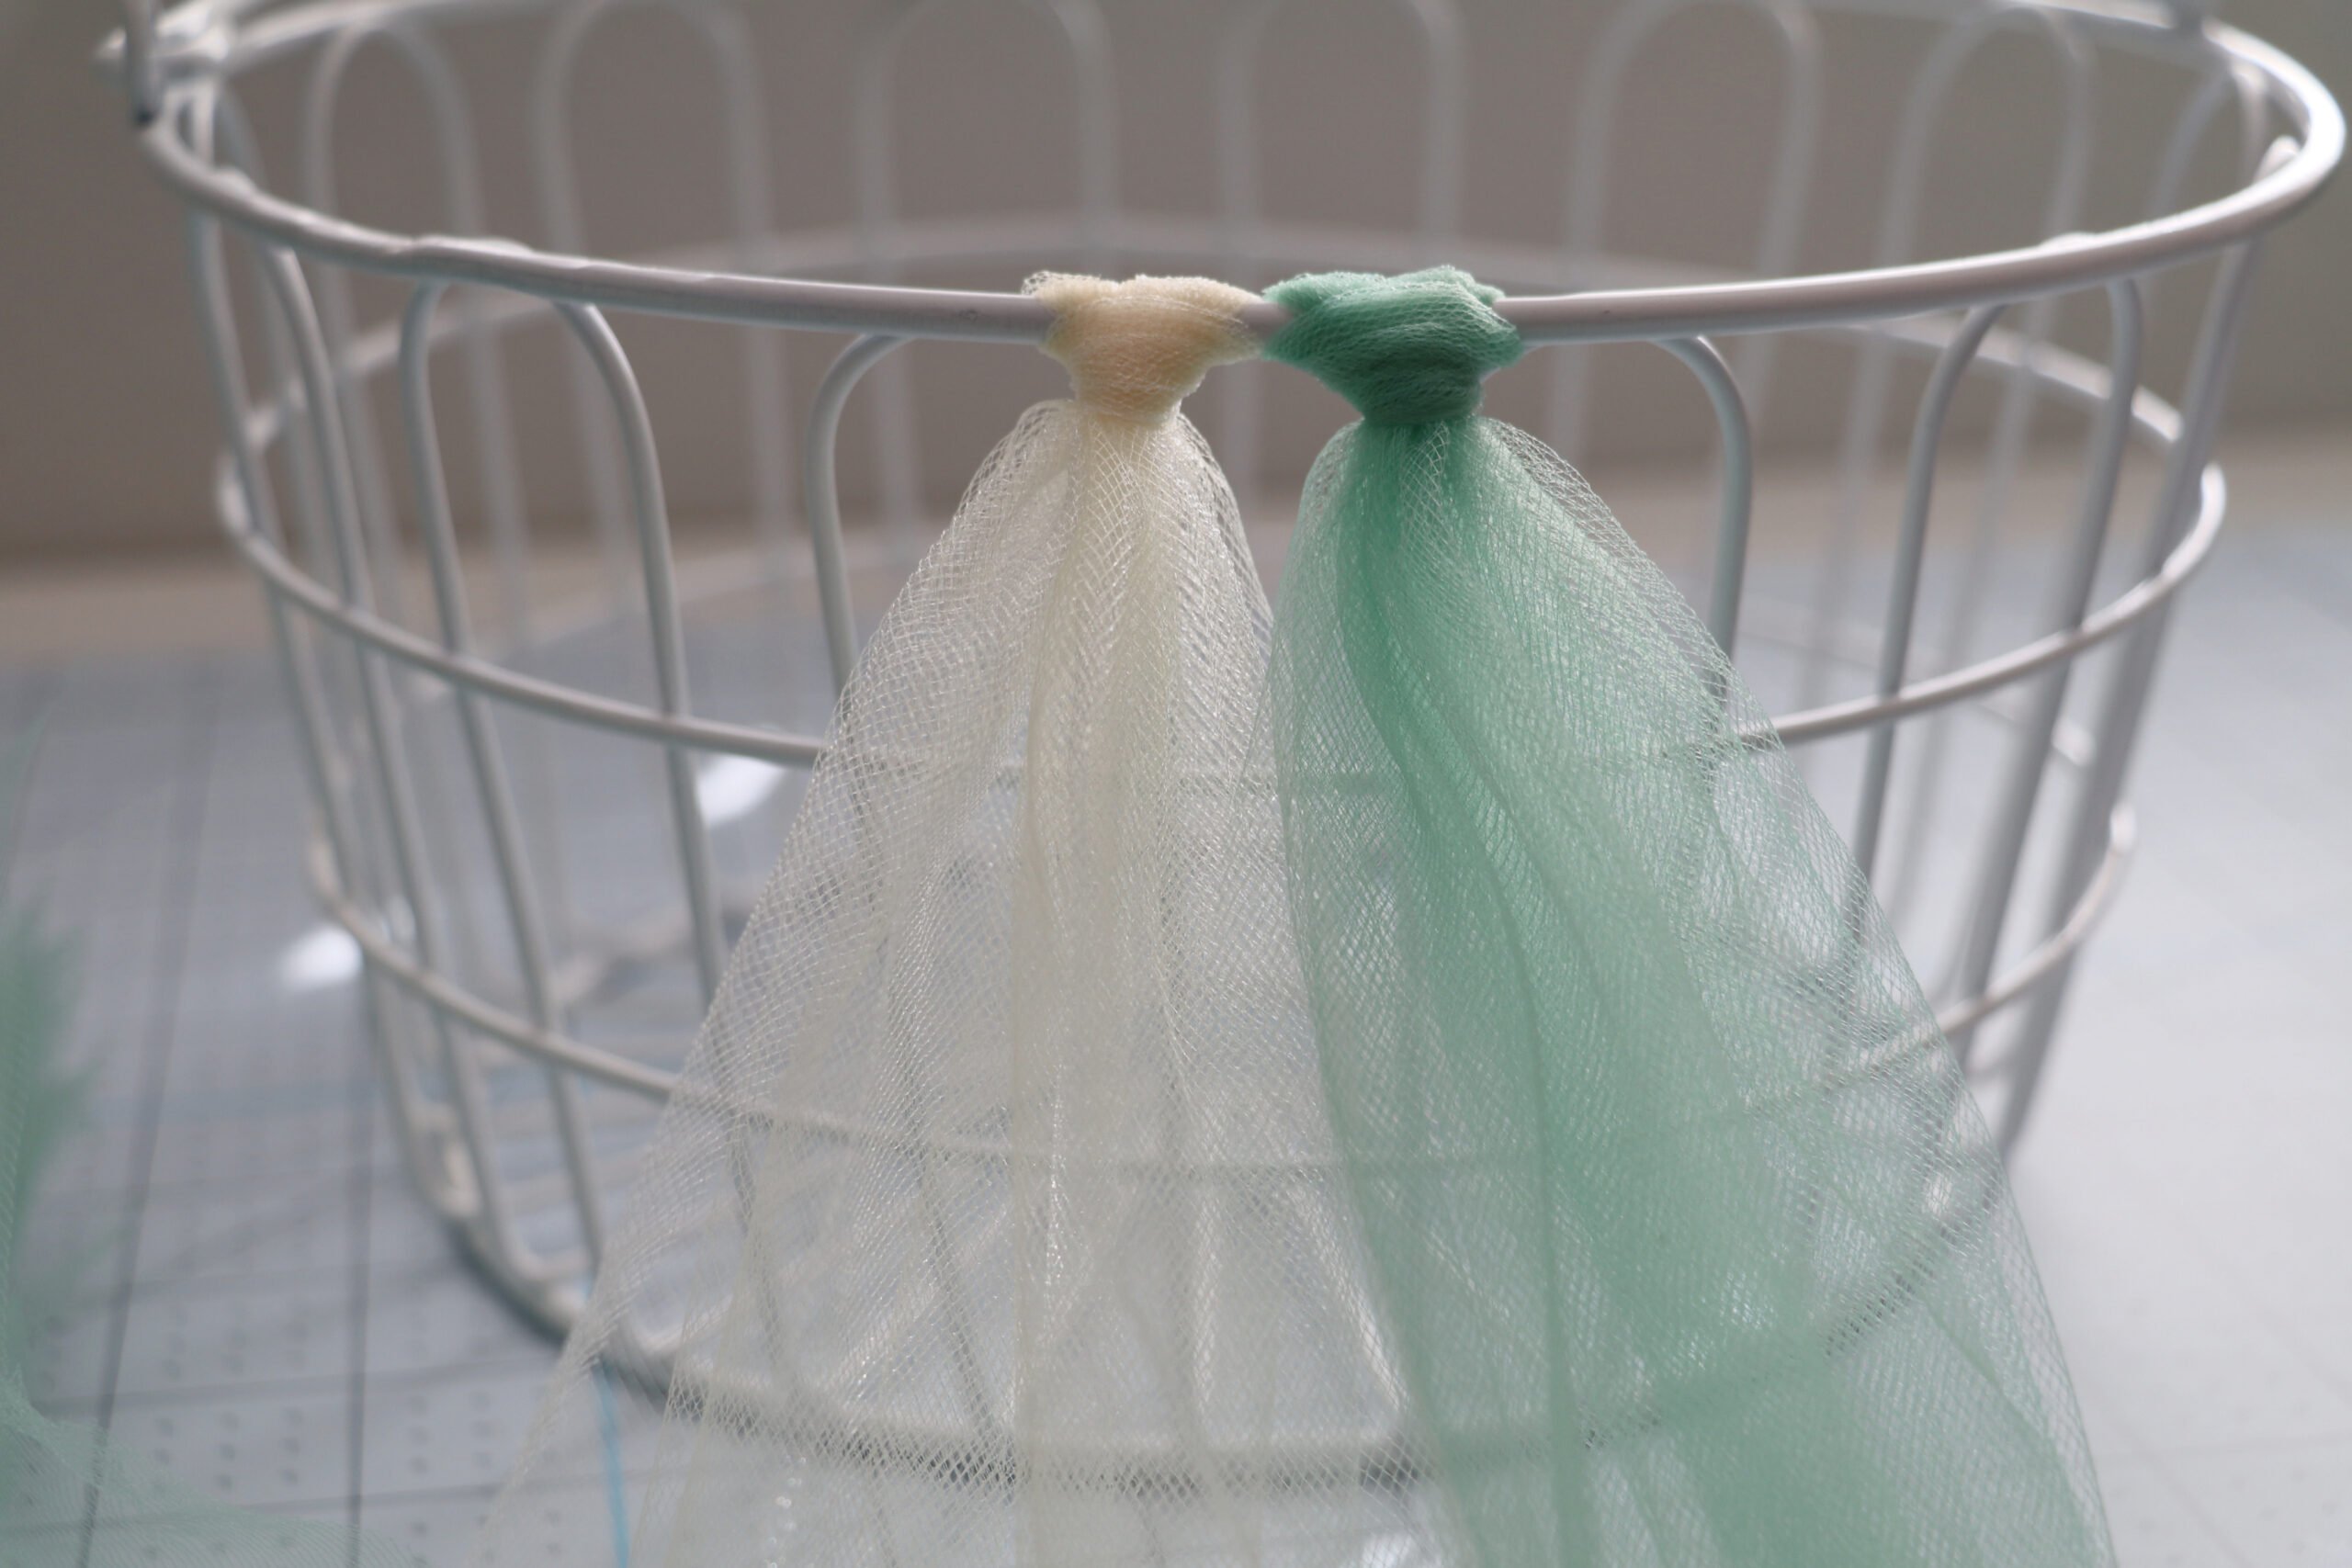
To make your tutu Easter basket you are going to take 2 tulle pieces and layer them on top of each other. You can either do each color individually or you can layer the green and cream on top of each other. This just comes down to preference.
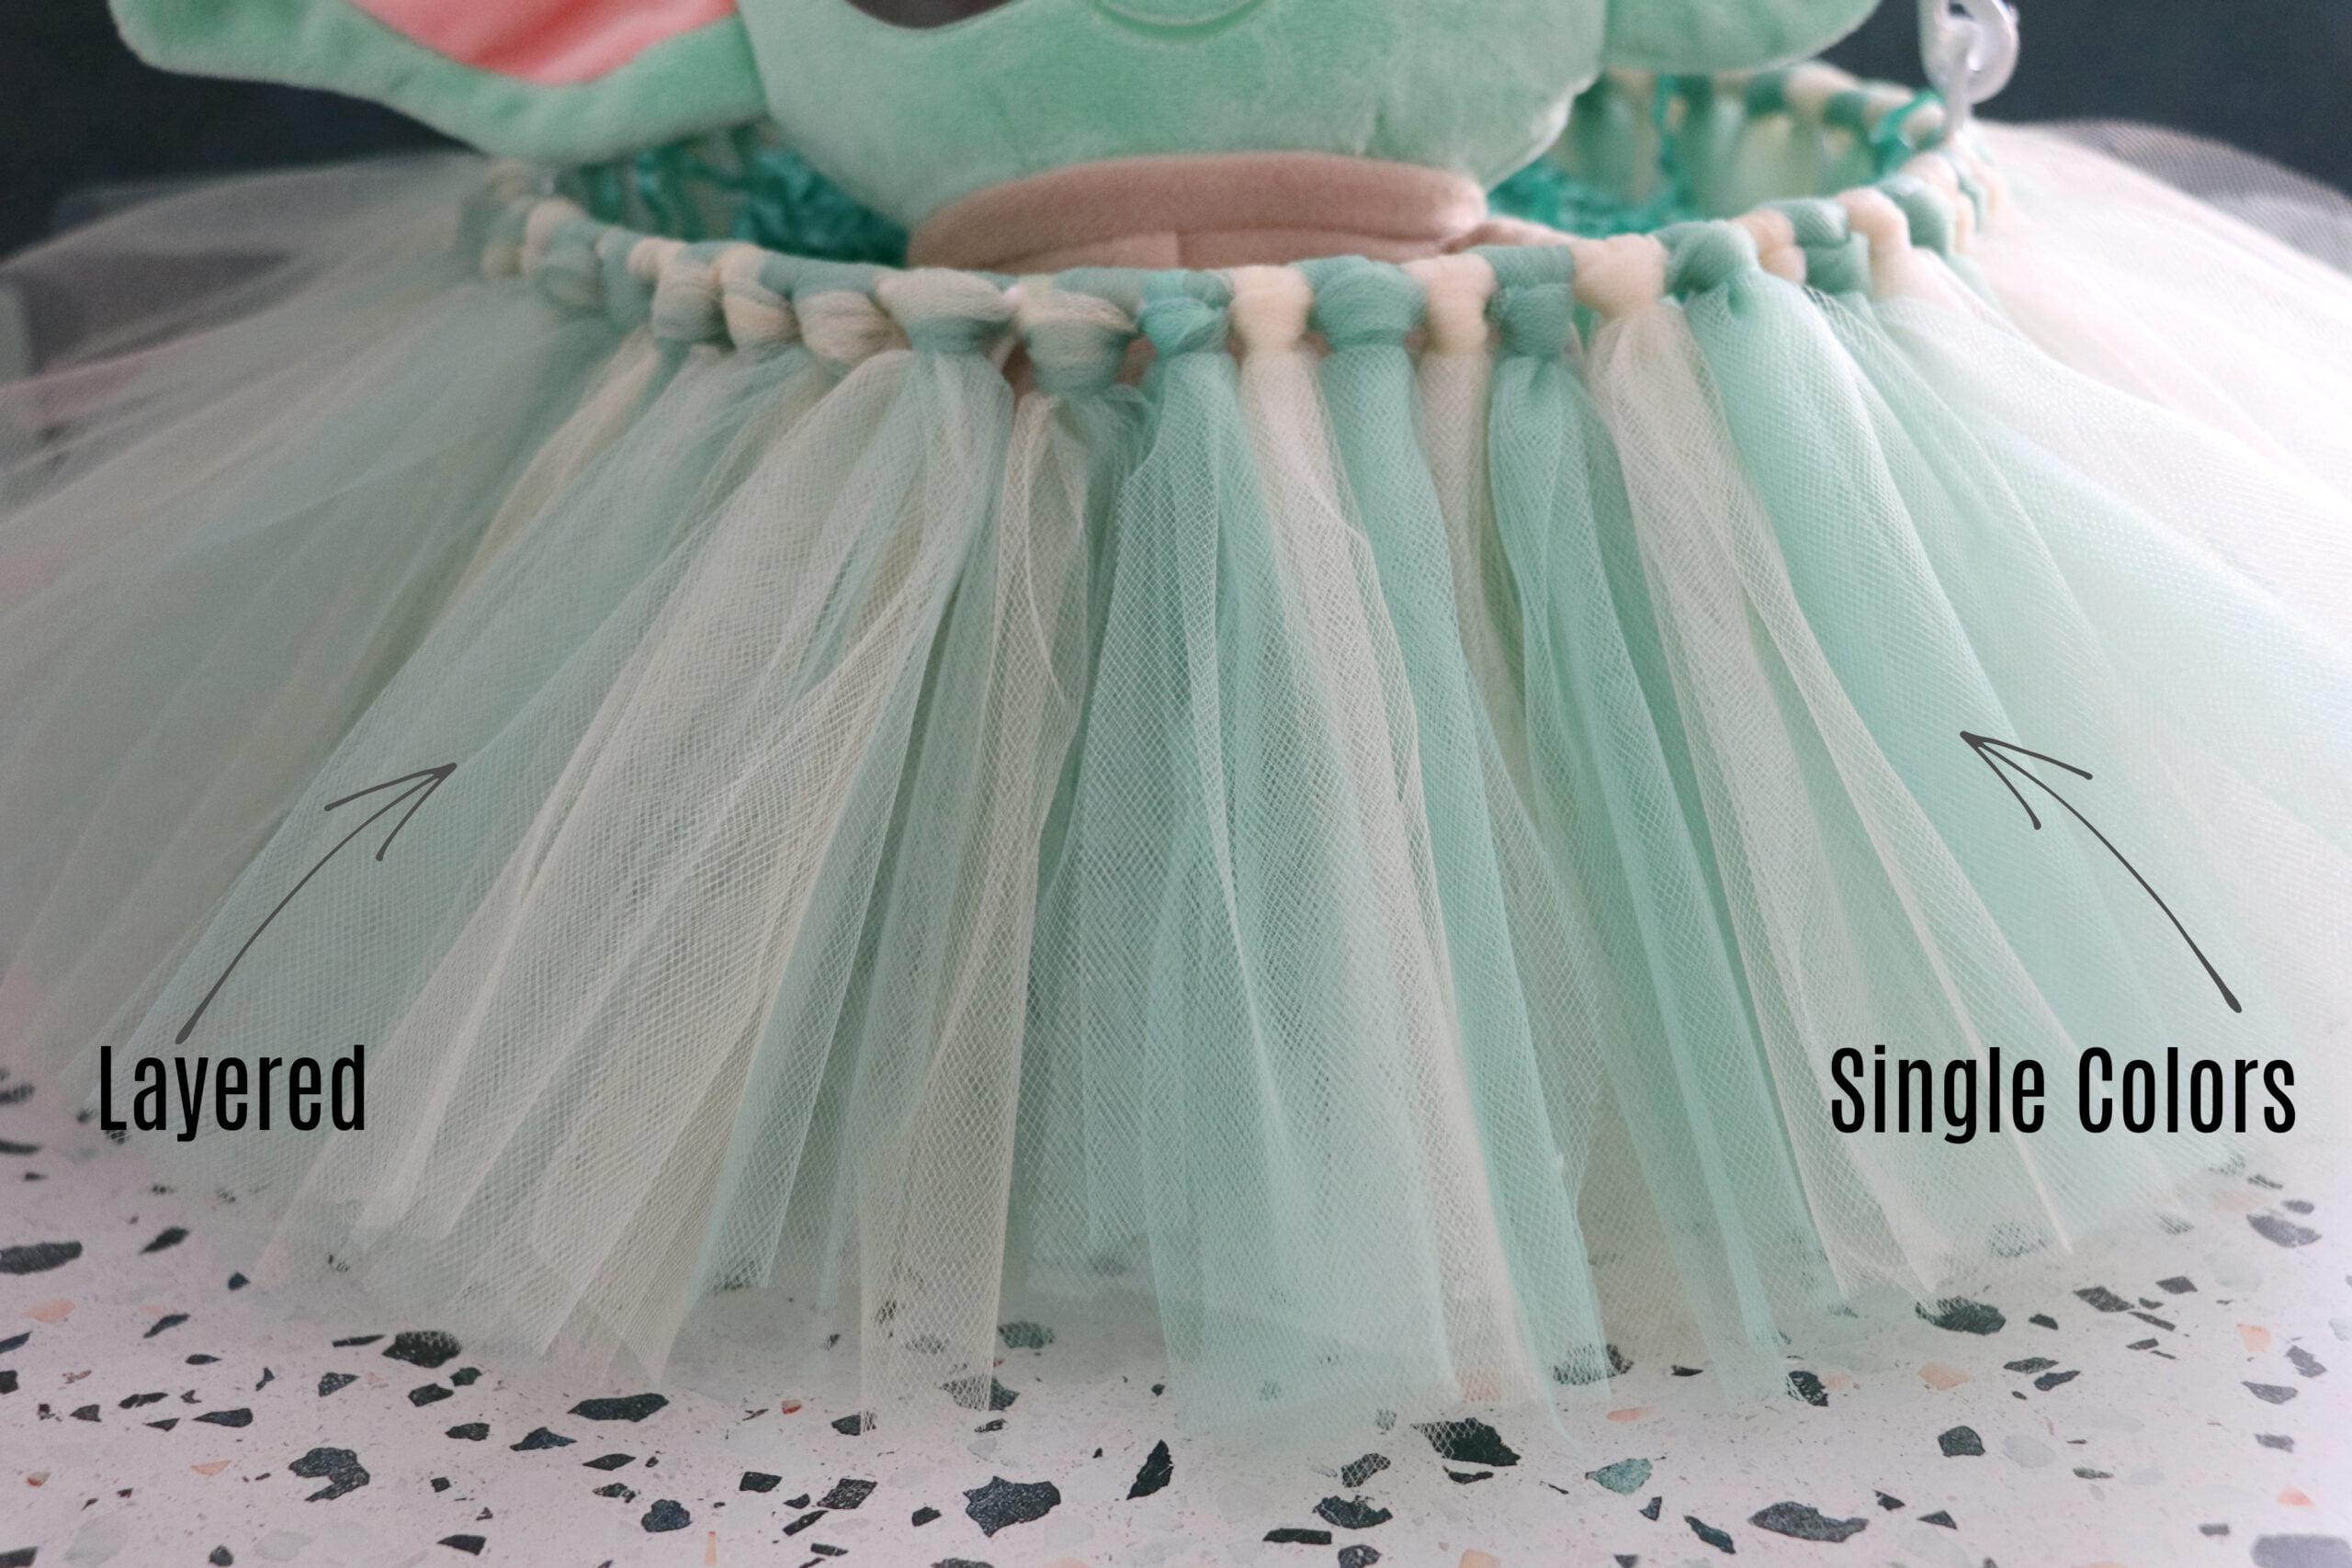
My tulle color doesn’t match the color of the ears. You could go with a lime color tulle instead of the sage. When I was ordering my supplies I was looking at the Baby Yoda plush I had ordered and ordering colors based on that, which match the plush perfectly but not the ears. You could even use both sage and lime tulle and layer the greens together.
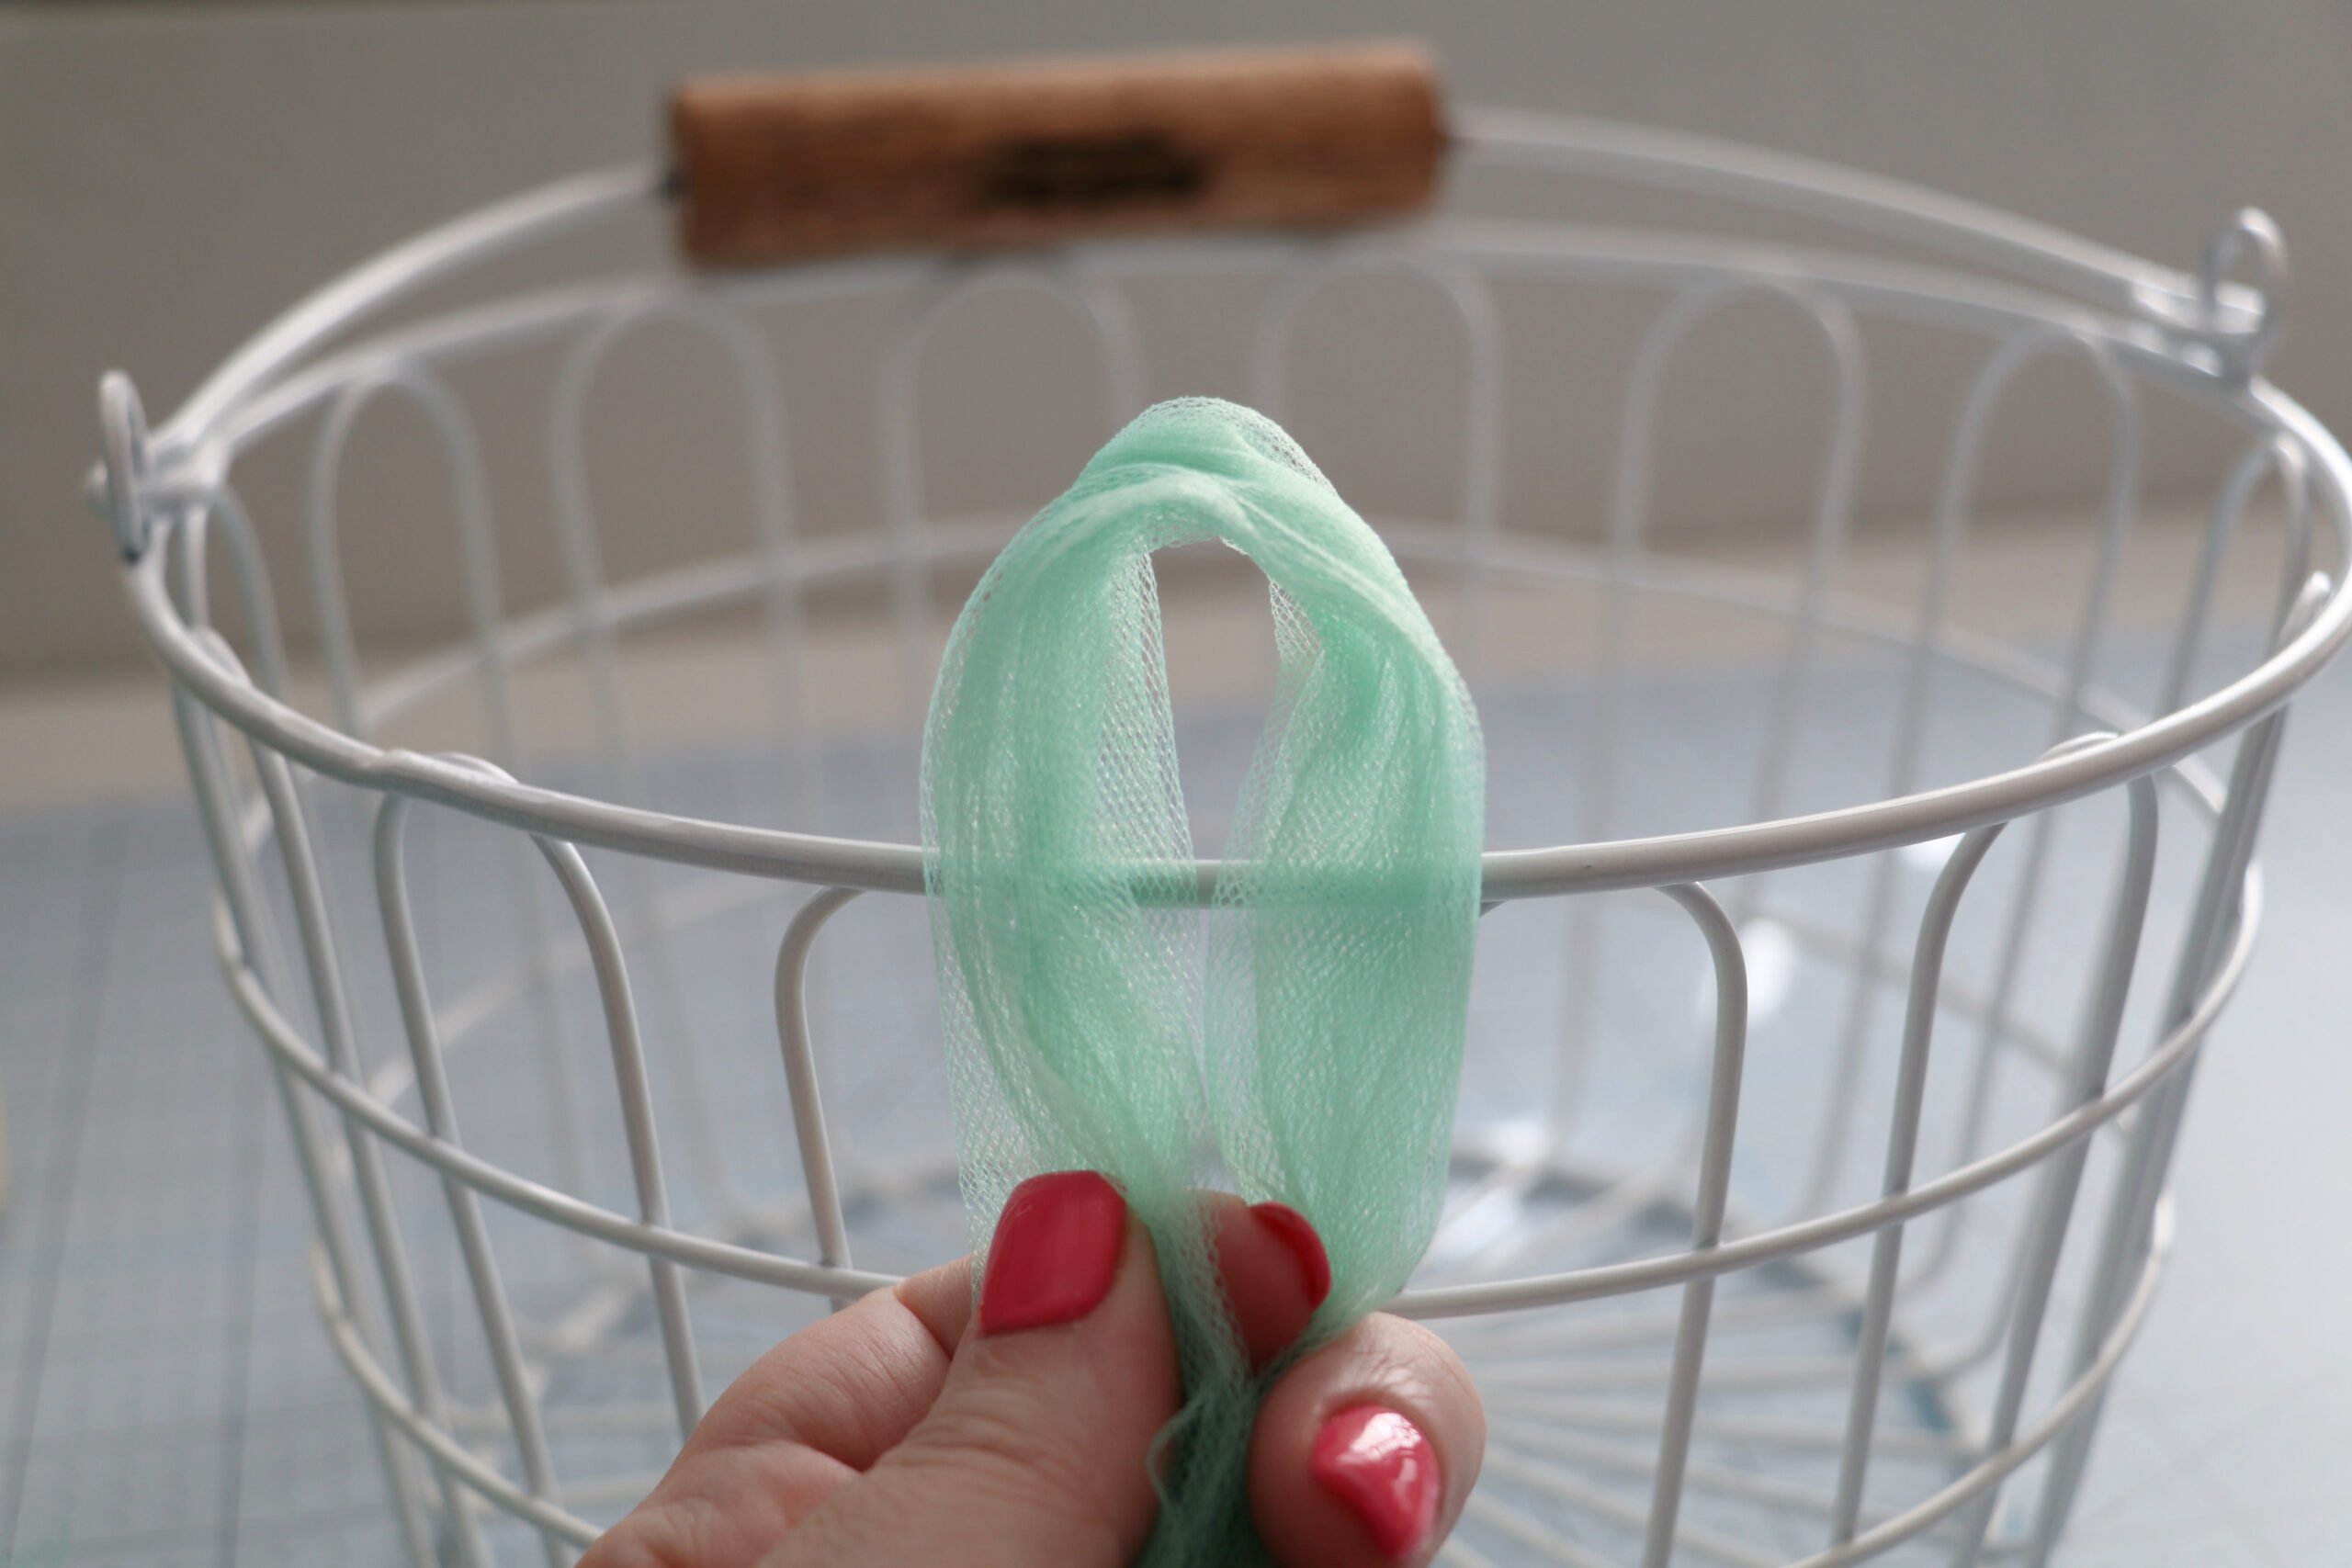
Fold the tulle pieces in half so they are even lengths.
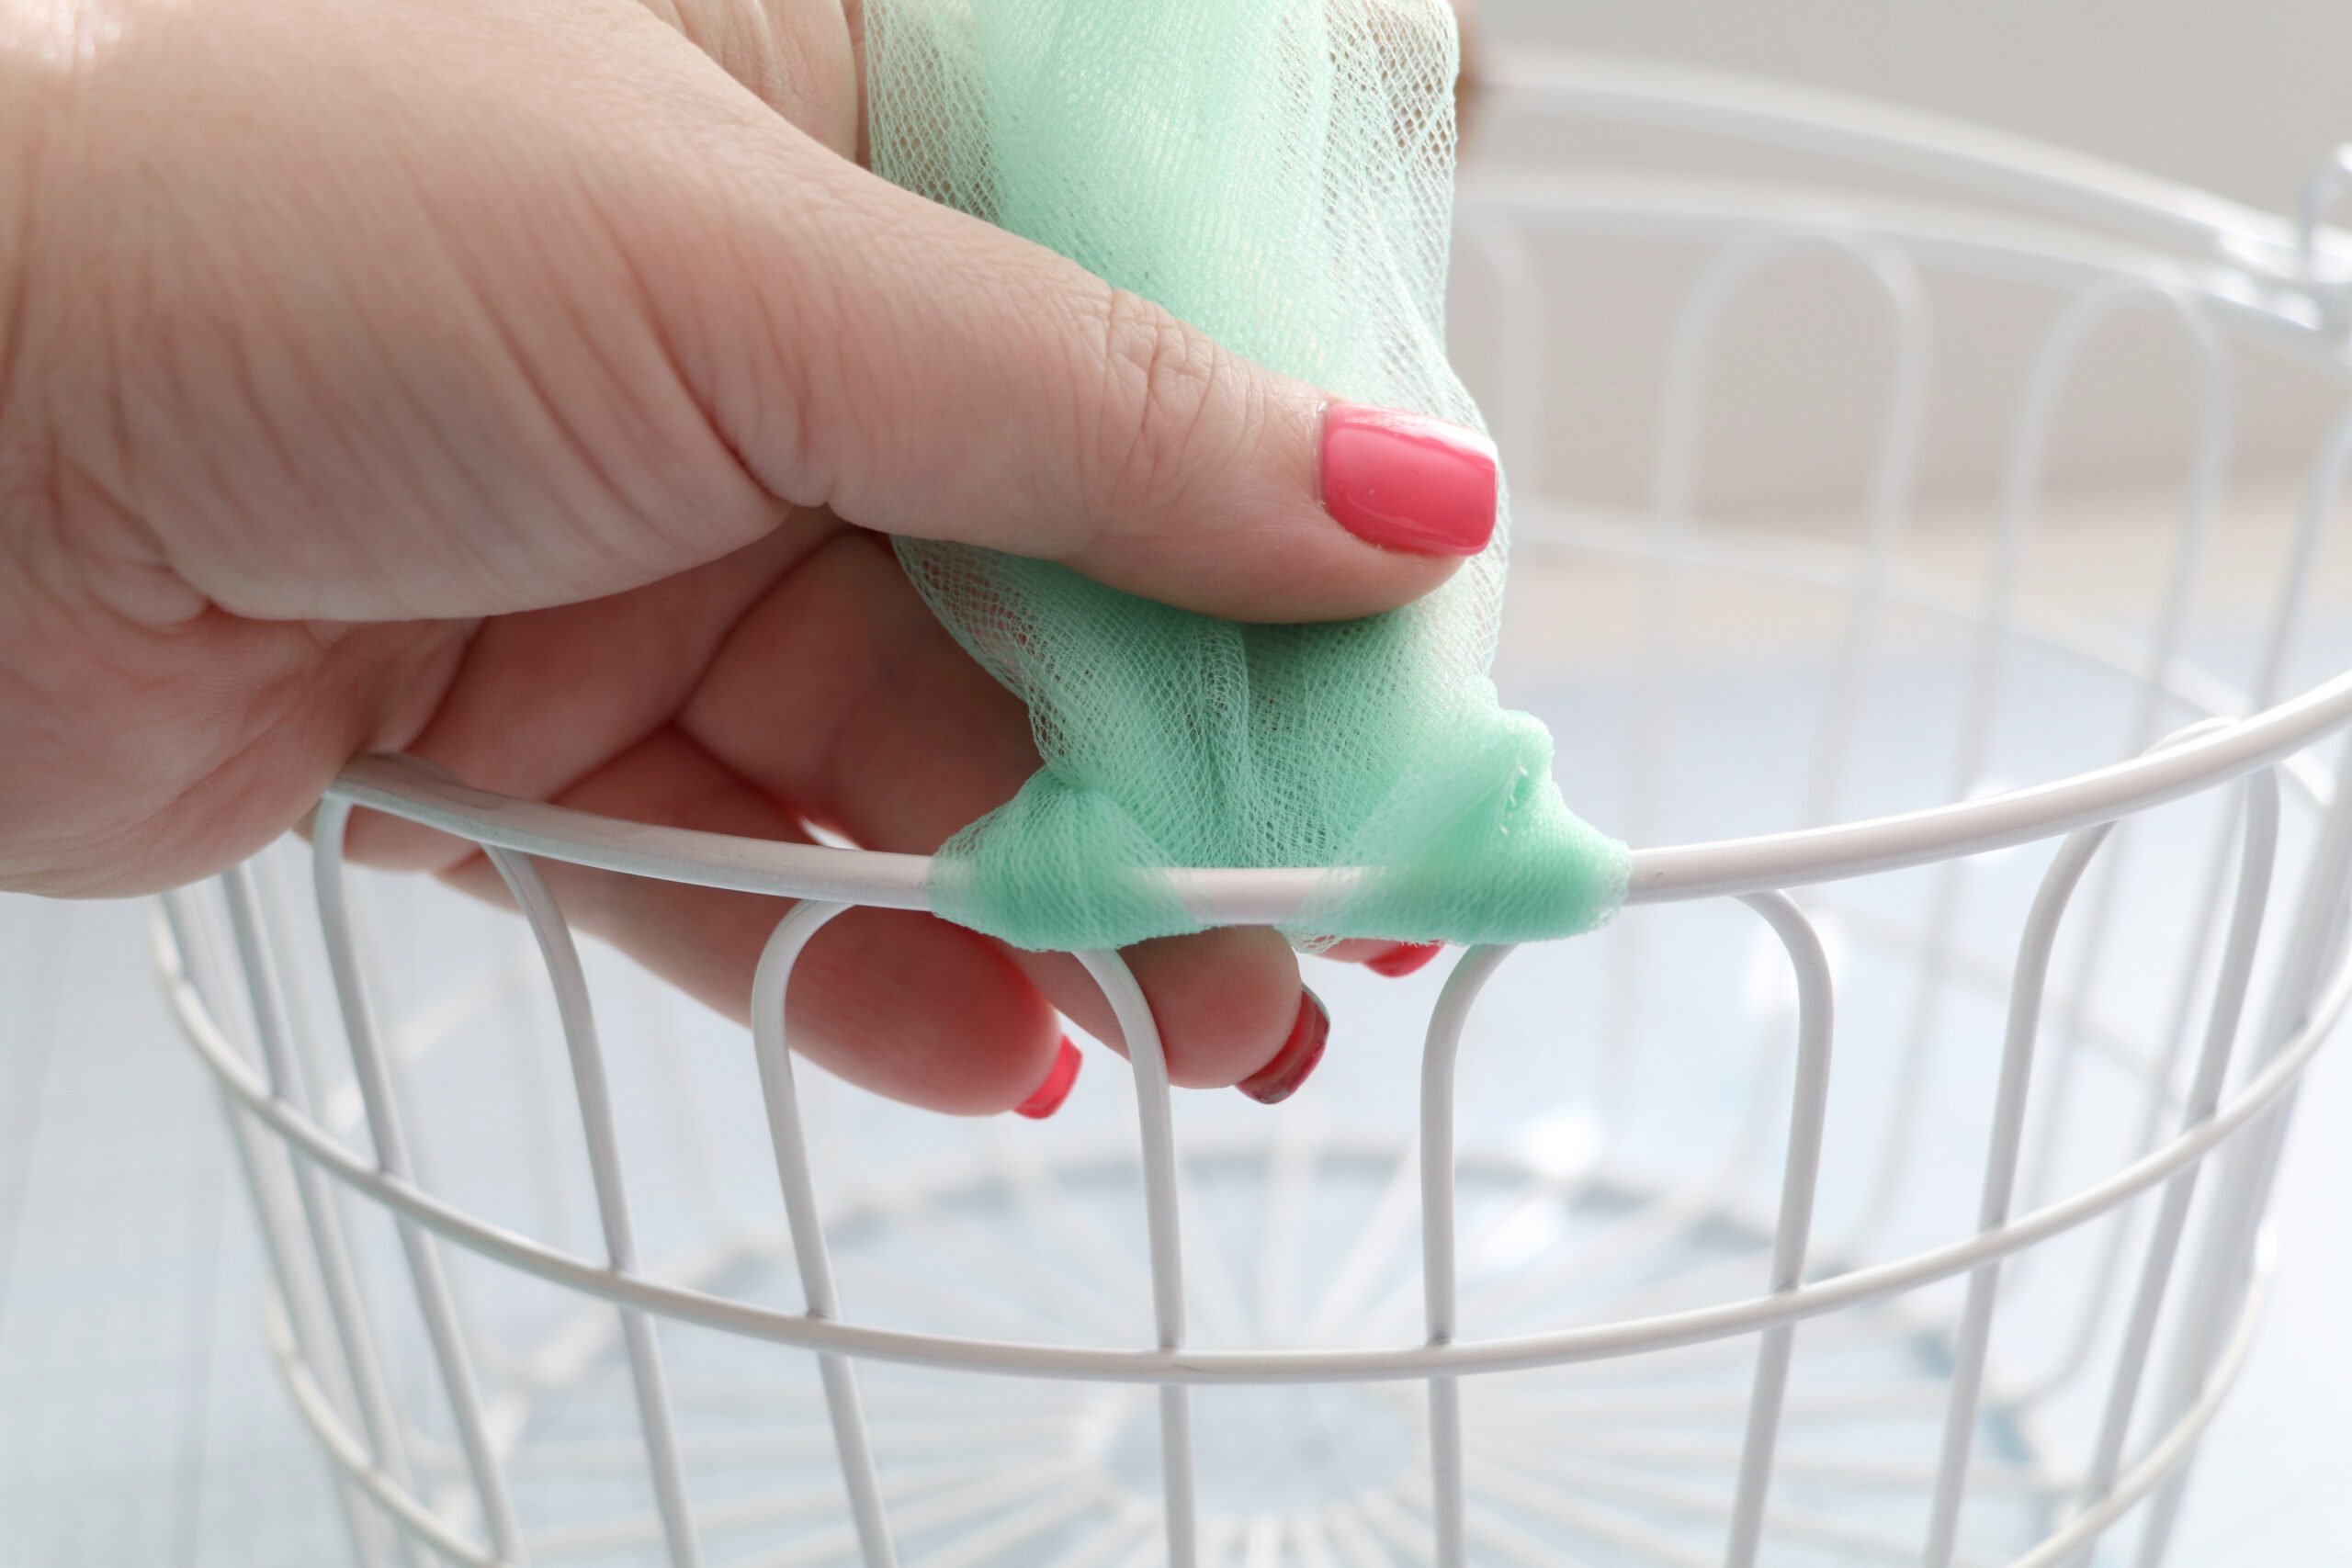
You will then form your tulle knot by creating a key hole on the outside of the basket at the top rim.
Pull the tail of the tulle inside the basket, up, and into the loop or keyhole you made. You are creating a knot around the top of the basket.
You want to start with the tulle on the outside of the basket so the knots face outwards. I think this way looks better, but you could start inside the basket if you want.
If this sounds confusing don’t worry, I have a video on how to make the knots below. (coming soon)
Do this by alternating colors around the basket until you are done.
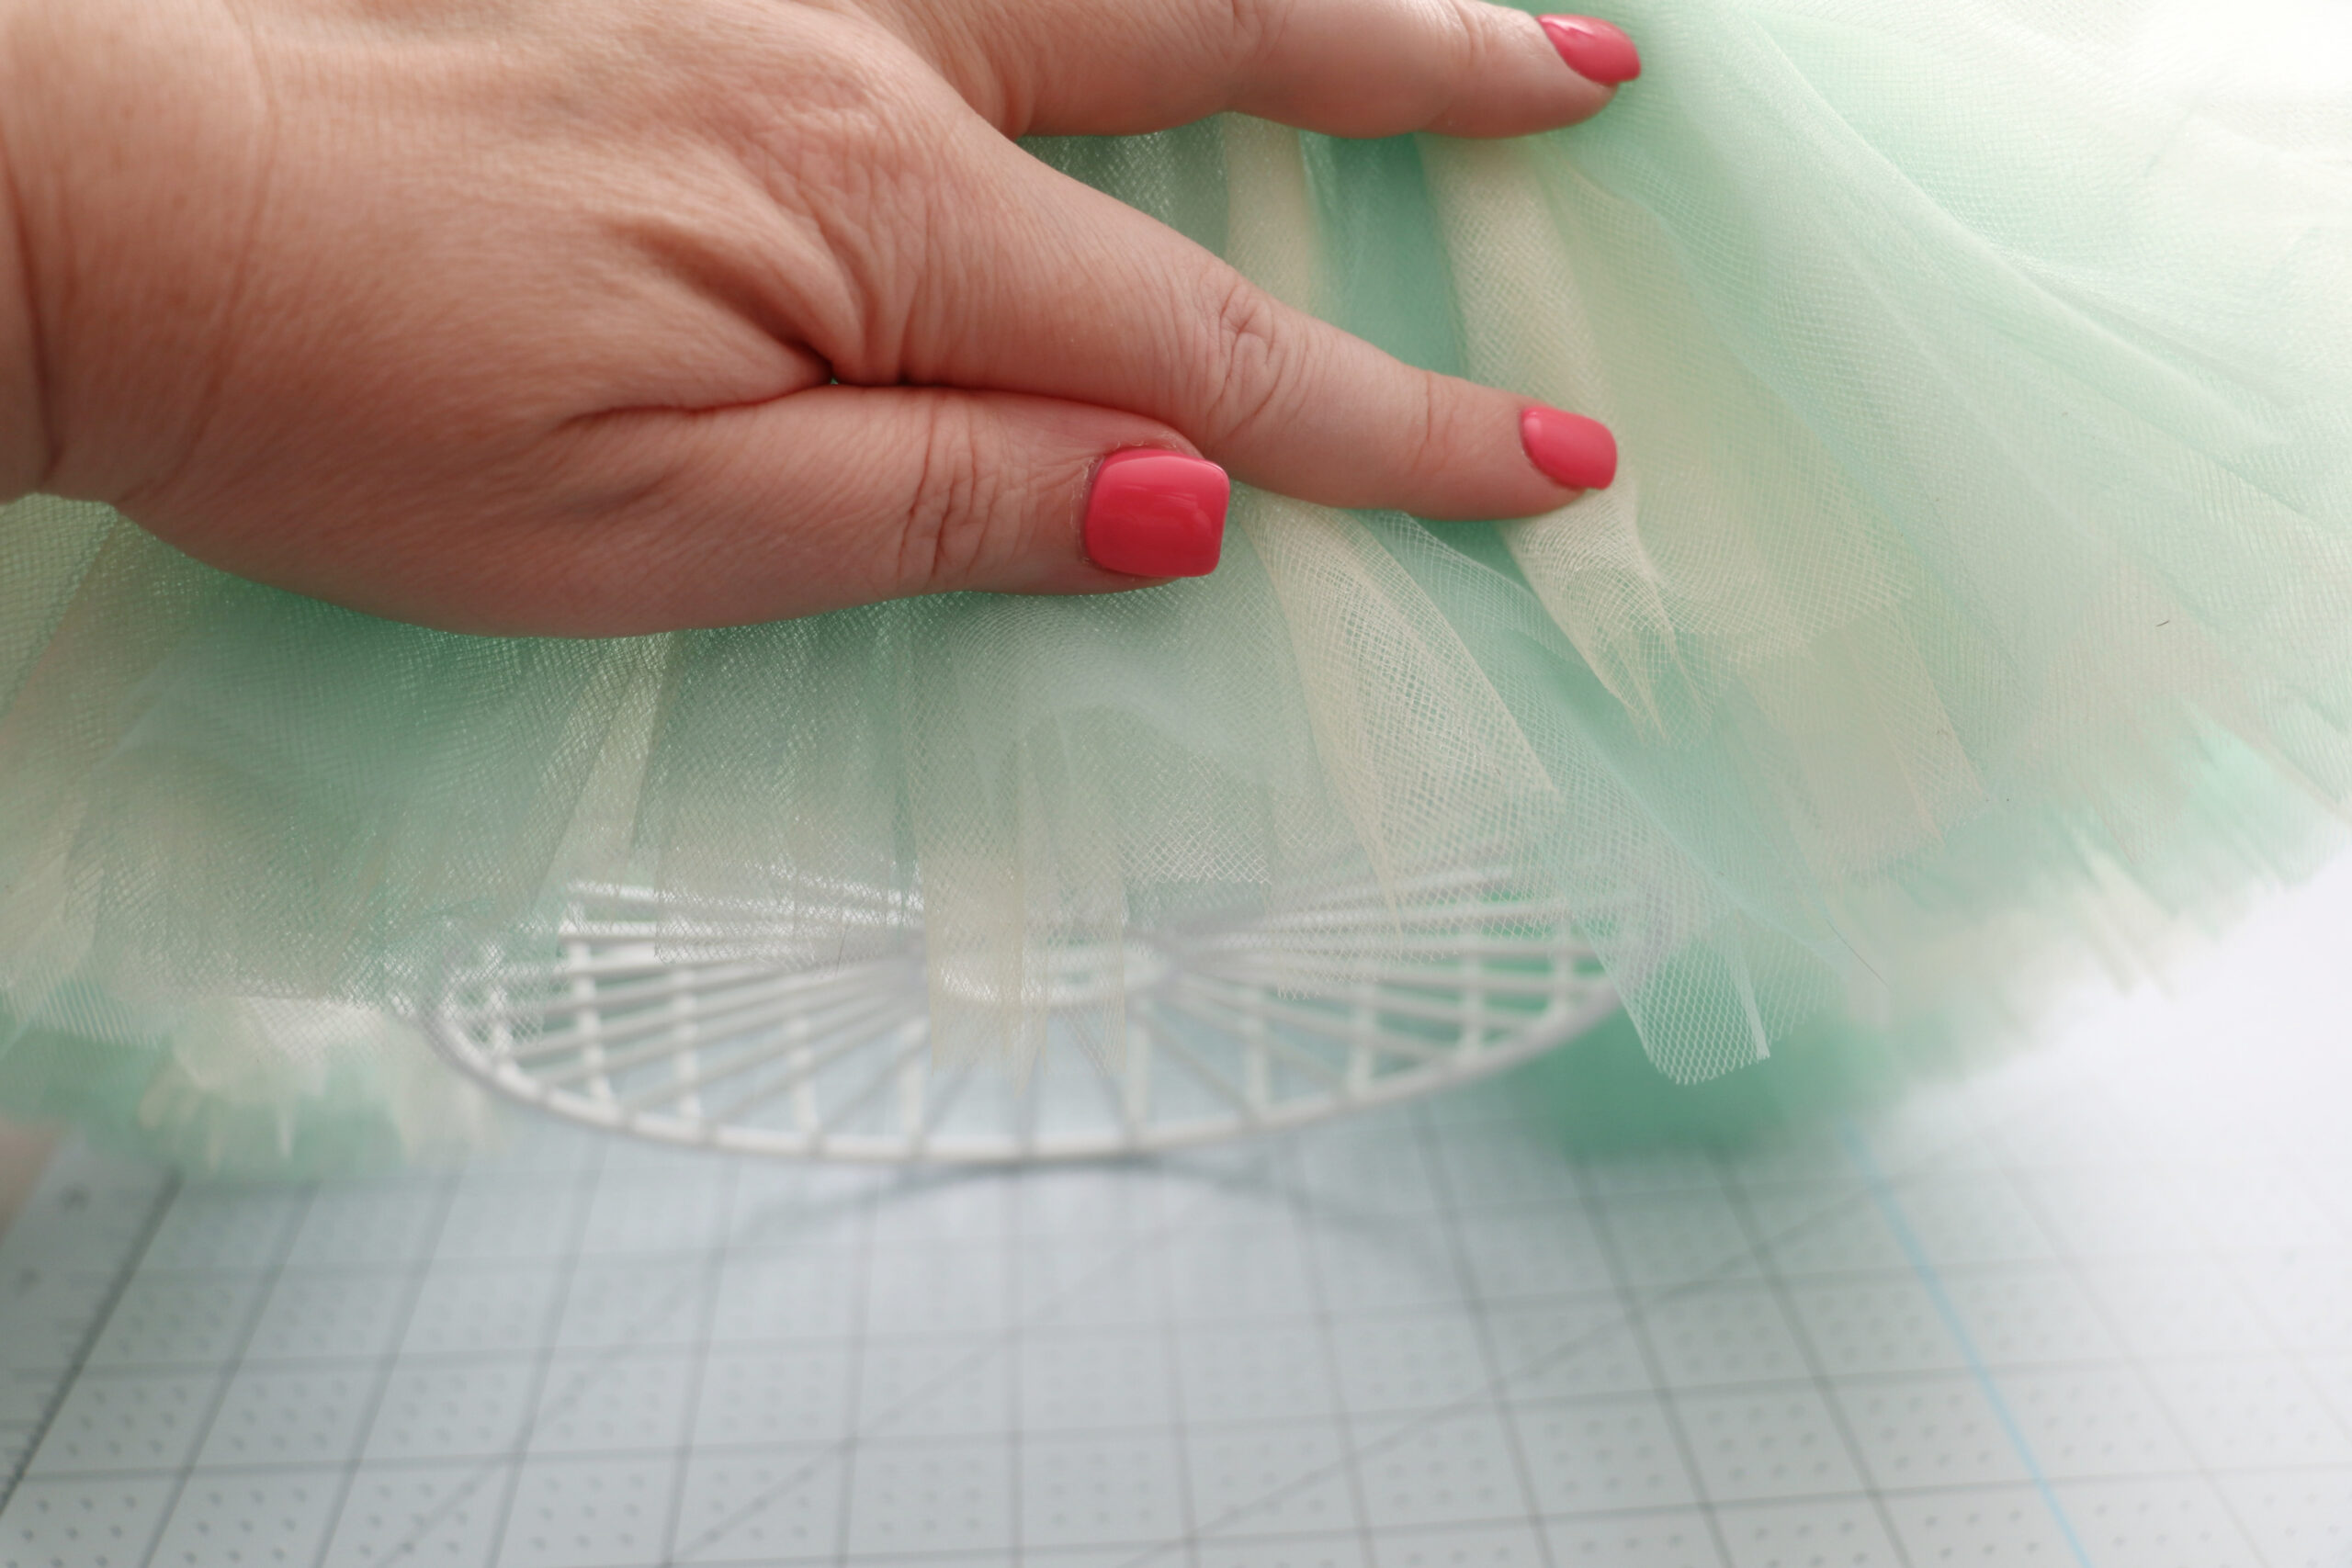
When all of your knots are done you are going to trim the ends if they need it. You don’t want them to be longer than the basket. I press mine against the basket and then run my scissors along the bottom and trim anything longer than the basket.
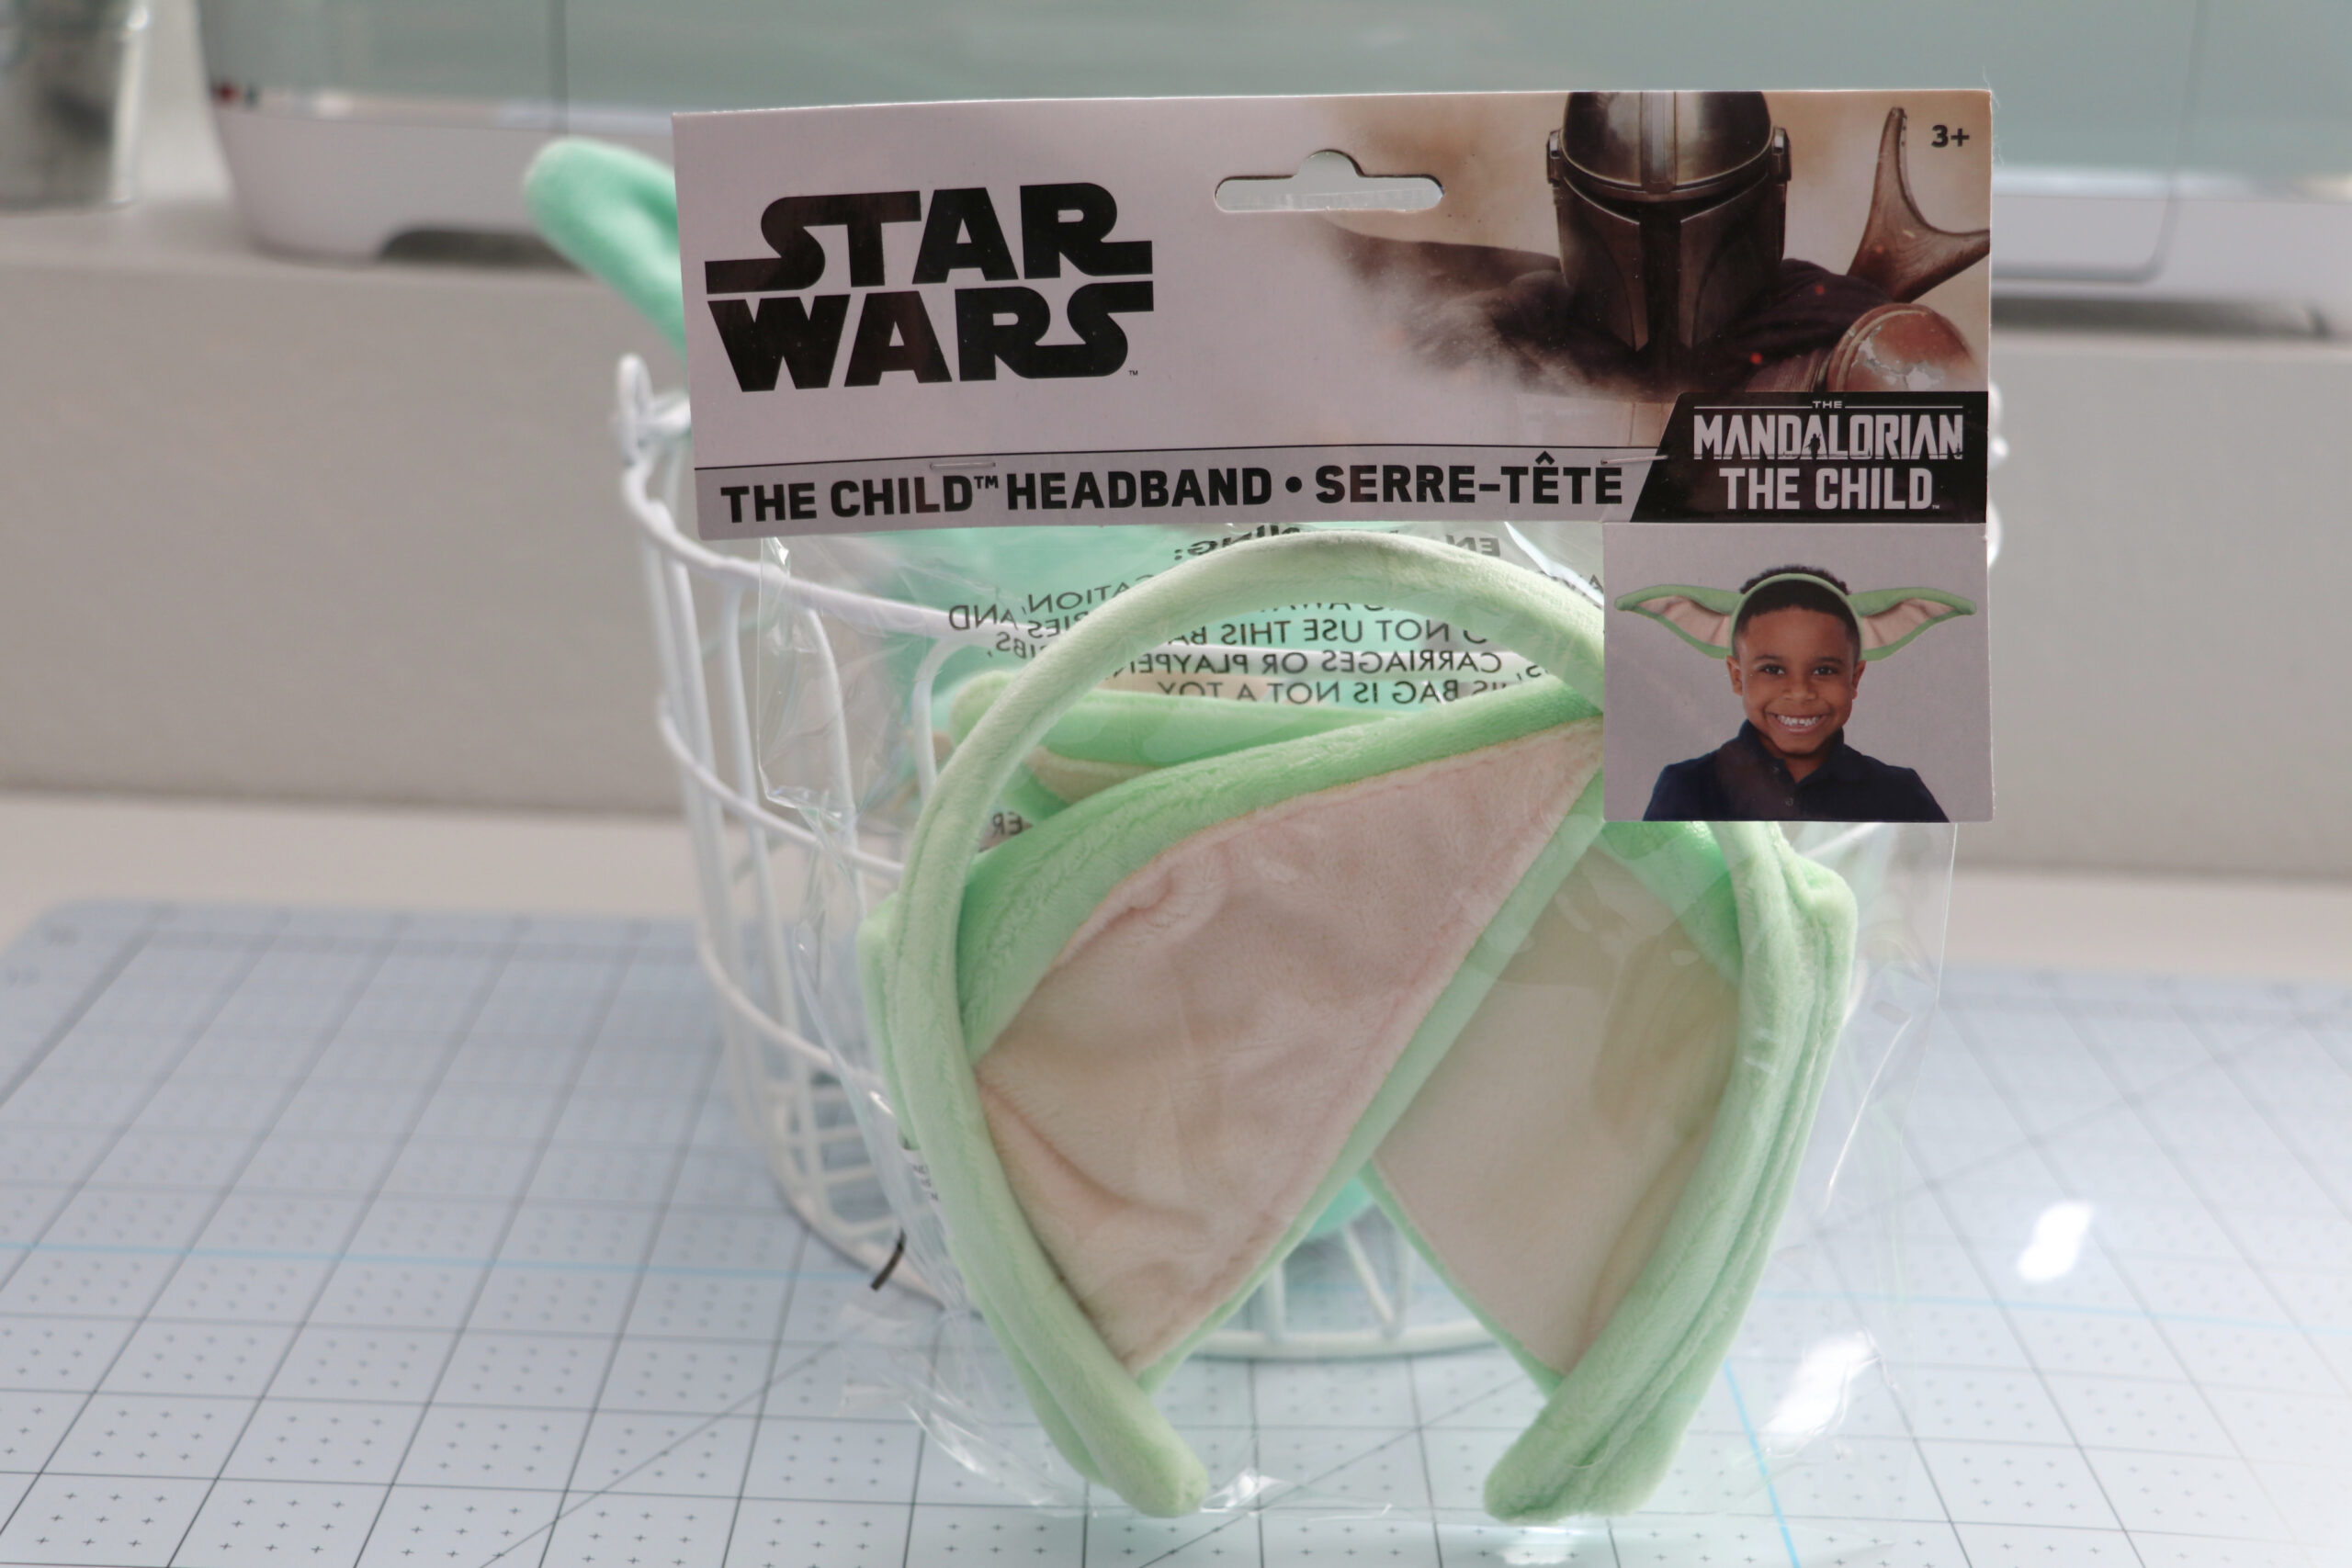
Once all your knots are done it will be time to attach Baby Yoda’s ears. I used a Baby Yoda Ears headband for this step, but you could make your own Baby Yoda ears with felt.
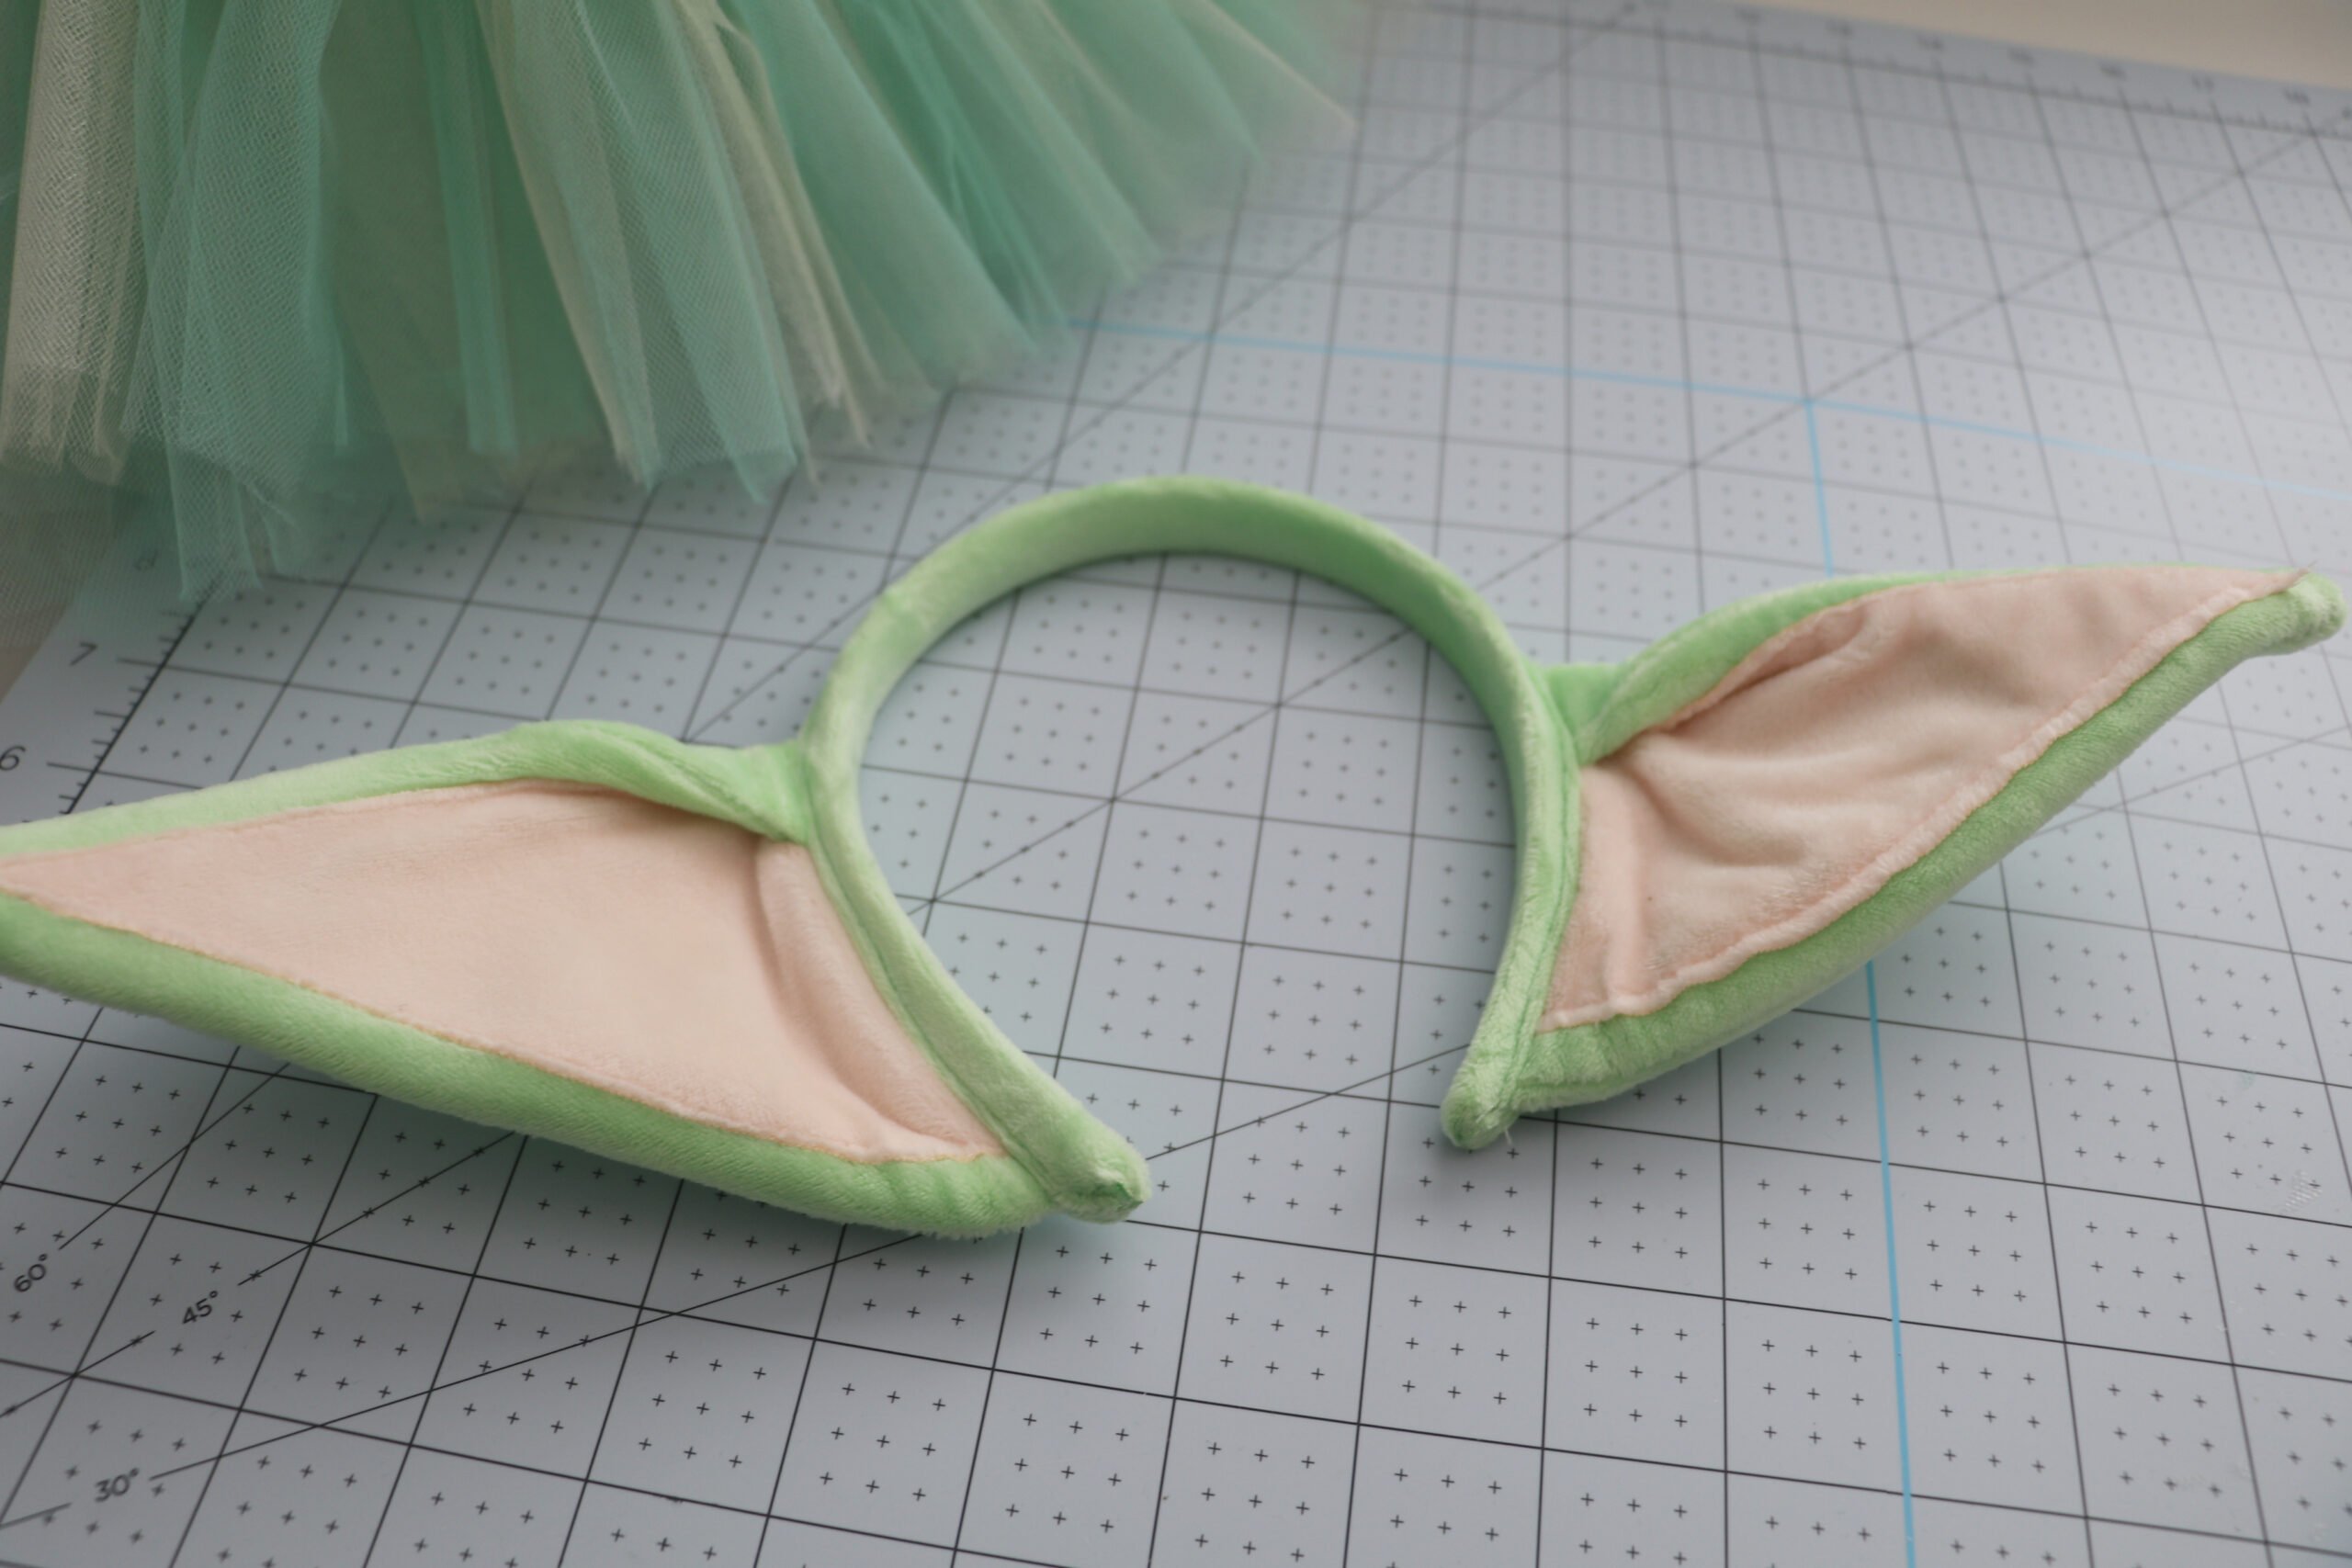
You are going to break your headband in half at the top of the headband and then cut the fabric straight across.
Pull out the plastic headband. I had a hard time doing this because there is glue at the end so I broke the headband again towards the end, pulled the broken piece out, and then cut down the side of the fabric. When I got to the last piece of plastic I was able to easily pull it out of the glue.
Cut the closed end off, but be careful not to cut the ear.
You should have the ear cut out with the fabric cut down the middle.
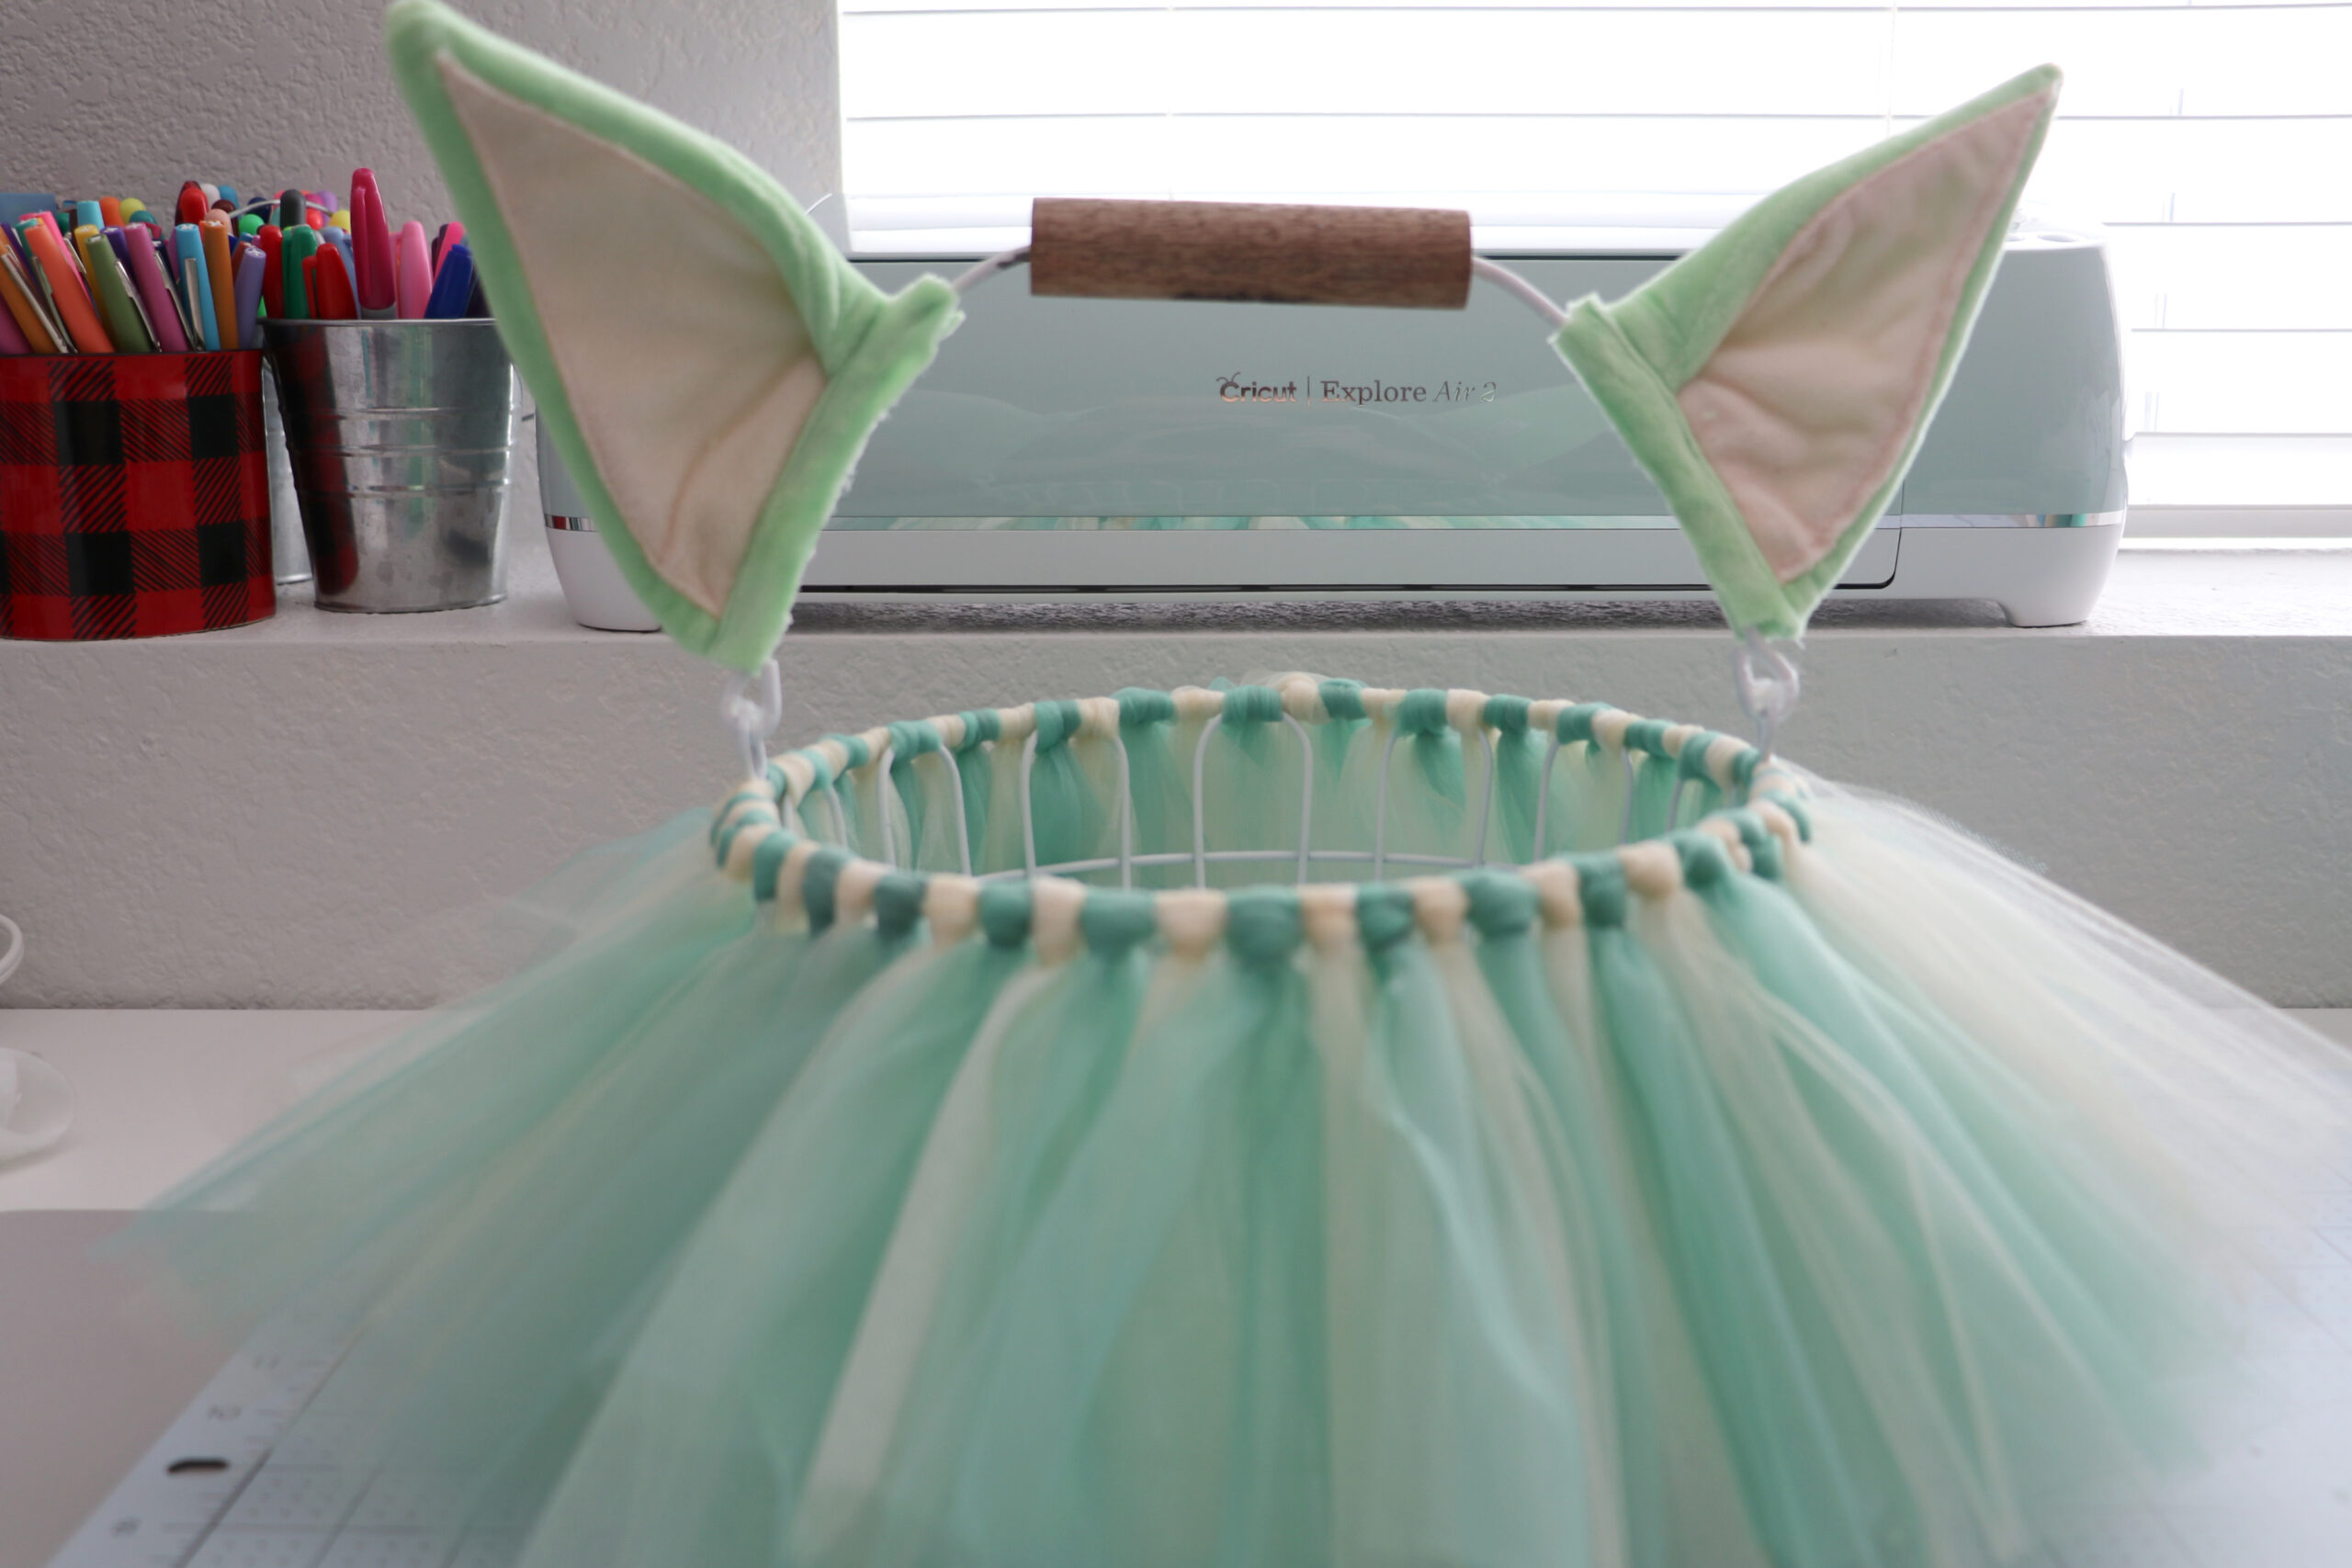
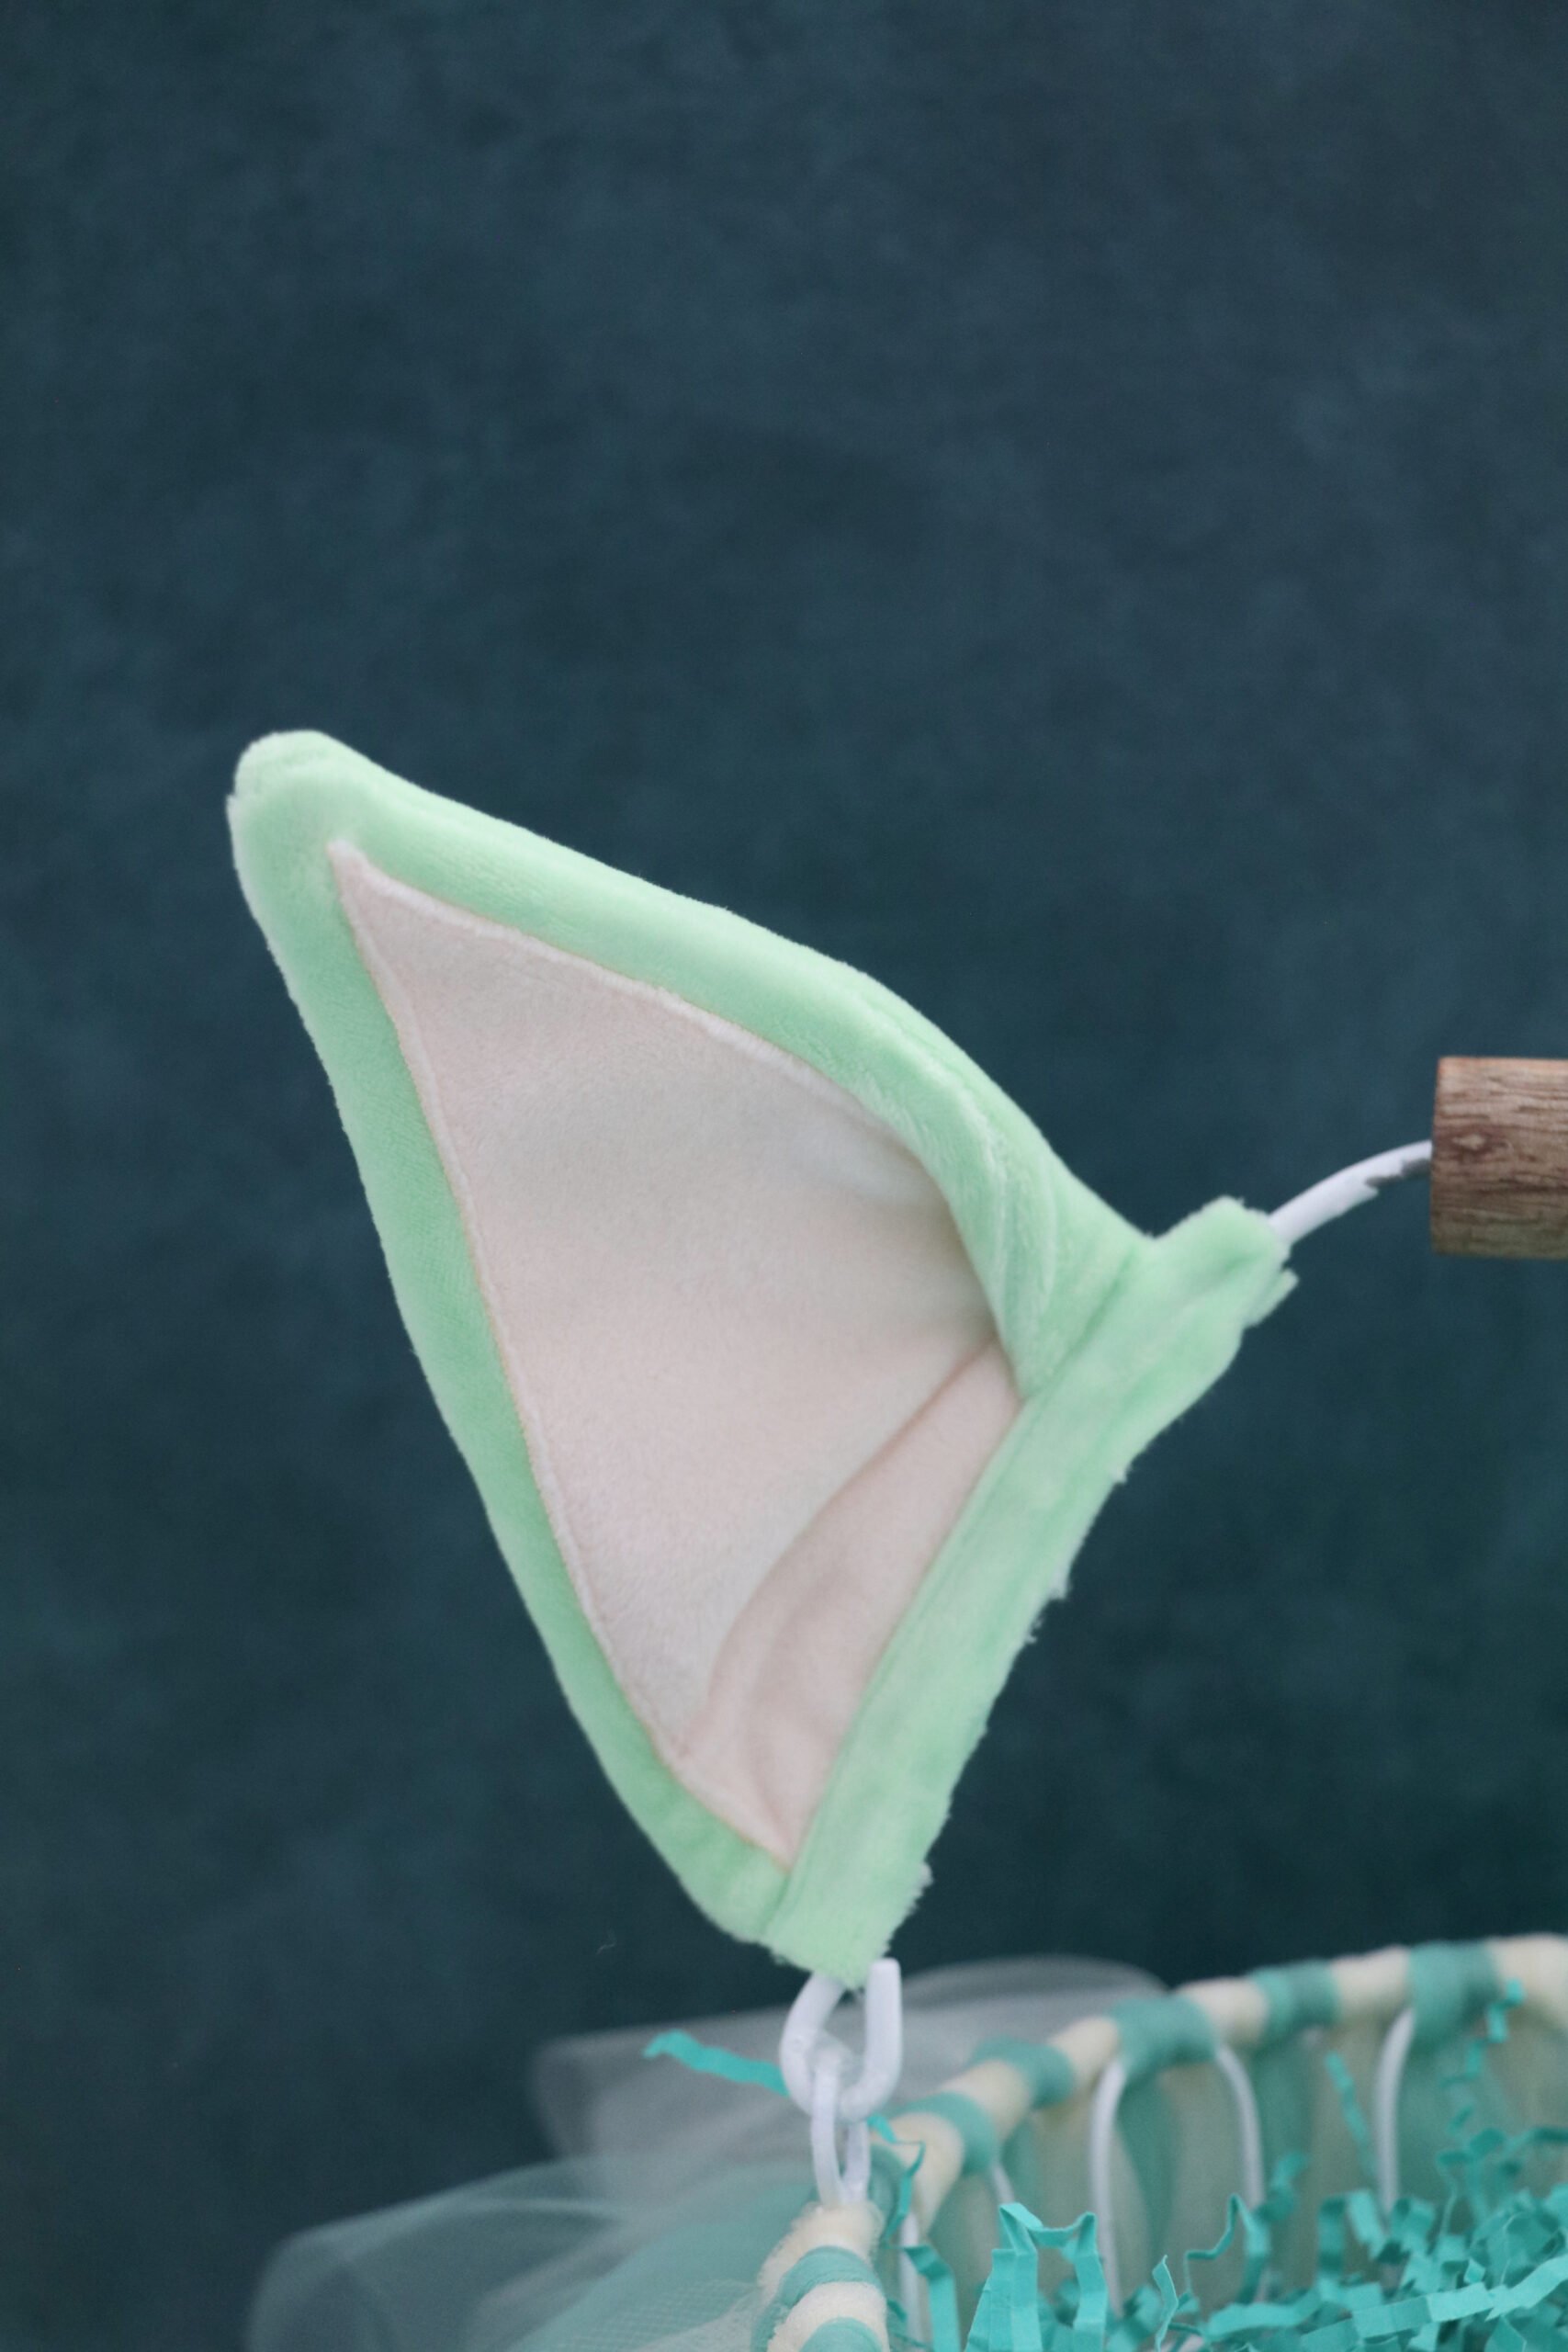
Place a strip of hot glue down the inside seam of the ear and attach it to the Easter basket handle. Give it a minute to dry and then run another strip of hot glue down the fabric and close it around the Easter basket handle.
Repeat with the other ear.
Now you’re done! Fill your basket with Baby Yoda themed goodies.
This post contains affiliate links which means I earn a small commission from purchases you make.
Baby Yoda Easter Basket
Turn Baby Yoda into a cute Easter basket for kids.
Materials
- Wire Easter Basket
- Tulle in Sage or Lime and Ivory
- Baby Yoda Ears or these
- Piece of Cardboard
Tools
- Glue Gun
- Scissors
- Ruler
- Tape
Instructions
- Measure your easter basket. Start at the top of the rim and measure to the bottom. Mine is 5 inches plus add 1 inch to account for the loop.
- You will need your tulle pieces to be the length of your basket X2 plus the 1 inch. Since my basket is 5 inches I would need tulle pieces cut to 11 inches.
- You are going to cut out a piece of cardboard that is the same height as your basket plus the 1 inch. So for mine, I cut out a piece that is 5.5 inches long. Width doesn’t matter too much.
- The easiest way to cut tulle is to wrap it around the cardboard piece a bunch and then make one cut at one of the ends, but you could also cut each 11-inch piece out. This is very time-consuming though.
- I used 60 strips of each color tulle because I double-layered my tulle. You can do a single layer and only cut out 30 strips. I cut my tulle out in batches because cutting out that much at once would be a pain. Do whatever is easier for you.
- Wrap your tulle around the cardboard and when you feel done you are going to cut only ONE END of the tulle. you’ll be left with long strips of tulle.
- To make your tutu Easter basket you are going to take 2 tulle pieces and layer them on top of each other. You can either do each color individually or you can layer the green and cream on top of each other. This just comes down to preference.
- Fold the tulle pieces in half so they are even lengths.
- You will then form your tulle knot by creating a keyhole on the outside of the basket at the top rim.
- Pull the tail of the tulle inside the basket, up, and into the loop or keyhole you made. You are creating a knot around the top of the basket.
- You want to start with the tulle on the outside of the basket so the knots face outwards. I think this way looks better, but you could start inside the basket if you want.
- Do this by alternating colors around the basket until you are done.
- When all of your knots are done you are going to trim the ends if they need it. You don’t want them to be longer than the basket. I press mine against the basket and then run my scissors along the bottom and trim anything longer than the basket.
- Once all your knots are done it will be time to attach Baby Yoda’s ears. I used a Baby Yoda Ears headband for this step, but you could make your own Baby Yoda ears with felt.
- You are going to break your headband in half at the top of the headband and then cut the fabric where the headband is broken straight across. Basically, you are breaking and cutting the headband in half.
- Pull out the plastic portion I had a hard time doing this because there is glue at the end so I broke the headband again towards the end, pulled the broken piece out, and then cut down the inside of the fabric. When I got to the last piece of plastic I was able to easily pull it out of the glue.
- Cut the closed end off, but be careful not to cut the ear.
- You should have the ear cut out with the fabric cut down the middle.
- Place a strip of hot glue down the inside seam of the ear and attach it to the Easter basket handle. Give it a minute to dry and then run another strip of hot glue down the fabric and close it around the Easter basket handle.
- Repeat with the other ear.
- Now you’re done! Fill your basket with Baby Yoda-themed goodies.