Want to learn how to make split text with any text in Cricut DesignSpace? This easy to follow guide will show you how to make split text and split text outlines in Cricut DesignSpace in a few easy steps!
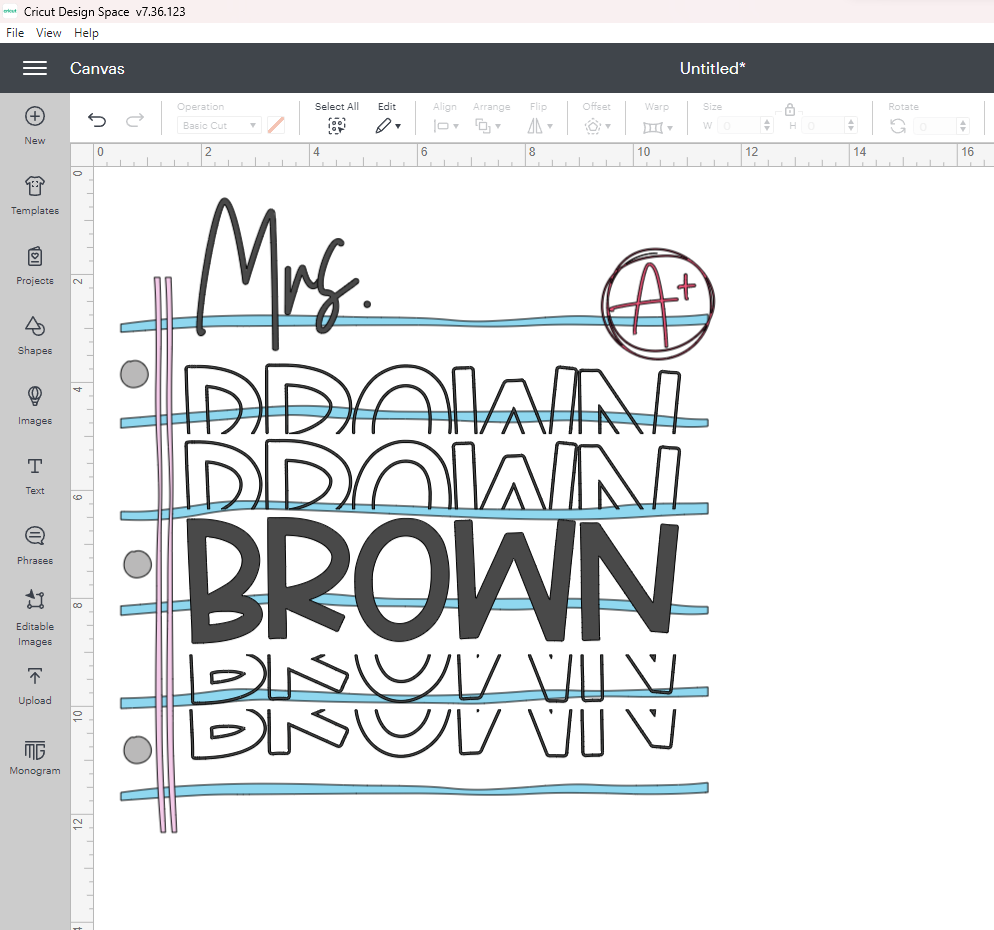
Step 1: Write Out Name – Open DesignSpace, Create a new project, and use the text box to type out the name you want to use.
Step 2: Pick Your Font – I am using Pink Sugar font for the last name and Sad Boy Font for the Mrs. You can use whatever fonts you want! While these are paid fonts, I have the Design Bundles subscription so they’re included in my subscription for “free”.
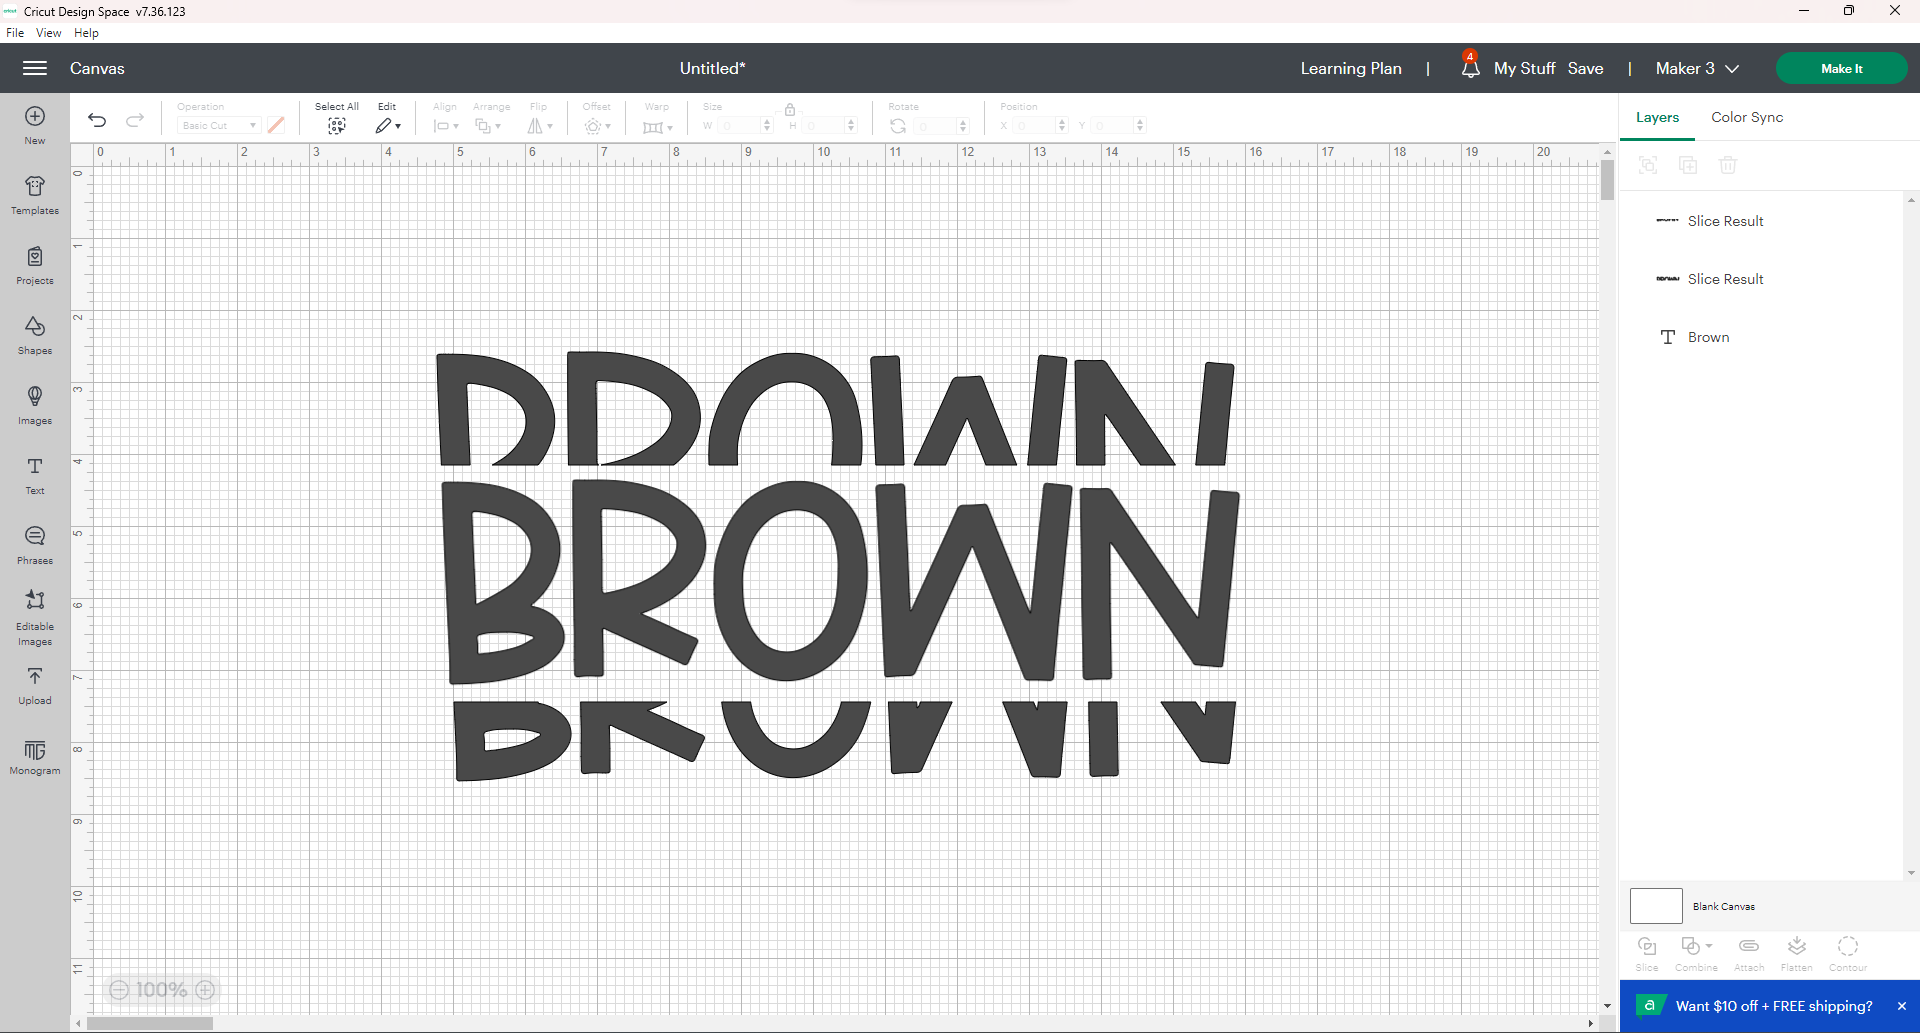
Step 3: Duplicate Your Text x3 – You will need 3 of your text, so duplicate it so there is 3 total and then hide 2 of them so your canvas is easier to work on. You can hide the other ones by clicking the eye on the right side bar.
Step 4: Create a Rectangle – We are going to do the top portion first. Use the shape tool (left side bad) and create a rectangle. Size it so that it is wider and longer than your text. Place the rectangle over your text where you want to slice it. I like to do it towards the middle. You’ll want to remove the bottom portion of your text.
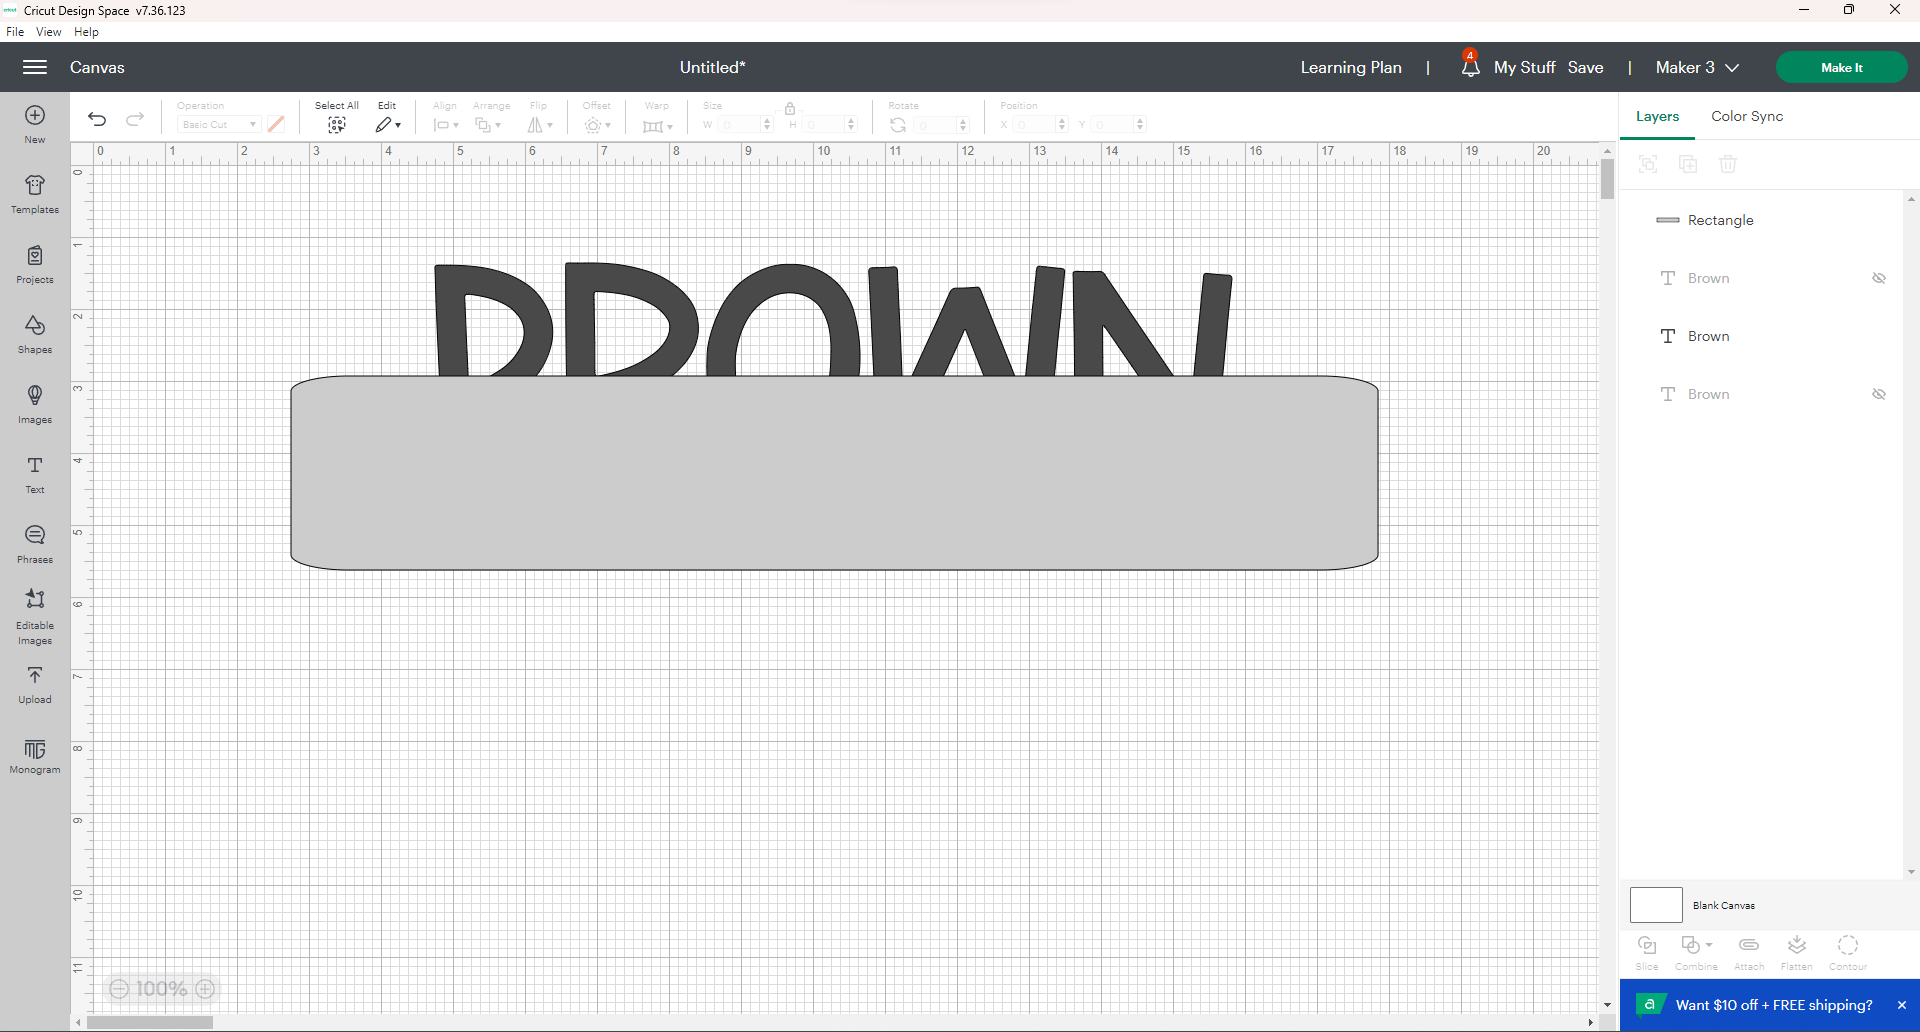
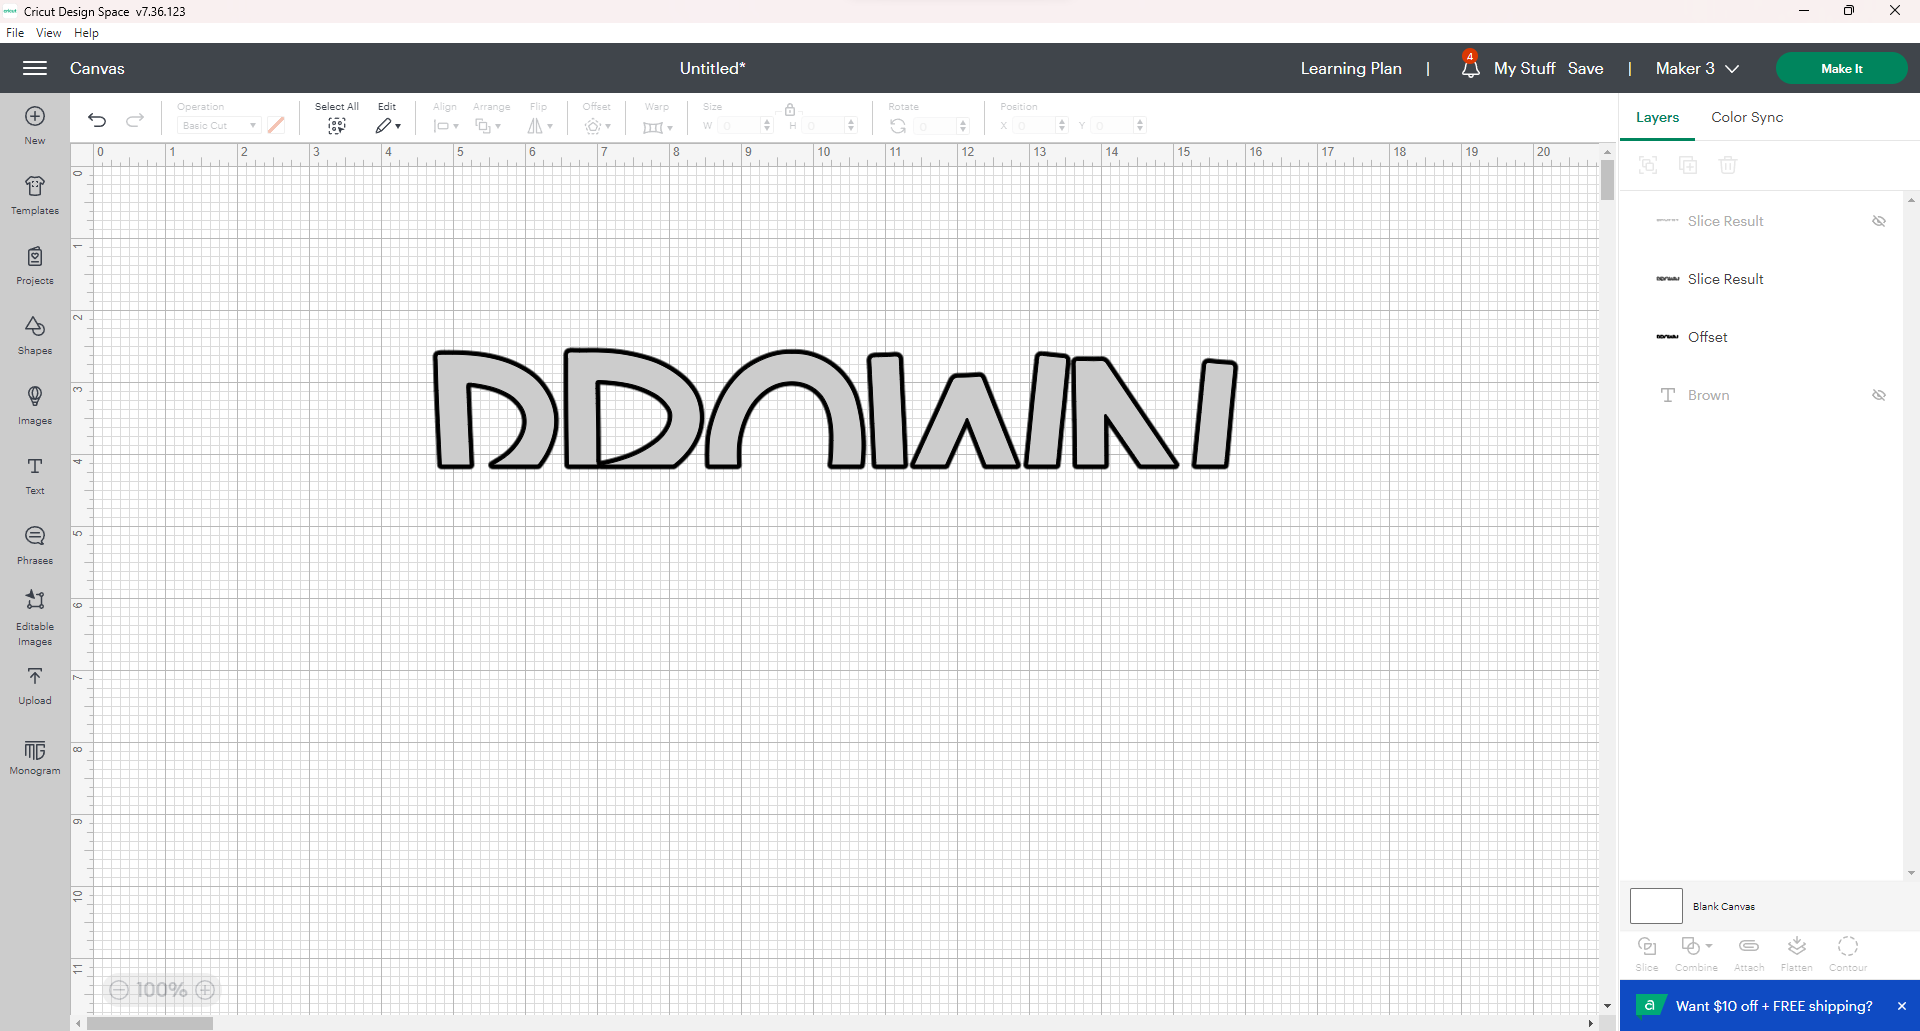
Step 5: Slice It – Highlight your text and rectangle and click slice. You will be left with 4 pieces. Your top piece which you are keeping and three bottom pieces. Delete the bottom pieces.
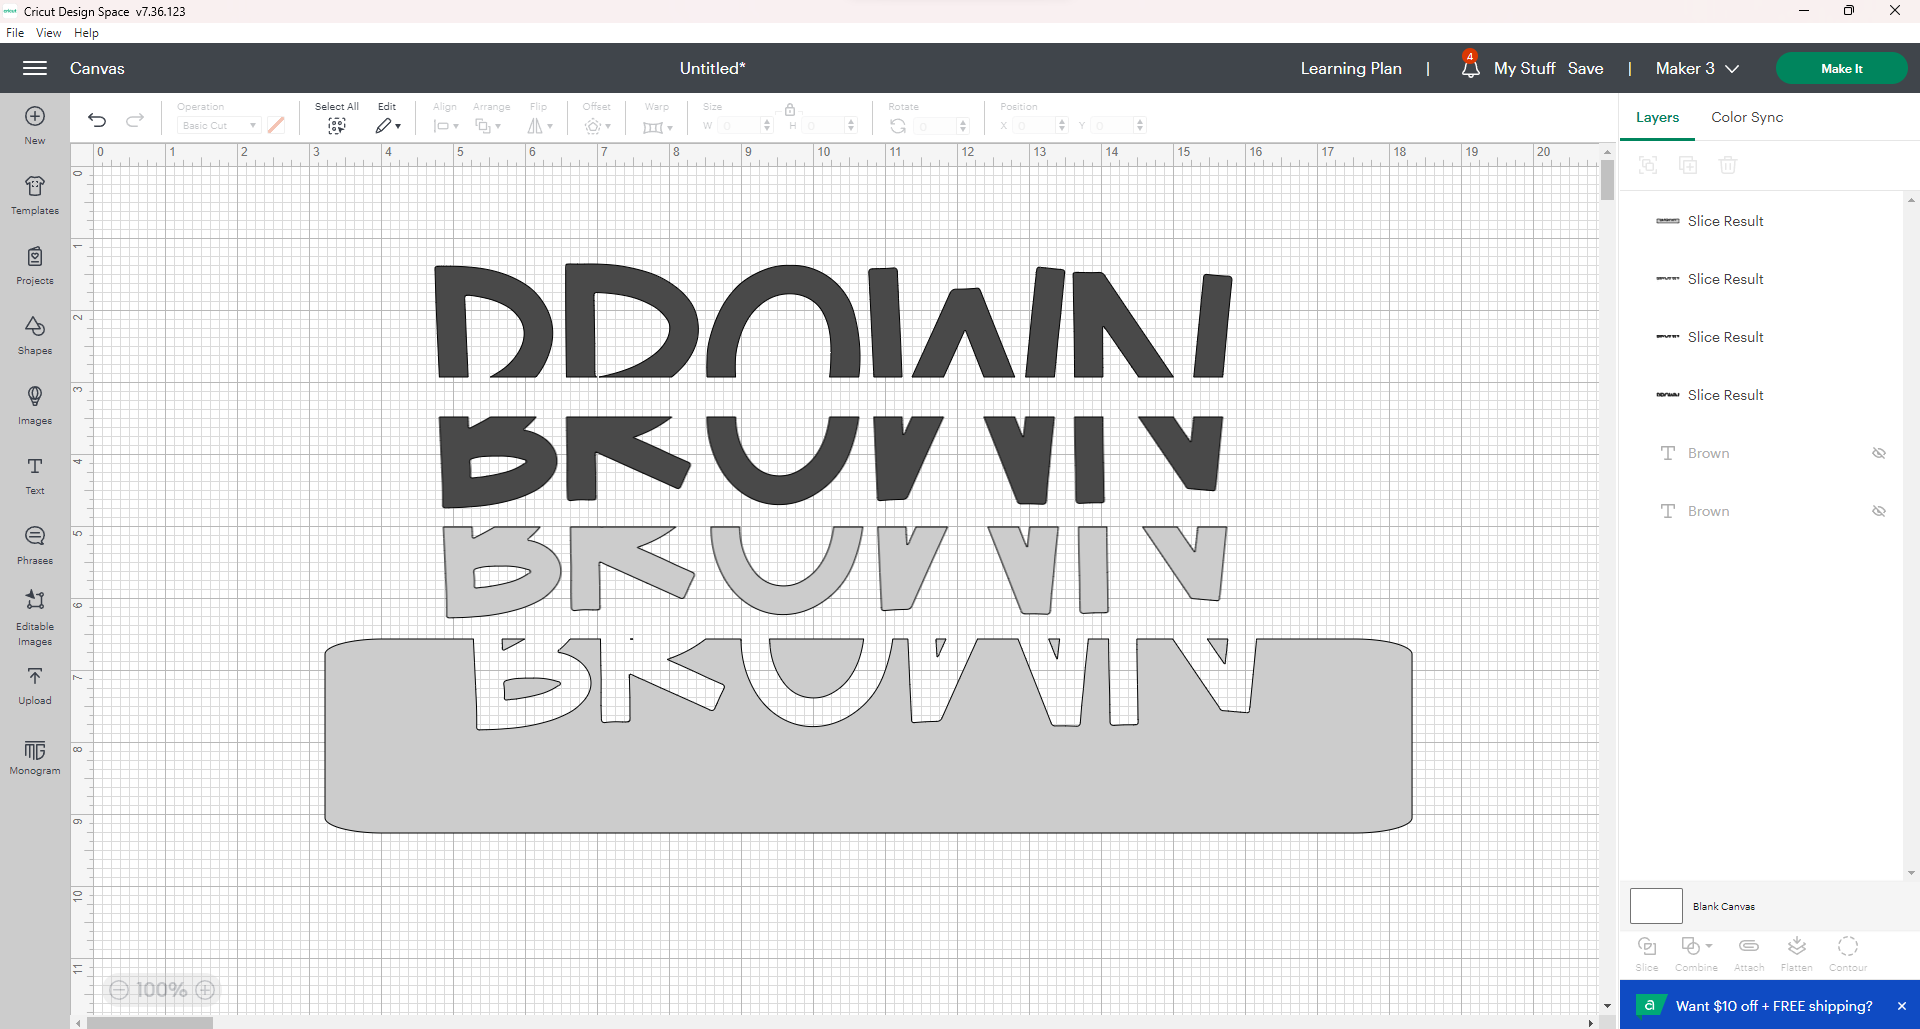
Step 6: Repeat – Unhide your bottom layer of text and repeat the same steps as above. This time you’ll want to remove the top portion of the font so make sure to place the rectangle on the top half of the text.
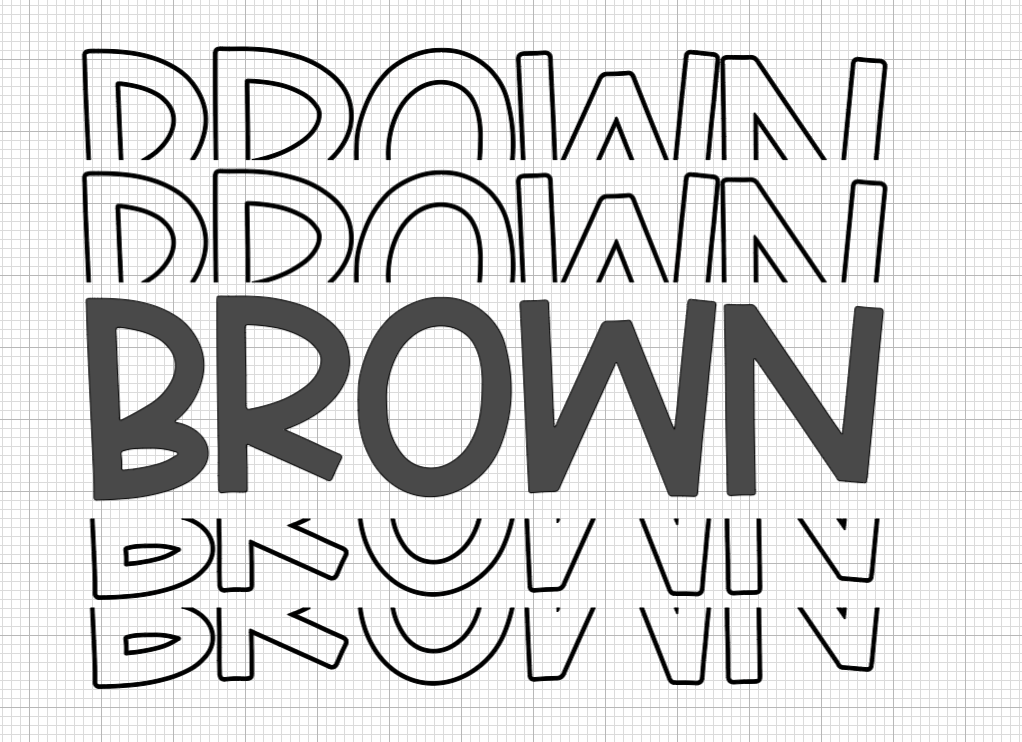
Step 7: Finish – Unhide the other piece of text and arrange them so they are layered how you like. Use the align tool to “Center Horizontally” your text. Now you can leave it like this and you’re done, but if you want more layers just copy and paste another top and bottom layer. You can do this up to 3-4 times.
Want to Make Outlines – As I said, you can stop at step 7 and be done with your project, but if you want the top and bottom layers to look like outlines we have a few more steps!
Step 8: Make an Offset – Click the top text and create an offset. I used 0.056 for my offset. You can use thicker if you want.
Step 9: Slice it – Highlight the text and offset and slice it. Remove the middle sections so all you have left is the offset.
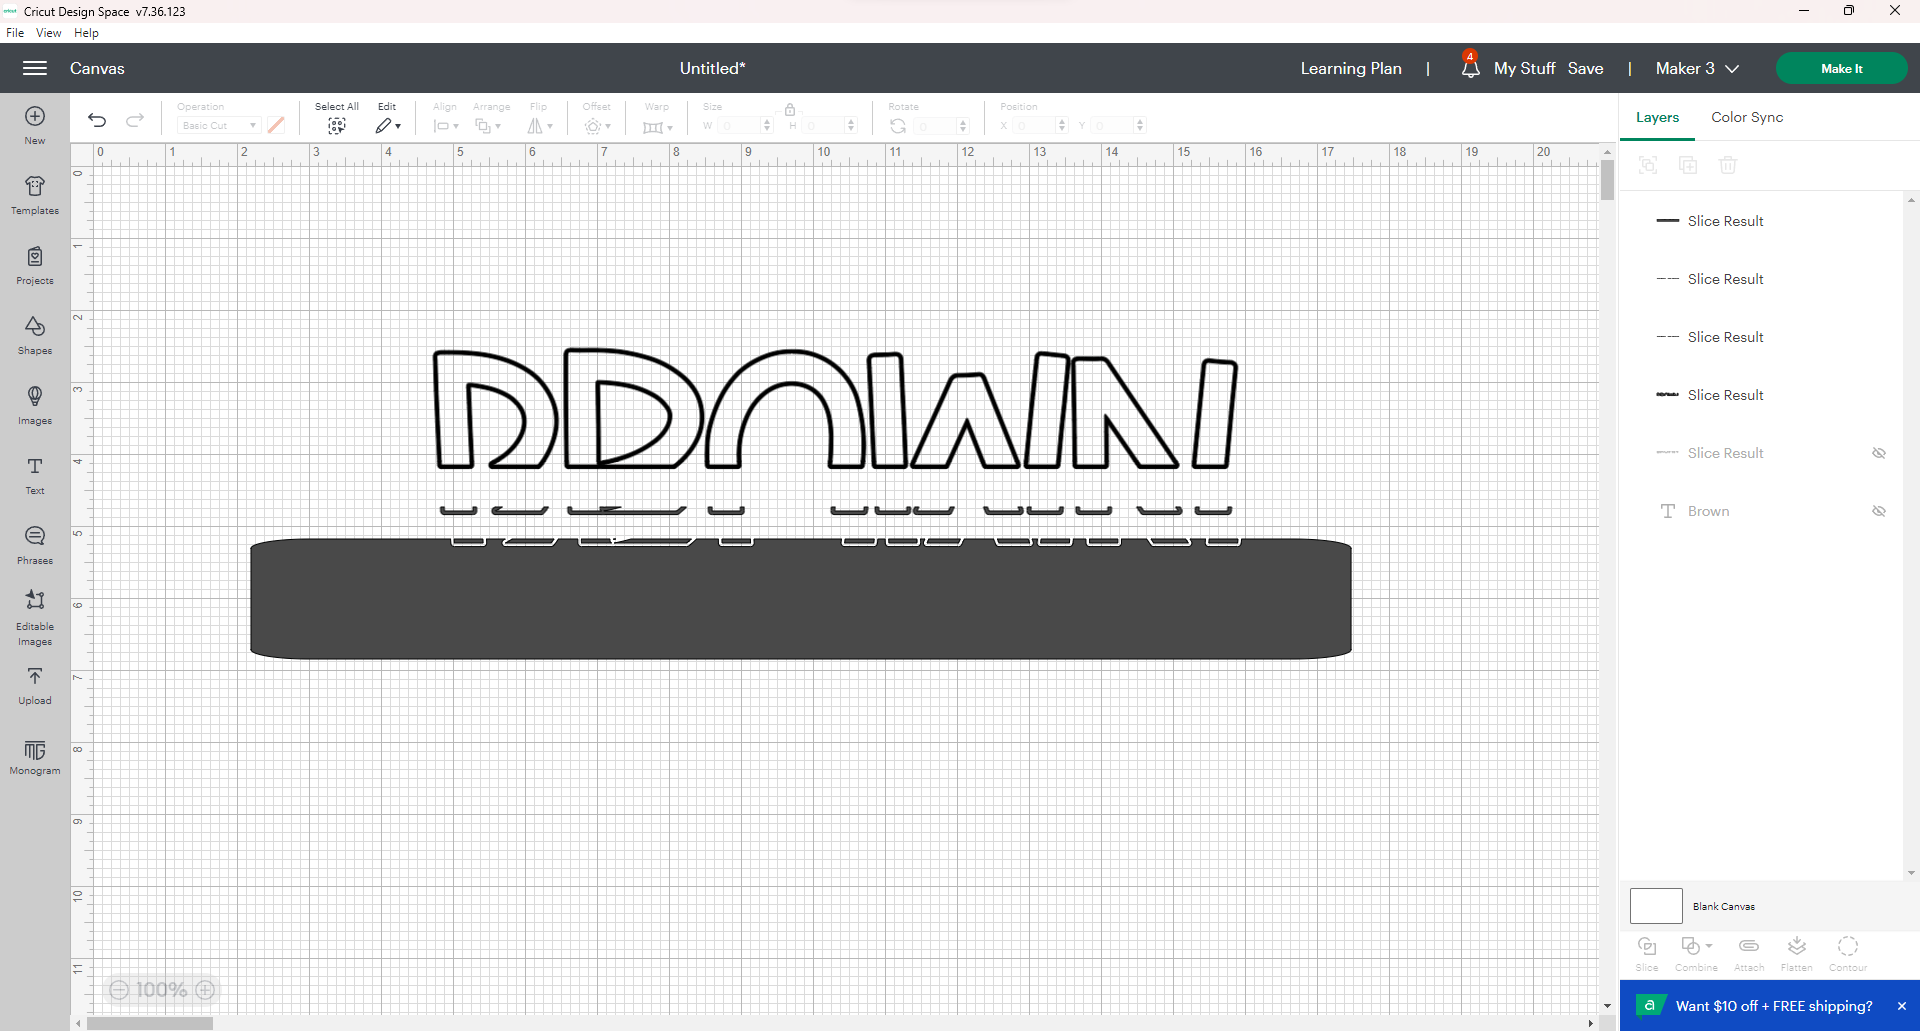
Step 10: Slice it Again – You can leave your text with just the outline, but I want to remove the bottom lines on the text so I am going to create a rectangle again. Place it on the very bottom of the text, overlapping so it’s only cutting off the bottom lines. Highlight the text and rectangle and slice again.
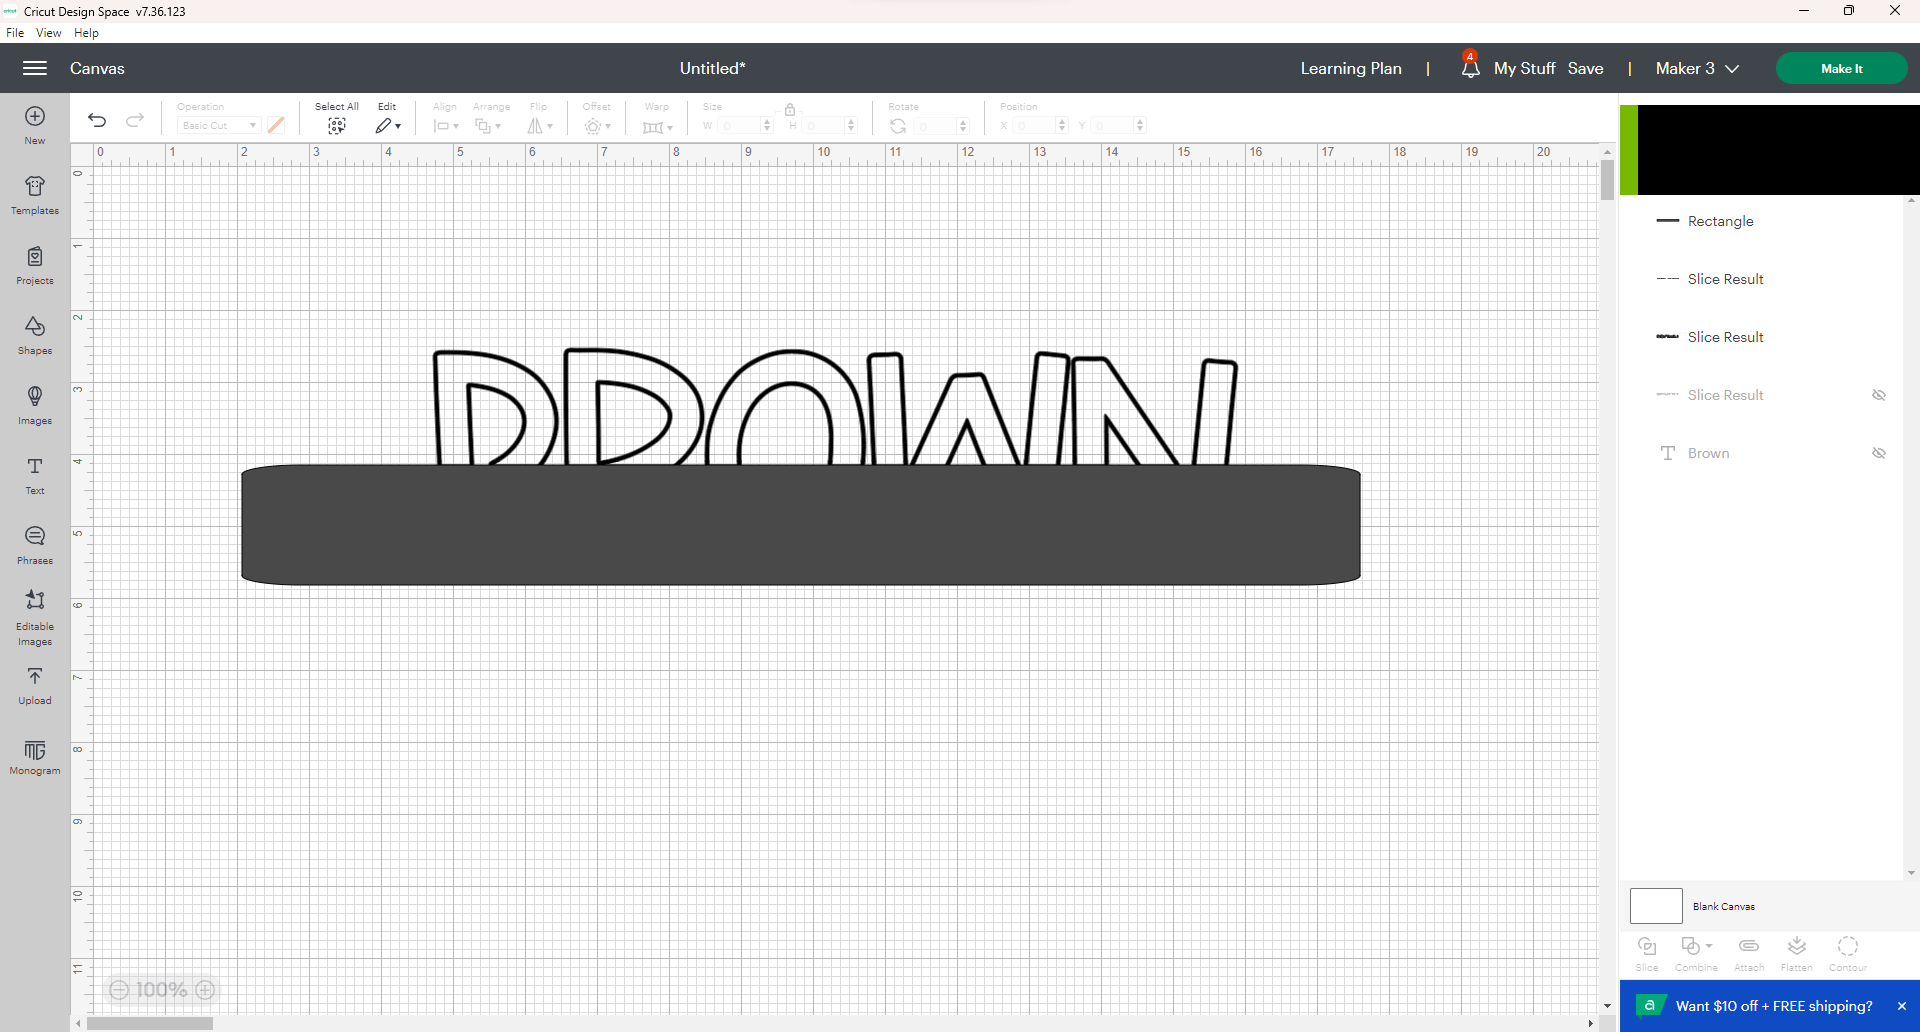
Step 11: Repeat for Bottom – Repeat the steps for the bottom text, but make sure to do it at the top of the text.
Now you’re all done! Use your split text for any projects you like. Want to make a cute Teacher Notebook shirt, tote, sign, or more? Grab this free Notebook Page SVG!